Adding URL to Site Logo
A simple jQuery script can add any URL to your website’s logo, though you will need to identify what ID or Class has been assigned to your logo’s containing element first.
Step 1. Navigate using the very top menu located outside of the RapidWeaver Window in the very top left of your screen. Next to the apple icon navigate to RapidWeaver > Preferences… (or hit CMD + ,) > General > Enable Web Developer Tools. This box will be unselected by default – select it before continuing.
Alternatively, open the page in Google Chrome.
Step 2. When viewing your website in preview mode (or in Google Chrome) locate the logo, right click and select “Inspect Element.”
![]()
This example is using the Hemera theme. We can see the image file in the HTML file that begins with <img and then the container of the image, which I have highlighted in the screenshot.
If you do not have a logo inserted, navigate to Setup and drag and drop your image file in the Site Logo field.
The container has 3 listed classes: frameBlock, content-color, logo. I am going to choose logo, which in jQuery or CSS has a period (.) before it, so logo would be typed as .logo for this example. If you’re using Hemera go ahead and do the same, but if not write down the class or id you wish to target. If an id is used, then place a hashtag (#) infront of the text instead of the period.
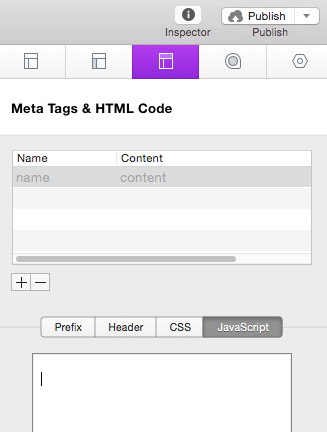
Step 3. Open the page Inspector
![]()
Navigate to the Header Section
![]()
Navigate to the JavaScript Section
Step 4. Enter the following code:
1 2 3 |
jQuery(document).ready(function() {
     jQuery('.logo img').wrap('<a href="https://onelittledesigner.com">');
});</a>
|
Alternatively, you can download this as a Snippet file here:
Step 5. Edit the code.
Notice on the 2nd line first the selector, which is .logo img – this is targeting the logo image or <img that is found inside the HTML with the class of logo. Likely the img won’t change, though the class or id of the containing element will (this is discussed previously).
Next edit the URL or the portion that starts with http:// and change it to whatever URL you wish.
you are finished!