Setup
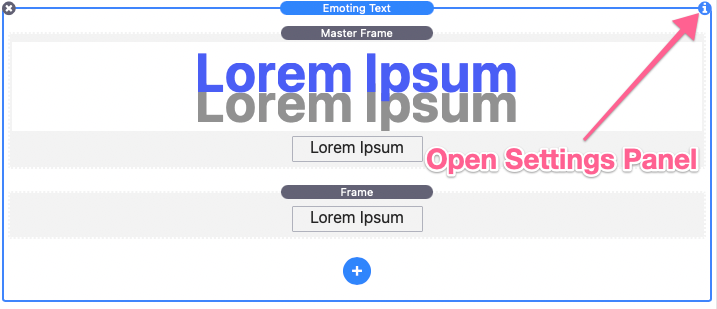
After adding the stack to the Stacks editor you will three major stack components.

Global Settings
The main Emoting Text outer component is titled after the stack. This stack contains the global animation and style settings. Select this outer stack and open the Settings Panel.
First we will want to choose an HTML Tag/Type for our text. The text styles will be automatically inherited from your theme or framework according to the selected HTML tag/type.
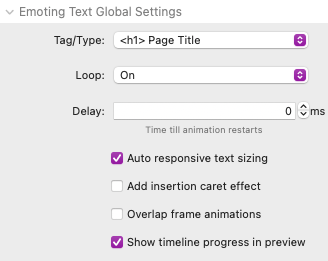
Next we will define the Loop behavior for the text animation. “Loop” is on by default which causes the animation to continually restart after each completion.
This option allows you to define a Delay (in milliseconds) before the animation restarts. You can also set the loop to “off” which will only play the animation once until is is completed. A third “When hovered” option is provided with also plays the animation once, but will restart the animation if a mouse cursor hovers over the text.
By default the Auto responsive text sizing option is enabled. With this option enabled, it will prevent the text from wrapping to a new line when there is not enough horizontal space, it will instead shrink the size of the text and only preserve any line-breaks that have been manually added to the text.
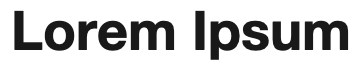
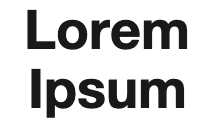
Example at default size:
Narrow horizontal space with Auto responsive text sizing enabled:
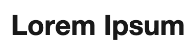
(Prevents line breaks and shrinks the text uniformly)
Narrow horizontal space with Auto responsive text sizing disabled:
(Preserves text size but allows text to break to a new line)
The Add insertion caret effect option is disabled by default. If it were to be enabled a text cursor indicator effect is added to the animation. This mimics the appearance of text being typed into a word document.
Example:
The Overlap frame animations option is disabled by default. If it were enabled, the in and out animations would be allowed to overlap creating a seamless transition between frames and the entire loop.
Example:
The last thing we will want to do while editing the global settings is leave Show timeline progress in preview enabled. This option will show a helpful detailed animation timeline while in RapidWeaver “preview” mode. We will go over this visual later while editing our animation. For now, we will want to start editing the frames.
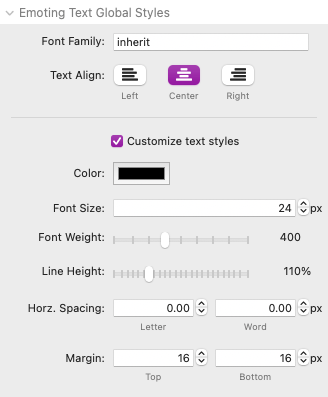
Note: The Master Frame Settings also includes optional text style customization options in case you want to define your own text styles.
Master Frame Settings
Inside of the Emoting Text stack is the Master Frame stack.
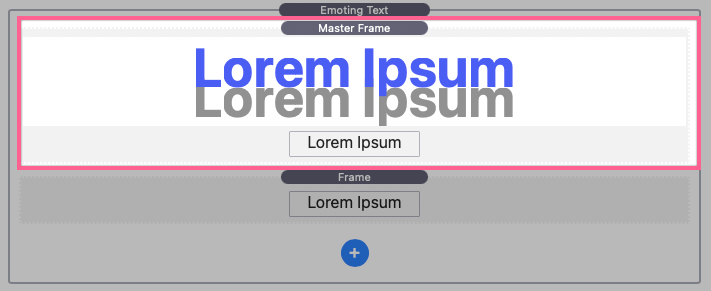
Select the Master Frame stack and open the Settings Panel. This is where the frame animation settings are defined. The settings are divided into a few separate categories each representing a different point in the overall frame animation. They are also color coded so you know what part of the animation each category applies to. The colors can be seen in the Master Frame’s “lorem Ipsum” example while in the Stacks editor. As you edit the settings you can refer to this area to get an Idea of where the text will be positioned at different points in the animation process.
Note: The red and green colors represent the “In” and “Out” animations and can only be seen when making changes to the settings as it demonstrates the animation positioning.
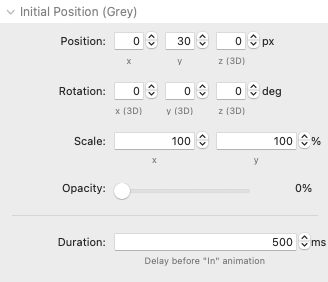
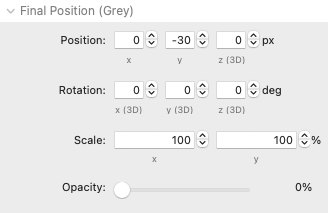
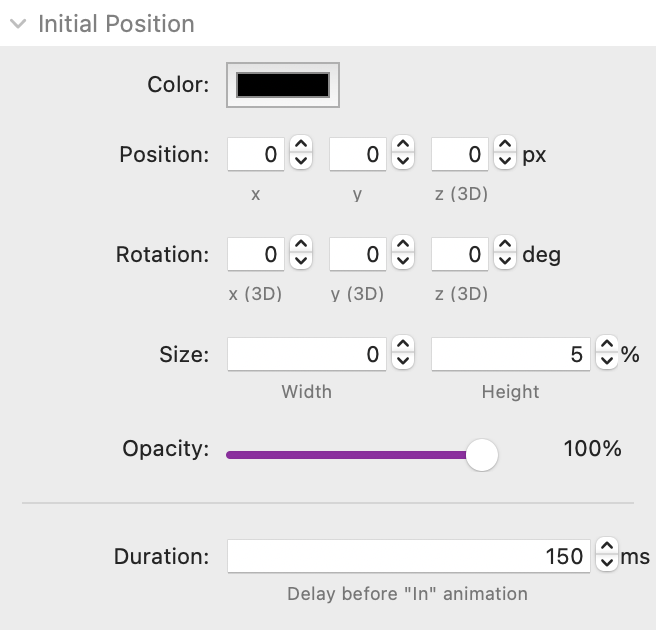
Initial Position Settings (Grey)
Grey is for the initial position, this defines the style and position of the text before the animation begins. These position settings are the basis for the entire text animation.
Here is breakdown the settings and what they do:
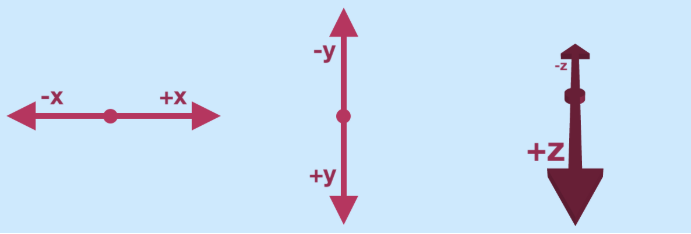
Position x: Define the horizontal position of the text. A negative value will move the text left while a positive value will move the text right.
Position y: Define the vertical position of the text. A negative value will move the text up while a positive value will move the text down.
Position z: Define the 3D horizontal position of the text. A negative value will move the text further away while a positive value will move the text closer.
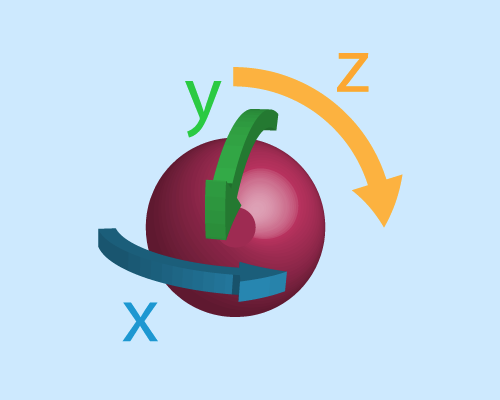
Rotation x: Define the 3D horizontal rotation of the text in degrees 0-360.
Rotation y: Define the 3D vertical rotation of the text in degrees 0-360.
Rotation z: Define the rotation of the text in degrees 0-360.
Scale x: Define the width of the text by percentage. A negative value will thin the text while a positive value with thicken the text.
Scale y: Define the height of the text by percentage. A negative value will shorten the text while a positive value will heighten the text.
Opacity: Adjust the transparency of the text.
Duration: Define a duration that serves as the delay before the “In” animation begins. By default it is set to 500ms (500 milliseconds or half a second).
By default, the text Position is set 30px in the “y” direction with a 0% Opacity. This means the text will animate in 30px from the bottom and fade in.
There is also a Duration setting that serves as the delay before the “In” animation begins. By default it is set to 500ms (500 milliseconds or half a second).
In Animation Settings (Green)
Green is for the “in” animation. These settings define the behavior of that “in” animation.
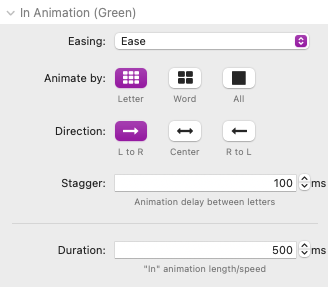
Here is breakdown the settings and what they do:
Easing: Select from 9 different options that modify the animation’s acceleration curve so that the speed varies over its duration. Linear is robotic while the rest mimic realistic motions.
Animate by: Select between three different options. By default it is set to “Letter”, this means each letter of the frame will animate one after the other, with the Stagger setting adjusting the delay between letters. “Word” behaves the same way but instead animates by word. If the “All” option is selected the entire text in the frame will animate together, this option will disable the Direction and Stagger options as they do not apply.
Direction: Select between three different options that change the direction of the staggered letter or word animation.
Stagger: Adjust the delay between letter or word animations in the frame’s text.
Duration: Define a duration that serves as the speed of the “In” animation. By default it is set to 500ms (500 milliseconds or half a second). Note that if the animation contains a stagger between letters or words, the duration will be extended as each delay is added to the overall total “In” duration.
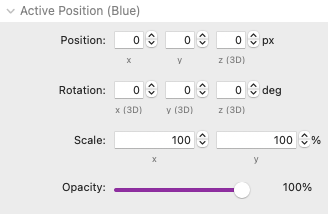
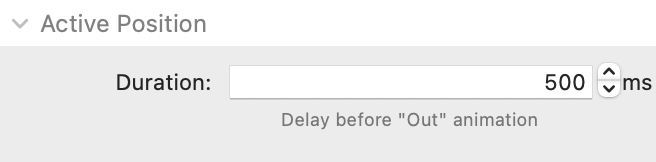
Active Settings (Blue)
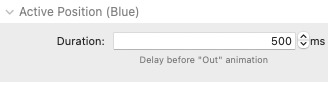
Blue is for the active position, this defines the style and position of the text before the animation begins. By default you cannot adjust the active position and style. This is because in most cases the active position should be unchanged. The initial position will animate to this to state. The only available option is Duration
Duration: Define a duration that serves as the delay before the “Out” animation begins. By default it is set to 500ms (500 milliseconds or half a second).
Out Animation Settings (Red)
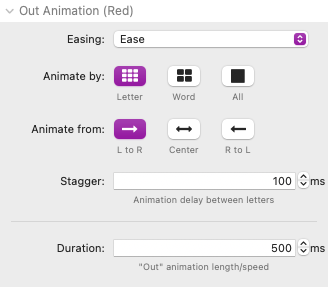
Red is for the “out” animation. These settings define the behavior of that “out” animation.
These settings are identical to the In Animation settings. Here is breakdown the settings and what they do:
Easing: Select from 9 different options that modify the animation’s acceleration curve so that the speed varies over its duration. Linear is robotic while the rest mimic realistic motions.
Animate by: Select between three different options. By default it is set to “Letter”, this means each letter of the frame will animate one after the other, with the Stagger setting adjusting the delay between letters. “Word” behaves the same way but instead animates by word. If the “All” option is selected the entire text in the frame will animate together, this option will disable the Direction and Stagger options as they do not apply.
Direction: Select between three different options that change the direction of the staggered letter or word animation.
Stagger: Adjust the delay between letter or word animations in the frame’s text.
Duration: Define a duration that serves as the speed of the “Out” animation. By default it is set to 500ms (500 milliseconds or half a second). Note that if the animation contains a stagger between letters or words, the duration will be extended as each delay is added to the overall total “Out” duration.
Advanced Settings
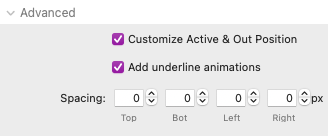
There are two additional settings provided in the Advanced category.
Customize Active & Out Position: Enable this to add position settings to the In Animation category and add a new category to define the Final Position settings. These settings behave identically to the Initial position settings defined above and allow you to further customize how the frame animation behaves.
Add underline animations: Enable this to add underline animations that run concurrently with the frames text animation. Please see the Underline Animations tutorial below for more info.
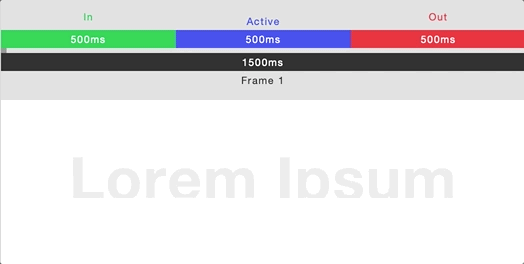
Preview Mode Timeline Visual
It is recommended that you switch to RapidWeaver preview mode when editing frame animations. If the Emoting Text > Show timeline progress in preview option is enabled a timeline visual will appear above your text animation.
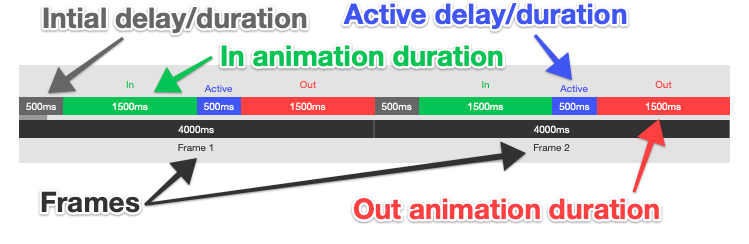
This timeline is color coded to help you see the duration and timing of each part of every individual frame. This can be helpful for understanding what each setting affects.
Note: This visual will not be visible when published to a live site, even if the Emoting Text > Show timeline progress in preview option is enabled.
Adding Custom Text and Frames
After you are done customizing the Master Frame animation you will just need to add your own text. This can be done by first editing the text in the Master Frame and then selecting the Frame stack below it.
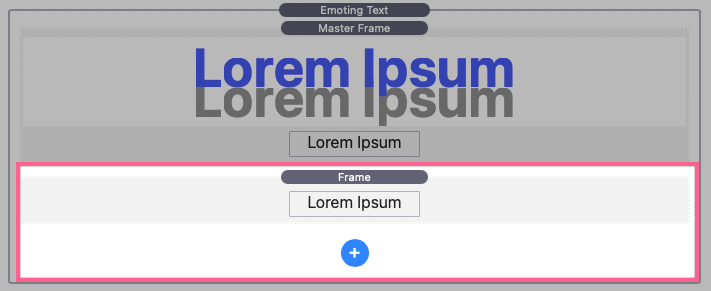
You can either add your own text here or delete this stack if you do not wish to have a second frame. There is also a blue add button that allows you to add as many more frames as necessary.
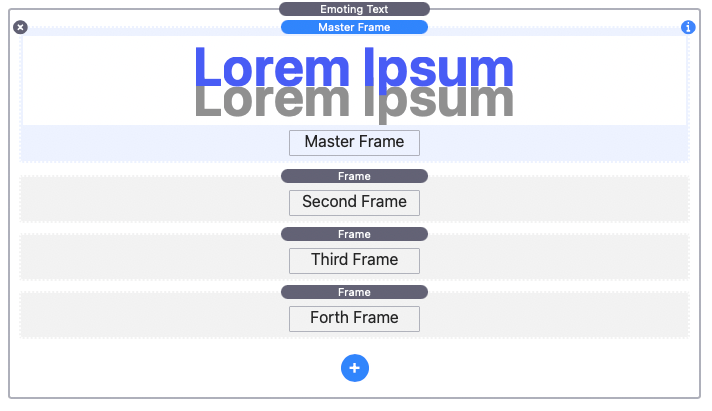
Each frame will automatically inherit the position and animation settings from the closest Master Frame above it. After you are done with the text setup is complete.
Underline Animations
The Master Frame stack includes an advanced option that allows you to add underline animations. When enabled a Spacing option is also provided to help you adjust the position of the underline to the frame’s text. However, in most cases you will not need to adjust this spacing.

Underline animations show up as a 4th type of stack inside of the Master Frame stack.
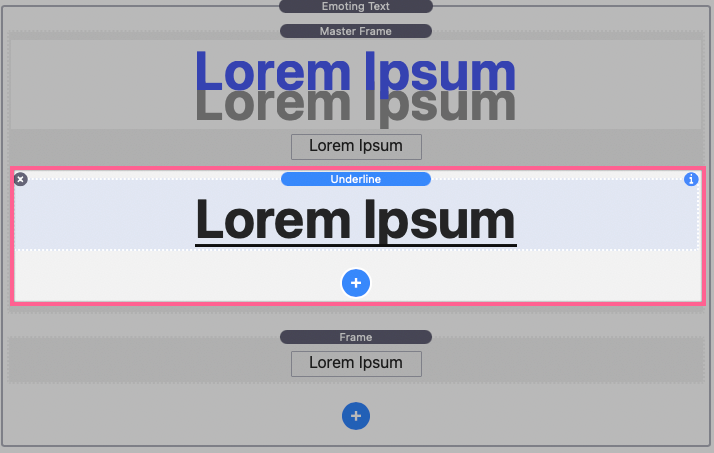
By default one stack is automatically added, but you can use the blue add button to add as many additional underline animations as you need.
Select an Underline stack and open the settings panel to adjust the animation. Underline animation settings are nearly identical to Master Frame animation settings with one key difference. Instead of applying after the Master Frame animation completes, the Underline animations occur in tandem with the Master Frame. This means if the Master Frame has a 500ms delay, and the Underline animation does not, it will start animating 500ms before the Master Frame text animation. If you want to chain underline animations you will need to adjust each Underline animation Duration setting accordingly.
For example, this Master Frame animation initial duration is set to 0ms, with a 500ms in, 500ms active, and 500ms out duration. This means the text animation begins immediately. We have added an underline that has identical durations settings:

Both animations begin at the same time.
In this next example, the Master Frame animation is unchanged. However, we have added a 500ms initial duration to the underline. This means the underline animation will wait half a second before starting. We have also reduced the active duration to 0ms to so the underline out animation begins at the same time as the Master Frame.
Here is a breakdown of the Underline settings:
Initial Position Settings
Color: Change the color of the underline.
Position x: Define the horizontal position of the underline. A negative value will move the underline left while a positive value will move the underline right.
Position y: Define the vertical position of the underline. A negative value will move the underline up while a positive value will move the underline down.
Position z: Define the 3D horizontal position of the underline. A negative value will move the underline further away while a positive value will move the underline closer.
Rotation x: Define the 3D horizontal rotation of the underline in degrees 0-360.
Rotation y: Define the 3D vertical rotation of the underline in degrees 0-360.
Rotation z: Define the rotation of the underline in degrees 0-360.
Scale x: Define the width of the underline by percentage. A negative value will thin the underline while a positive value with thicken the underline.
Scale y: Define the height of the underline by percentage. A negative value will shorten the underline while a positive value will heighten the underline.
Opacity: Adjust the transparency of the underline.
Duration: Define a duration that serves as the delay before the “In” animation begins. By default it is set to 500ms (500 milliseconds or half a second).
In Animation Settings
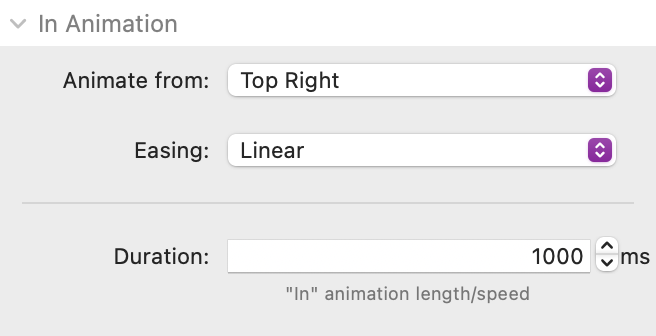
Animate from: Select the point around which the 3d position is applied. See an example of each here.
Easing: Select from 9 different options that modify the animation’s acceleration curve so that the speed varies over its duration. Linear is robotic while the rest mimic realistic motions.
Duration: Define a duration that serves as the speed of the “In” animation. By default it is set to 500ms (500 milliseconds or half a second).
Active Position Settings
Duration: Define a duration that serves as the delay before the “Out” animation begins. By default it is set to 500ms (500 milliseconds or half a second).
Out Animation Settings
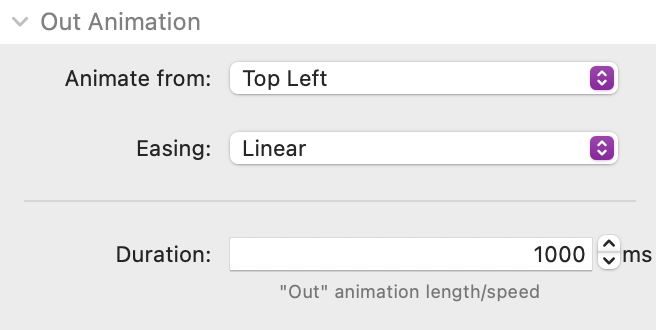
Animate from: Select the point around which the 3d position is applied. See an example of each here.
Easing: Select from 9 different options that modify the animation’s acceleration curve so that the speed varies over its duration. Linear is robotic while the rest mimic realistic motions.
Duration: Define a duration that serves as the speed of the “Out” animation. By default it is set to 500ms (500 milliseconds or half a second).
Advanced Settings
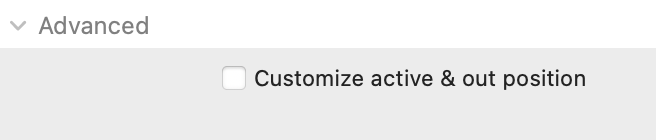
Customize Active & Out Position: Enable this to add position settings to the In Animation category and add a new category to define the Final Position settings. These settings behave identically to the Initial position settings defined above and allow you to further customize how the underline animation behaves.