Setup
Drag the Pagelit Stack into the editor.
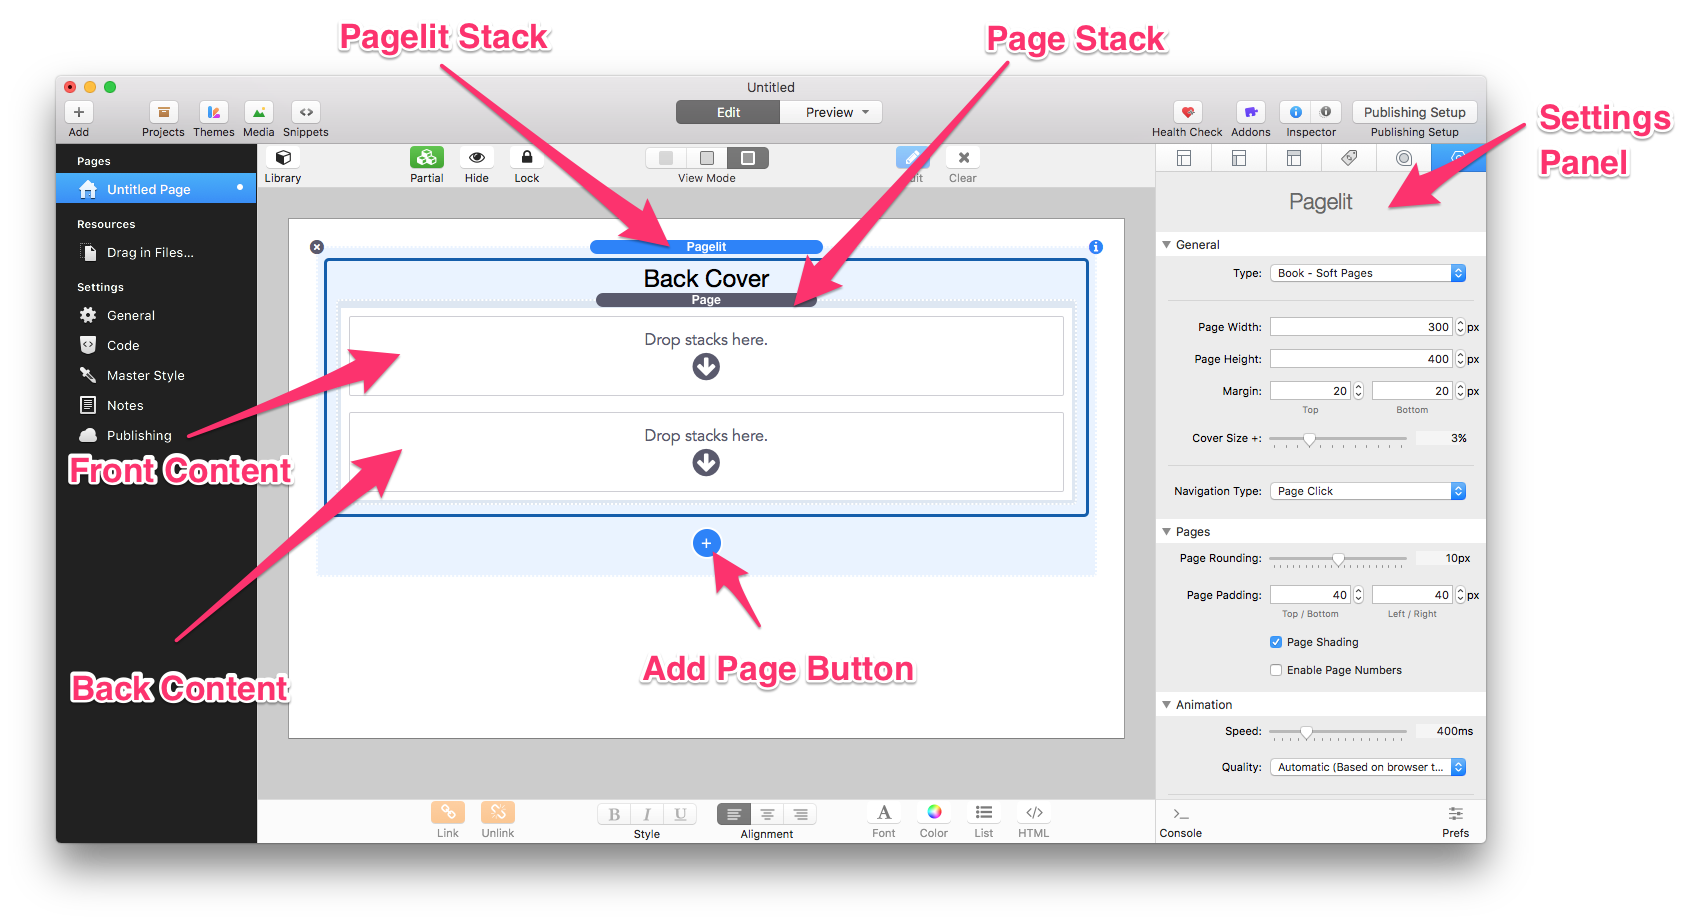
Pagelit starts with a single page, clicking the blue “Add Page Button” will add additional pages.
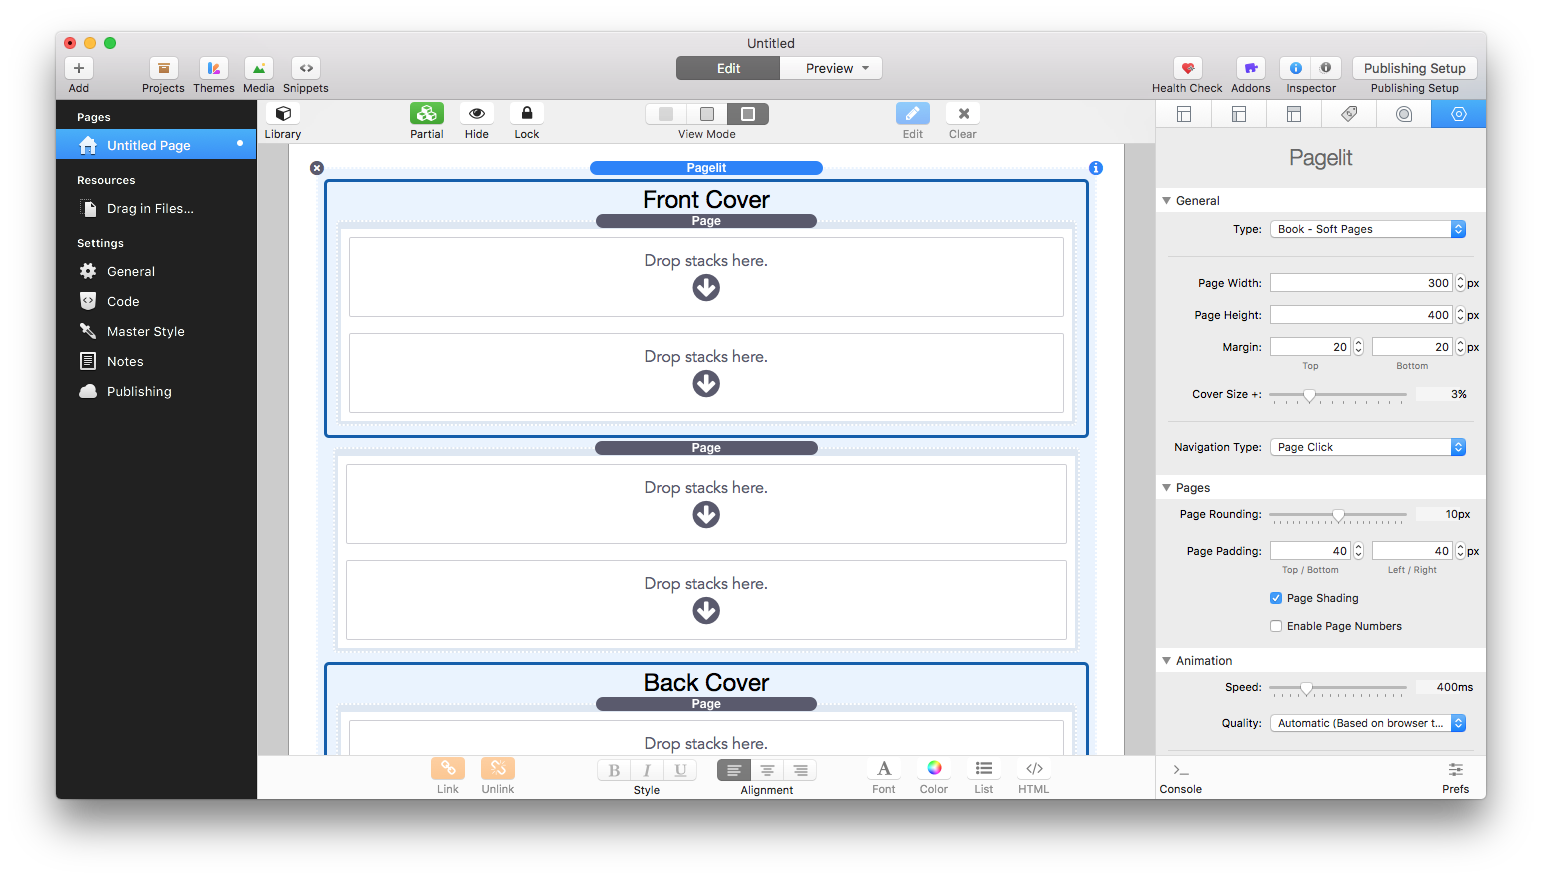 The top Page will be used as the Book or Magazine cover and the last page at the bottom will be used as the back cover. The cover pages will be highlighted with a blue rectangle and will be labeled “Front Cover” or “Back Cover” in edit mode.
Each Page Stack has a front and back represented by two “Drop Stacks here” sections. The front section (located at the top of each individual Page Stack) is for the content that will display when the page is on the right side of the book. Once the page is turned it moves to the left side and reveals the back section (Located at the bottom of each individual Page Stack). Inside of each page you can drag any Stack content you wish, including images, video, text, and even other stacks.

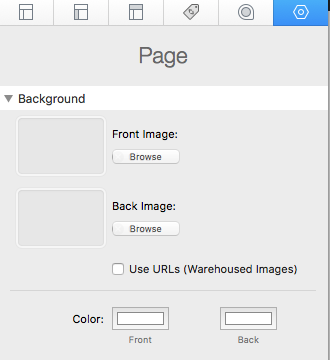
Click on individual Page Stacks to reveal background options in the “Settings Panel”. Here you can set the color of the background or set an image to display as the content. You can also use “Warehoused” images by enabling “Use URLs”.
If you are creating a book or magazine made from images you can simply drag and drop the images into each Page Stack’s Settings Panel “Front Image” or “Back Image” section.
Additional customization and settings will be explained in the Settings Panel Breakdown below.
Pagelit Settings Panel Breakdown
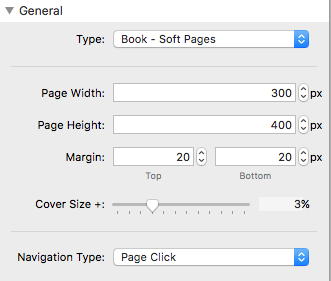
Type – Choose between 3 different modes:
- Book – Soft Pages will make the first and last pages animate as a hard cover.
- Book – Stiff Pages will make all pages animate as solid and stiff card stock.
- Magazine will make all pages animate as paper. This option removes the “Cover Size +” and “Page Rounding” settings.
Page Width – Adjust the width of the pages. If the container is not wide enough to fit Pagelit while it is open, it will scale to fill the available space. This will also cause the content to shrink as if it were an image.
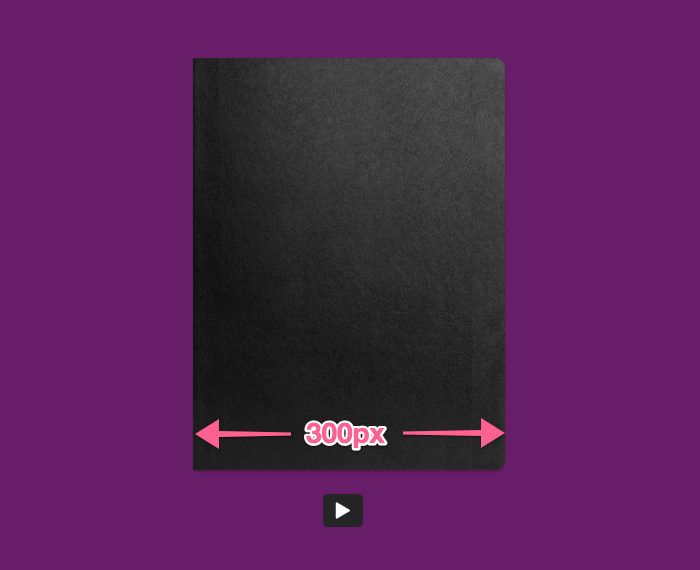
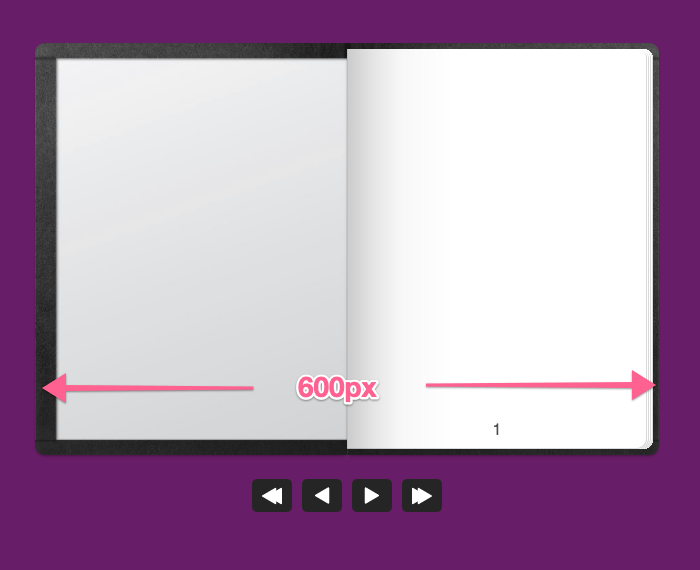
Note: This value adjusts the width of each of the individual pages and not the entire “book” when opened. If you set the page width to 300px, the book will be 300px wide when closed and 600px wide when open.
Page Height – Adjust the height of the pages. The height will also scale if the container is not wide enough to fit Pagelit while it is open.
Margin – Adjust the space at the top and bottom of Pagelit.
Cover Size – Adjust how much larger the cover pages are in relation to the inner pages. This setting is disabled if the “Type” is set to Magazine.
Navigation Type – Choose between 3 different modes:
- Page Click will allow users to navigate forward and backward by clicking or touching the cover, left page, or right page. Users will not be able to interact with the content inside the pages if this mode is enabled.
- Buttons will add navigation buttons below Pagelit that will allow users to navigate forward or backwards. This option is best if you want users to interact with the content inside the pages.
- Page Click and Buttons will add navigation buttons below Pagelit and allow users to click or touch to navigate.
Page Rounding – Adjust the corner radius of the book edges. This setting is disabled if the “Type” is set to Magazine.
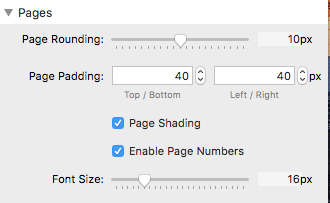
Page Padding – Adjust the padding around the edges of each page.
Page Shading – Enable/Disable inner page shading at the spine of the book or magazine.
Enable Page Numbers – Enable/Disable page numbers that display at the bottom of each page.
Font Size – Adjust the size of the enabled page numbers.
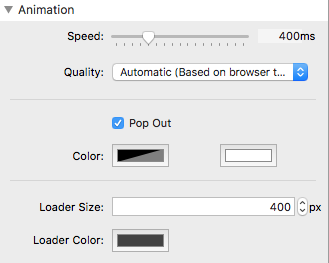
Speed – Adjust the speed (in milliseconds) of the page turn animation. This will also adjust the speed of the “Pop Out” animation when enabled.
Quality– Choose from three modes:
- Automatic will make Pagelit automatically adjust the detail of the animation depending on the user’s device pixel density or browser type. This is the recommended setting.
- Best Performance will always use the lowest level of detail for the animation. This prioritizes the animation to be a smooth as possible.
- Best Quality will always use the highest level of detail for the animation. This setting is only recommended if your page dimensions are less than 400 (page width) by 600 (page height) as larger books or magazines can be quite demanding on high dpi (IE Retina) screens and some browsers.
Pop Out – Enable/Disable a pop out animation that will remove Pagelit from it’s container and place it in a full screen overlay. If Pagelit has been scaled to fit it’s container, it will grow to the set height once it leaves the container.
Loader Size – Adjust the height of open space shown while the book is loading.
Page Settings Panel Breakdown
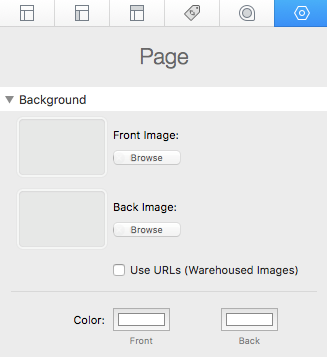
Front Image & Back Image – Select an image to display stretched out over the entire page. The image will match the dimensions you set in Pagelit’s Settings panel.
Use URLs – Enable/Disable input boxes that allow you to declare the location of a warehoused image.