Booklit Stack
The Booklit Stack is placed first onto your Stacks page. Afterwards, you can place the Booklit Page Stack inside and sequentially place the Page Stacks one below each other again and again untill you have as many pages as you want to use.
Basic Setup
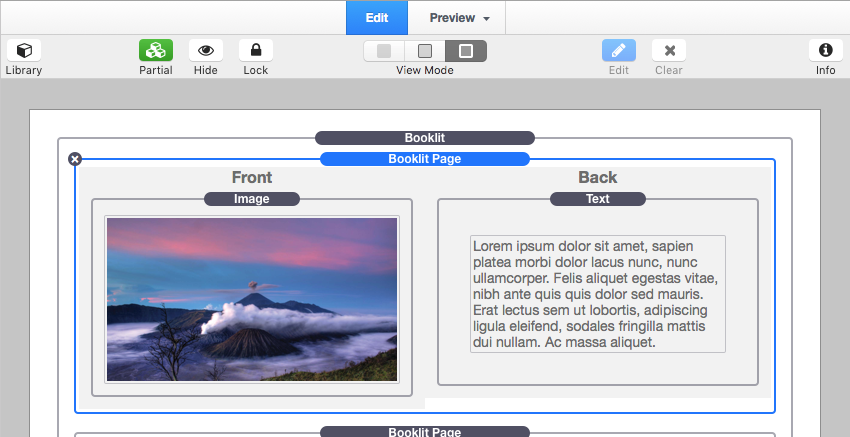
Drag Booklit onto any Stacks page, then drag a Booklit Page stack inside. Each Page stack has a front and back section. The front section is for the content that will display when the page is on the right side of the book. Once the page is turned it moves to the left side and reveals the back section. Inside of each page you can drag any Stack content you wish, including images, video, text, and even other stacks.
Definition of Terms
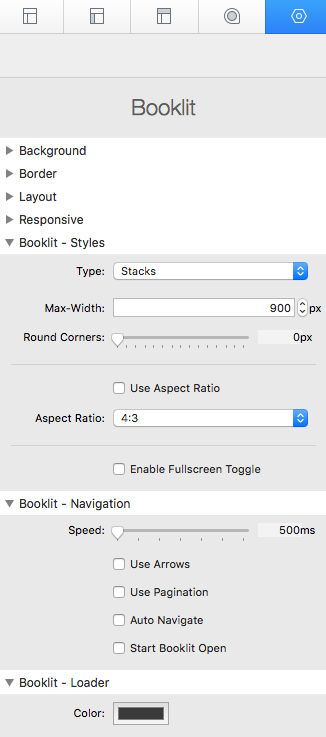
Type – By default this is set to “Stacks”. This type allows you to add any type of stacks content. The “Images only” mode is for what is says, this will disable the ability to add other stacks to the pages. Images only mode is good for when you have a pdf, book, or magazine photos to show.
Max-width – You can set a max-width value (The width the book will display when viewed in desktop browsers) in pixels.
Round Corners – Allows you to add rounded borders to the page and book edges. (Supported in IE9+, Firefox, Chrome, Safari, and Opera.)
Aspect Ratio – This is a setting that effects the responsive behavior of the stack. If you set an aspect ratio Booklit will always maintain this shape no mater what size the browser window is. This setting is mandatory for images only type pages, and optional on Stacks type pages.
Note: Stacks type pages will not maintain the aspect ratio if content overflows the height of the book. You will need to adjust the aspect ratio to match your content.
Fullscreen Toggle – Enable this option if you would like to add a button that appears in the top right when Booklit is hovered with the mouse. This button opens up a lightbox that displays the book at the max-width you set. The fullscreen max-width controls the size of Booklit only in fullscreen mode. Increase the size of the max-width value to increase the size of the book in the lightbox.
Speed – Use this slider to adjust how fast the page turn animation is.
Use Arrows – When not enabled, users will need to click on the page itself to turn through the pages. When enabled, users will use the left and right navigation buttons to turn the pages. Note: If you do not enable the Page Navigation buttons you will not be able to click and interact with the stacks inside of your pages (The whole page is used as a clickable area to turn the page).
Navigation Arrows Enabled Options:
- Only On Hover – The left and right navigation buttons will only appear once a user places their mouse over the stack.
- Theme: Detailed, Simple, Flat – Select between these three styles to change how the arrows look.
- Color – Change the color of the Detailed or Flat styles. Note: The simple style does not have a changable color.
Use Pagination – When enabled, selectable bullets will appear below Booklit to allow users to quickly navigate between multiple pages.
Pagination Enabled Options:
- Color – Change the color of the pagination bullets.
Auto Navigate – When enabled, The pages will turn automatically. Note: Once a user clicks on the Booklit Stack, auto navigate will turn off and allow them to navigate manually.
Auto Navigate Enabled Options:
- Loop: One Time, One Full Loop, Infinite – “One time” will turn through the pages until the last page is reached and stop. “One Full Loop” will turn through the pages until the last page and then turns backwards till the first page is reached and stops. “Infinite” will loop back and forth between all of the pages and will not stop unless a user clicks on the stack.
- Speed – Set in milliseconds, this option determines how long the delay is before each turn of the page. IE 2000 = 2 seconds.
Start Booklit Open – When enabled, Booklit will start open to a page that you specify.
Start Booklit Open Options:
- To Page # – Number of the page you want Booklit to start open on.
Loader color – When Booklit is loading it displays a loader. Use this to control what color it is.
Booklit Page Stack
This stack is placed inside of the Booklit stack and creates the individual pages. The size of the Book will depend on the content you place inside of the Booklit Pages. Booklit will find the page with the most content and match the height of that page to all the other pages inside of your book. As for the width, that is determined by where you place the stack. It will match the width of the container you place it in (IE a column stack) otherwise the stack will fit to the width of your site. You can also adjust the left and right margin to make the book more narrow. After placing your desired amount of Booklit Pages into the Booklit stack, you can then add stacks content to each page. Note: Each page has a front and back.
Definition of Terms
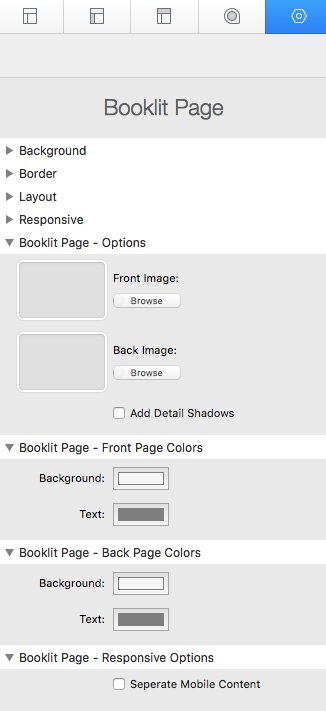
Front & Back images – These sections are best if you would like to create a book made completely from images. This will allow the images to scale correctly when the browser is resized. Just set the aspect ratio option in Booklit to match the ratio of the images you are using. If the images do not match the aspect ratio the image will be cropped to fit.
Detail Shadows – Enabling detail shadows will add a curved shadow for a book page look to the front and back of the page.
Background Colors – Controls the background colors of the front and back of the page.
Base Font Colors – Controls the text color of the front and back of the page. Note: This will only set the base color and it can be overidden by the stacks you place inside if they have their own font color options.
Resonsive Options – Seperate Mobile Content – Enabling this option will display another row of Front and Back content sections. Anything that you place into these content areas will be displayed to mobile devices inplace of the normal content. This is useful if you find that your content does not display how you would like on smaller screens.
Using the Social Media Stack Template
*Requires the free Font Awesome Stack (included with the Booklit Stack).
Step 1: Drag and drop the Font Awesome Stack onto your Stacks page.
Step 2: Drag and drop the “Booklit – Social Media” Stack Template into your desired location on your Stacks page. This stack works best in narrow areas like a three column stack.
Step 3: You can now start editing the template to create links to your own social media websites. Click on any of the icons to edit them. All you need to do is change the URL (http://www.twitter.com) to your page’s address and if you need to change the icon, change the icon name (IE fa-twitter) to match the social media icon you want to use. You can find a list of usable icons and their names here: Font Awesome. You may also want to change the background colors to match the social media sites you are linking to.
Step 4: Repeat step 3 until you have changed all of the links. Delete or duplicate pages to create new or remove unused links.
Using the Lightbox Stack Template
*Requires the Ice Box Stack.
Drag and drop the “Booklit – Lightbox” Stack Template into your desired location on your Stacks page.
Please refer to the Ice Box tutorial page to set up the Ice Box Stack