Setup
You only need to drag and drop the Live Search Stack into the Stacks page where you want it to display. No additional setup is necessary for the Stack to function. The page must be uploaded online for the search feature to work.
Below are some tutorials on optional customization.
Search Bar Options
Show Suggested Search Terms

Enabling this will allow you to define any number of suggested search terms. These terms will appear as a drop down selection menu that users can click to automatically populate the search bar. The suggested search terms will also display as they are spelled out in the search bar as a form of auto-complete.
Note: This HTML5 feature is not yet supported in Safari browsers.
Allow Auto-complete
Enabling this will allow browsers to auto-complete search terms that have been previously searched for by the same user.
Customize Appearance
Enabling this option will reveal search bar customization settings.
Search Result Options
Results per Page
Define how many search results will display before sorting the remaining results into navigable pages (pagination).
Word Count
Define how many words each search result displays under the page title.
Open Link in a New Window
Enable this to have the search result links open in a new window or tab.
Show File Path
Enable this to show the file path beneath the page title in the search results.
Customize Appearance
Enabling this option will reveal search results customization settings.
- Theme – Choose between two themes (chat bubble or plain results). You can also choose options that display the results as a popover, hovering over the content, or embedding the results into the page.
- Focus Overlay – Choose a light or dark option to enable an overlay that will darken or lighten the background content when a search has been performed.
Custom Page Summary
By default, Live Search will display the first 60 words as the description for a page in the search results. If the searched term is not found within the description, a section from the text containing the searched term will be added with ellipsis (…) to the description.
This Stack includes a snippet that you can place inside any text area to mark where you want the search results to grab the description from (Stacks and non-Stacks pages).
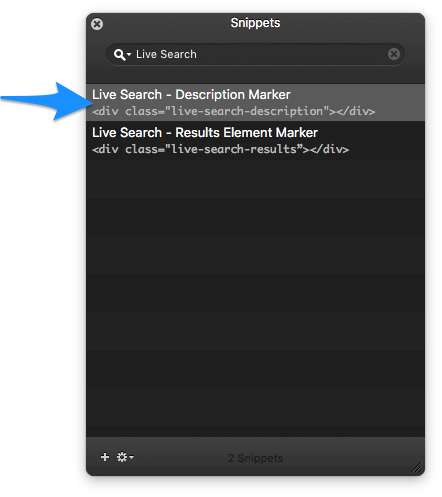
You can also copy it from here:
<div class="live-search-description"></div>
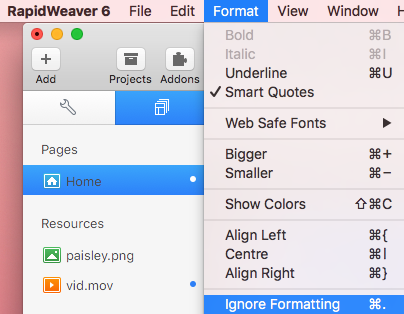
To change the description on any page, drag and drop the snippet into a text area above the text you want to display as the description for that page. Then highlight the snippet and choose “Ignore Formatting” from the Format drop down menu.
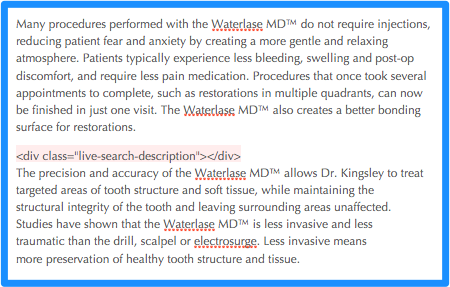
In the example below, I have placed the Description Marker below the first paragraph and above the second. Now when this page shows up in the search results it will ignore the first paragraph and display the text from the second paragraph, highlighting any terms found in the description.
Show Search Results in a Custom Container
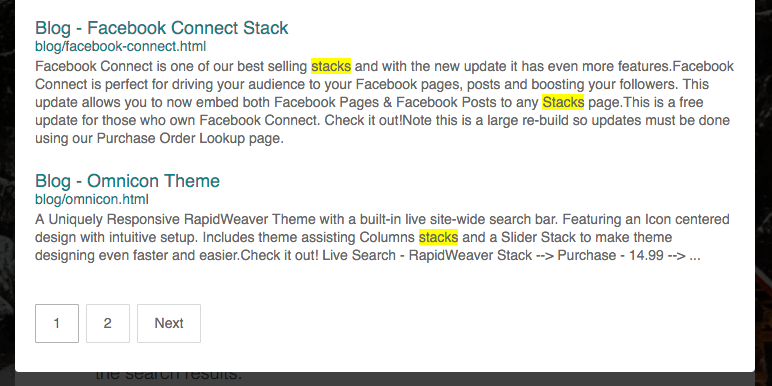
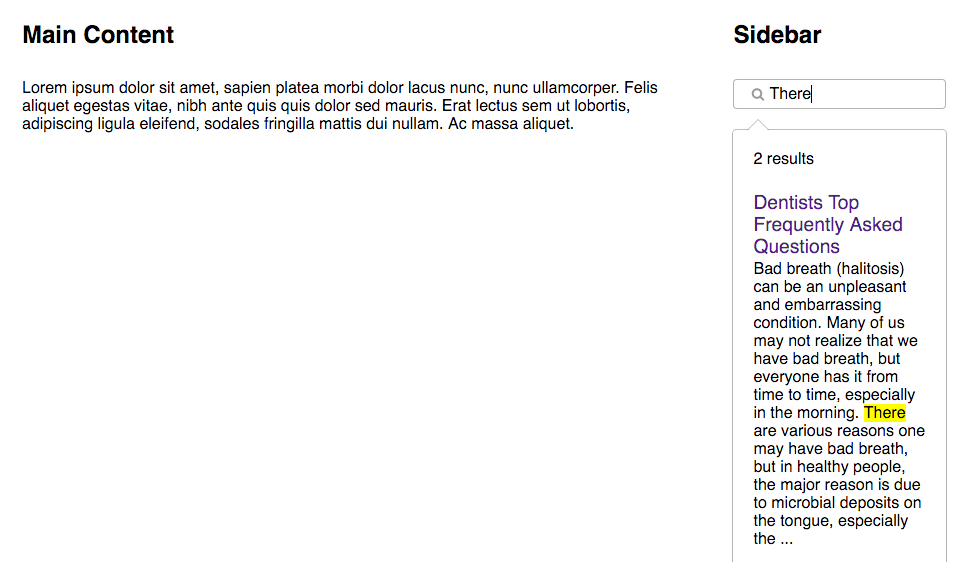
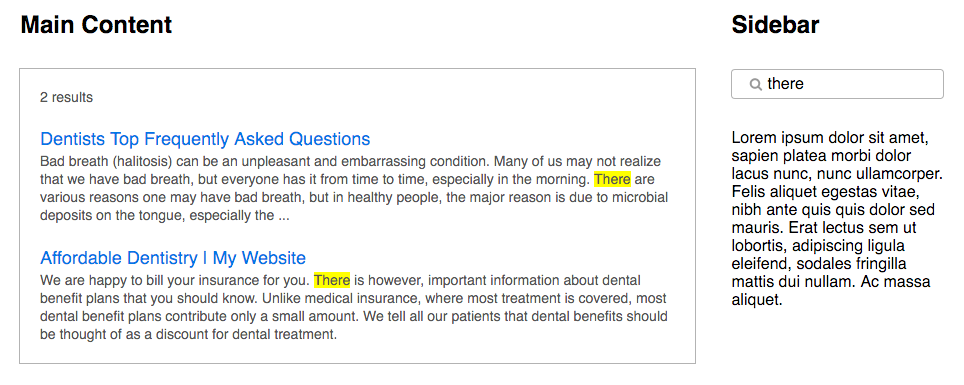
By default, Live Search will display the search results directly below the search bar at the same width of the search bar’s container. In some instances you may want to place the Live Search stack into a narrow container (like a sidebar). However if the search bar’s container is narrow, the search results will also be narrow. The image below is an example of what the results would look like.
This Stack includes a snippet that you can use to declare where you want the search results to display. In this case I want the search results to display in the Main Content container because there it has a bigger width. To mark where you want the search results to display just drag and drop the “Results Element Marker” snippet into any text area. Then highlight the snippet and choose “Ignore Formatting” from the Format drop down menu.
You can also copy the snippet it from here:
<div class="live-search-results"></div>
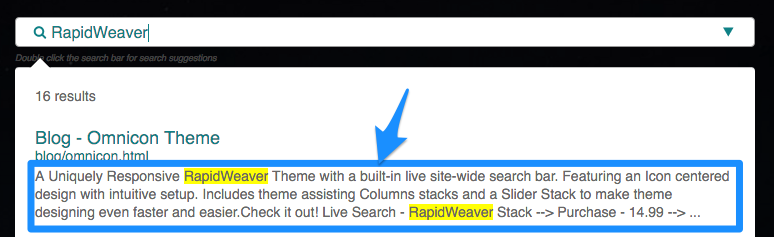
In the example below the snippet was placed inside the Main Content container.
Note: Because of the limited space and the possibility of content being in-between the search bar and search results (creating a bad user experience on mobile devices) the results will automatically appear below the search bar when viewed on a mobile device. If you would still prefer to place the results elsewhere, you can use the snippet below for mobile devices.
<div class=”live-search-results-mobile”></div>
Advanced Options
Customize Text/Language
Enable this option to reveal text input fields that will allow you to change the language of the search’s messages and placeholders.
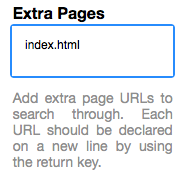
Search Additional Pages
Enable this option to define pages that you would like to search through that are not in the navigation menu. Each extra page to search is added by clicking on the ‘plus’ icon in the editor. Click on the empty field to choose which page to include in the settings panel to the right of the editor. There is no limit to how many pages you can add.
Note: Each added page needs to be apart of the same domain and website.
Note: If your website has allot of pages (100+) it may take quite a while to add each individual page. If you have this issue, check out the link here and we can help you add the pages in a more efficient manner.
Exclude Specific Pages
Enable this option to define pages that you would like to to exclude from the search results. Each excluded page is defined by clicking on the ‘plus’ icon in the editor. Click on the empty field to choose which page to exclude in the settings panel to the right of the editor.
Hide Description Terms
Enable this option to define certain words or phrases you do not want to show up in the search result page descriptions. For instance, if a certain slogan is on every page and you do not want every search result description to have the same text, you can define it here to remove it from the descriptions. You will also need to add a plus symbol and backslash (+\) between each of the listed terms/phrases. Do not add these symbols before the first or after the last term/phrase listed.
Declare Search Container
If you are using a specific theme and you know the class or id name of a specific element, you can define it here and the search will only search that specified container instead of the the entire page. Prefix a class name with a period(.) or and ID with a hash/pound symbol (#).
If you have a webkit browser such as Chrome, Firefox, Safari or Opera, Inspect Element is available by right clicking the element on the page you want to be searched. It will show up highlighted.
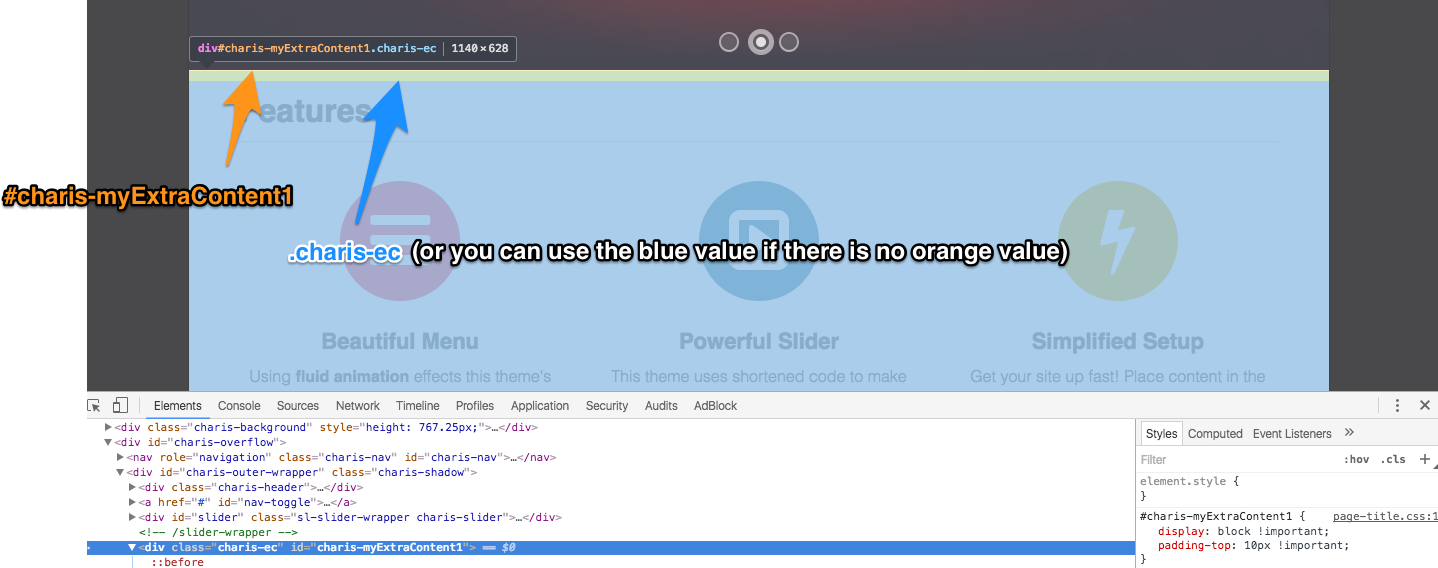
Here are acceptable values for the field (using the info from the screenshot above).
#charis-myExtraContent1 (This is the recommended value if the container has an ID [orange # value] )
.charis-ec (This is also acceptable, but unlike an ID [orange # value], classes [blue . value] can be used more than once on other containers, so other containers with the same class will also be searched)
Note: You can only declare a single container in this field.
Search a specific section or element on a page
Add a new link the the page with the element or section you want to search to the “Search Additional Pages” section.
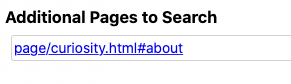
The link to the page must be added manually and not selected from the dropdown menu. When adding a the link add a #(hashtag) followed by the ID of the element you want to search. See the “Declare Search Container” section above to learn how to obtain and ID for a section or element.
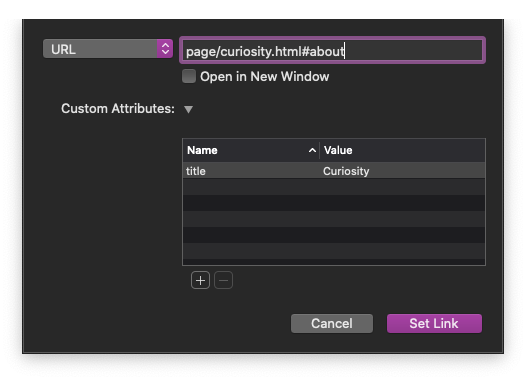
This page link with hashtag will display as it’s own result when a search is made.
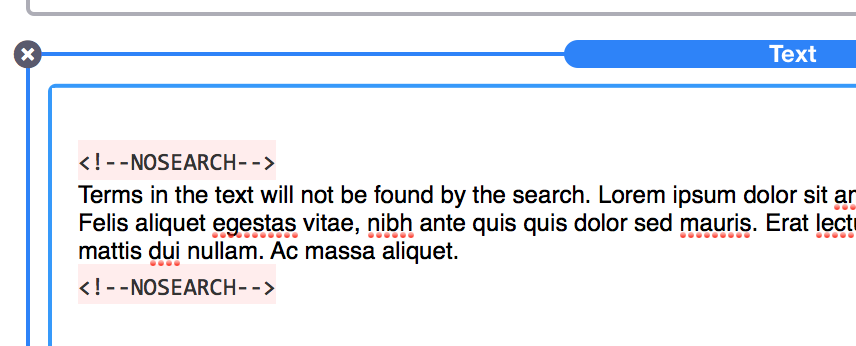
Exclude a Section of Text from the Search Results
If you want to exclude a section of text from showing up within a page in the search results, place the snippet below before and after the text you want to exclude.
<!--NOSEARCH-->
Include the Current Page in the Search Results
If you would like to include the page the Live Search Stack is on in it’s search results, just enable “Search Additional Pages” in the Advanced Options. Then add the page’s filename (found in the Page Inspector > General Settings) to the Extra Pages field.