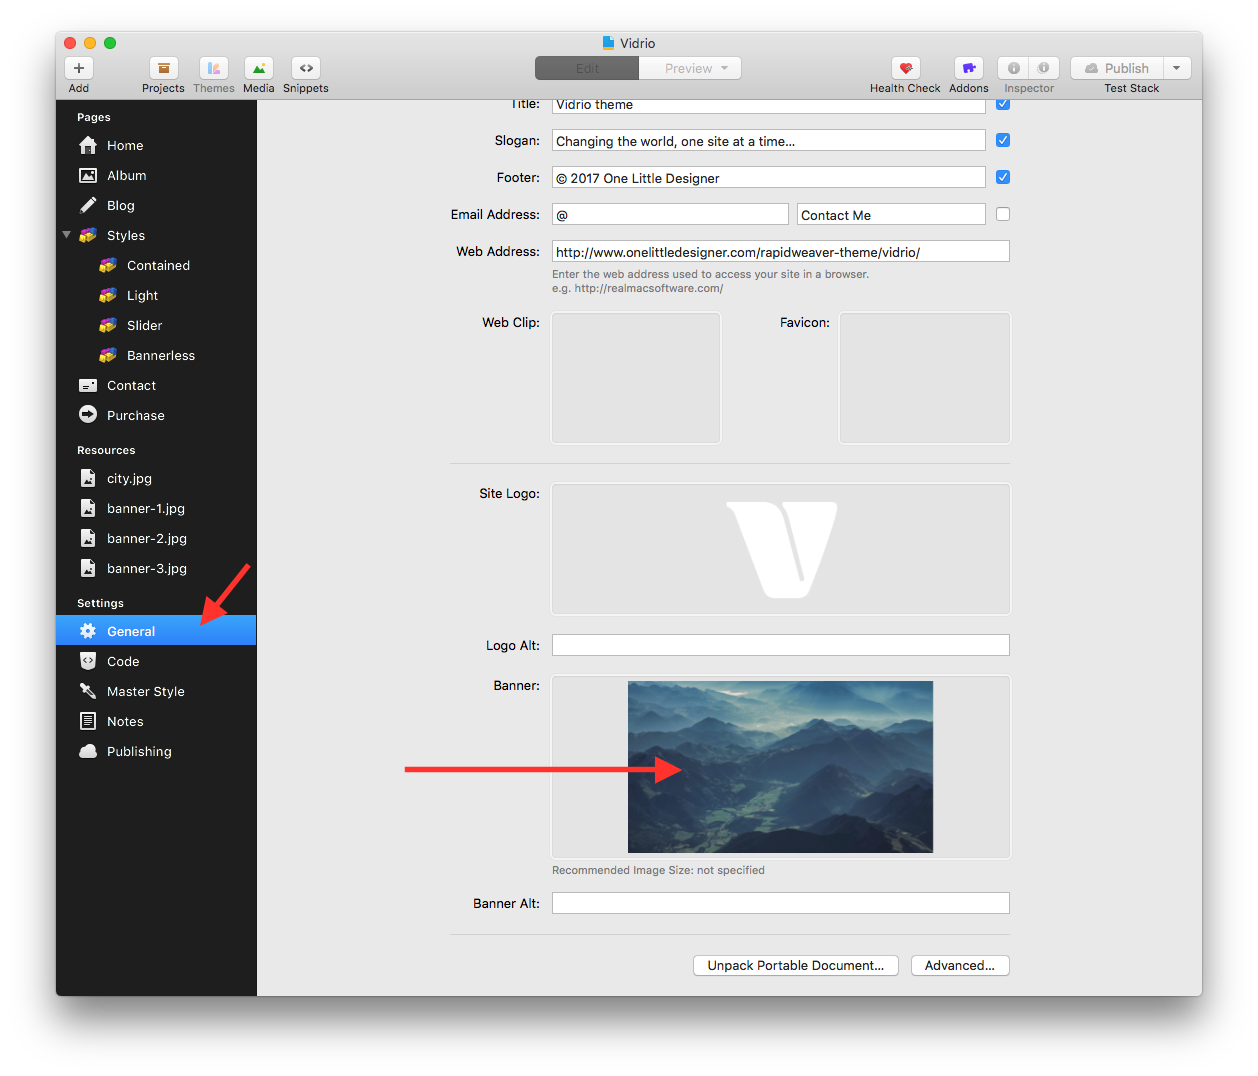
Adding a Banner Image
If you are using RapidWeaver 7, you just need to drag and drop your image into the Site General Settings page “Banner” section.
To use a page specific banner, select the page and navigate to the Page Inspector > General Settings tab and use the “Override Site Banner” section.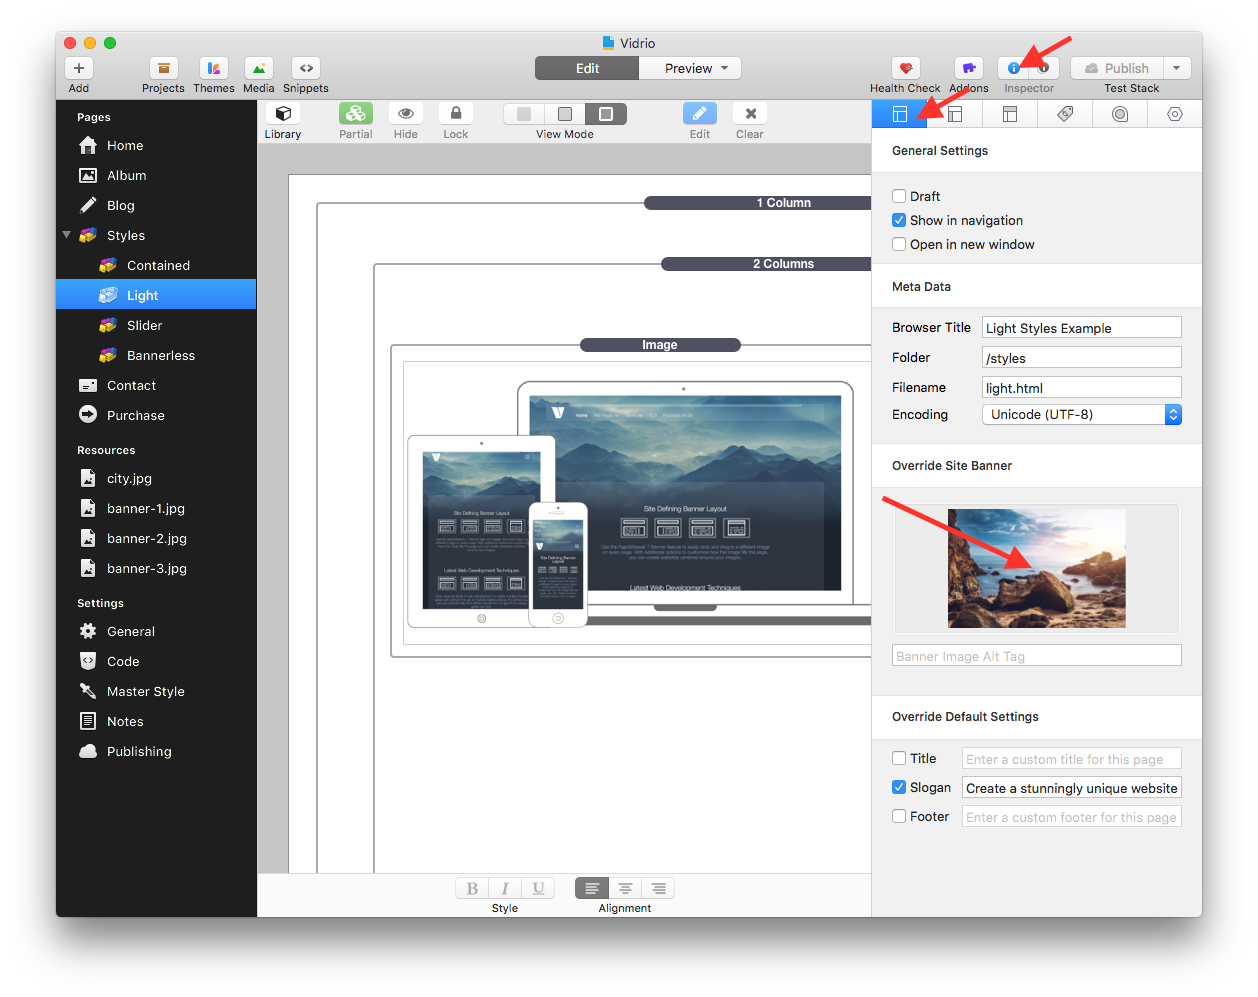
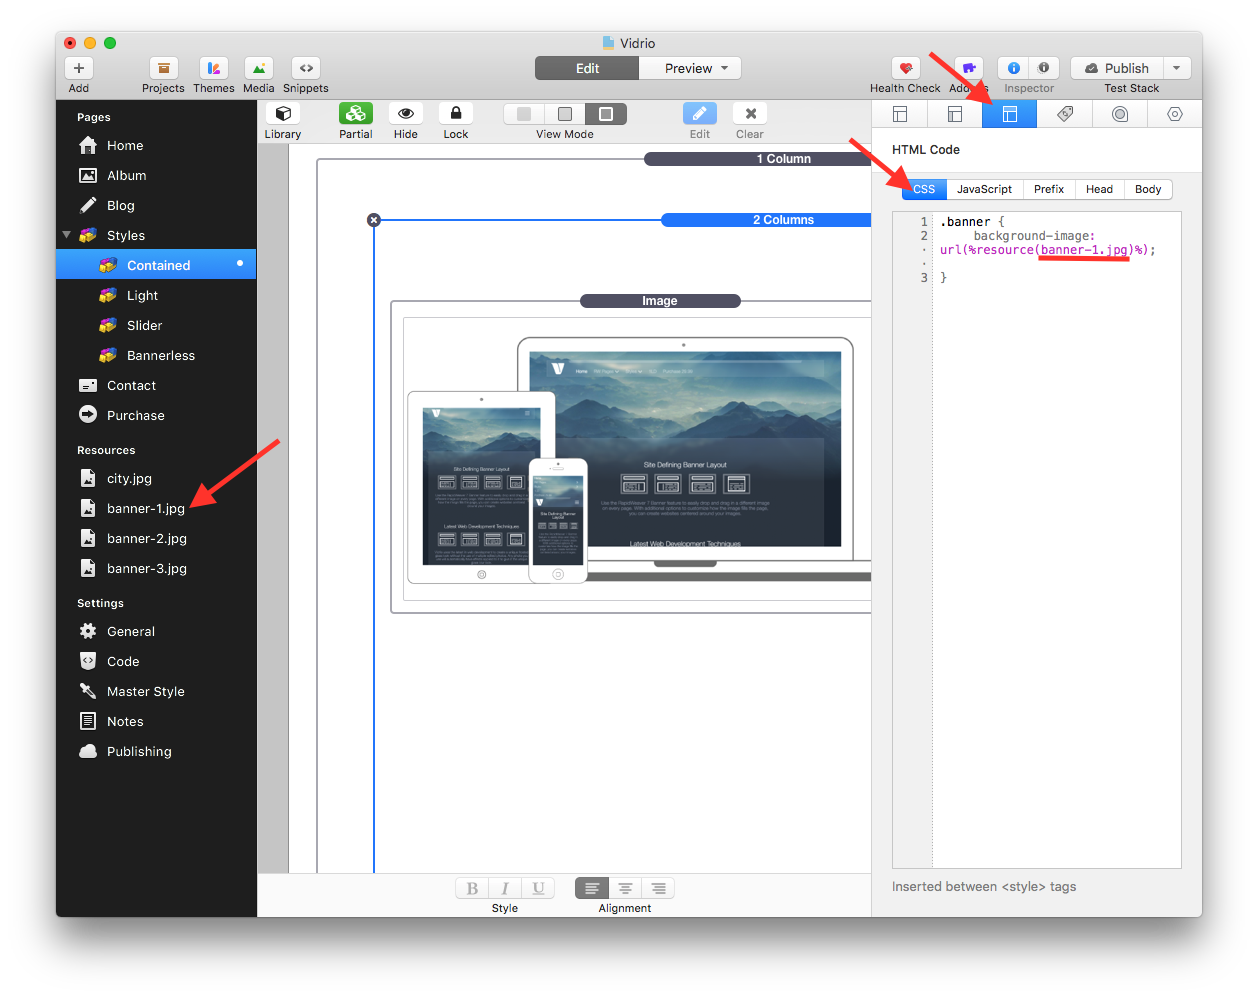
If you are using an older version of RapidWeaver that does not have the “Banner” Setting you can use the snippet below instead. Place the code inside the Page Inspector > CSS tab for the page you want to apply the image to.
.banner {
  background-image: url(%resource(image.jpg)%);
}
Then drag and drop your image into the “Resources” Section found in the left menu bar. Replace the text “image.jpg” with the title and extension of your image file (Case sensitive).
Adding a Background Image
When the “Banner Toggles” option ‘Full Width’ is disabled, you are able to add an optional image to the background.
To do so, place the code below inside the Page Inspector > CSS tab on the page you want to apply the image to.
.background-image {
  background-image: url(%resource(image.jpg)%);
}
Then drag and drop your image into the “Resources” Section found in the left menu bar. Replace the text “image.jpg” with the title and extension of your image file (Case sensitive).

Opening Images in a Lightbox
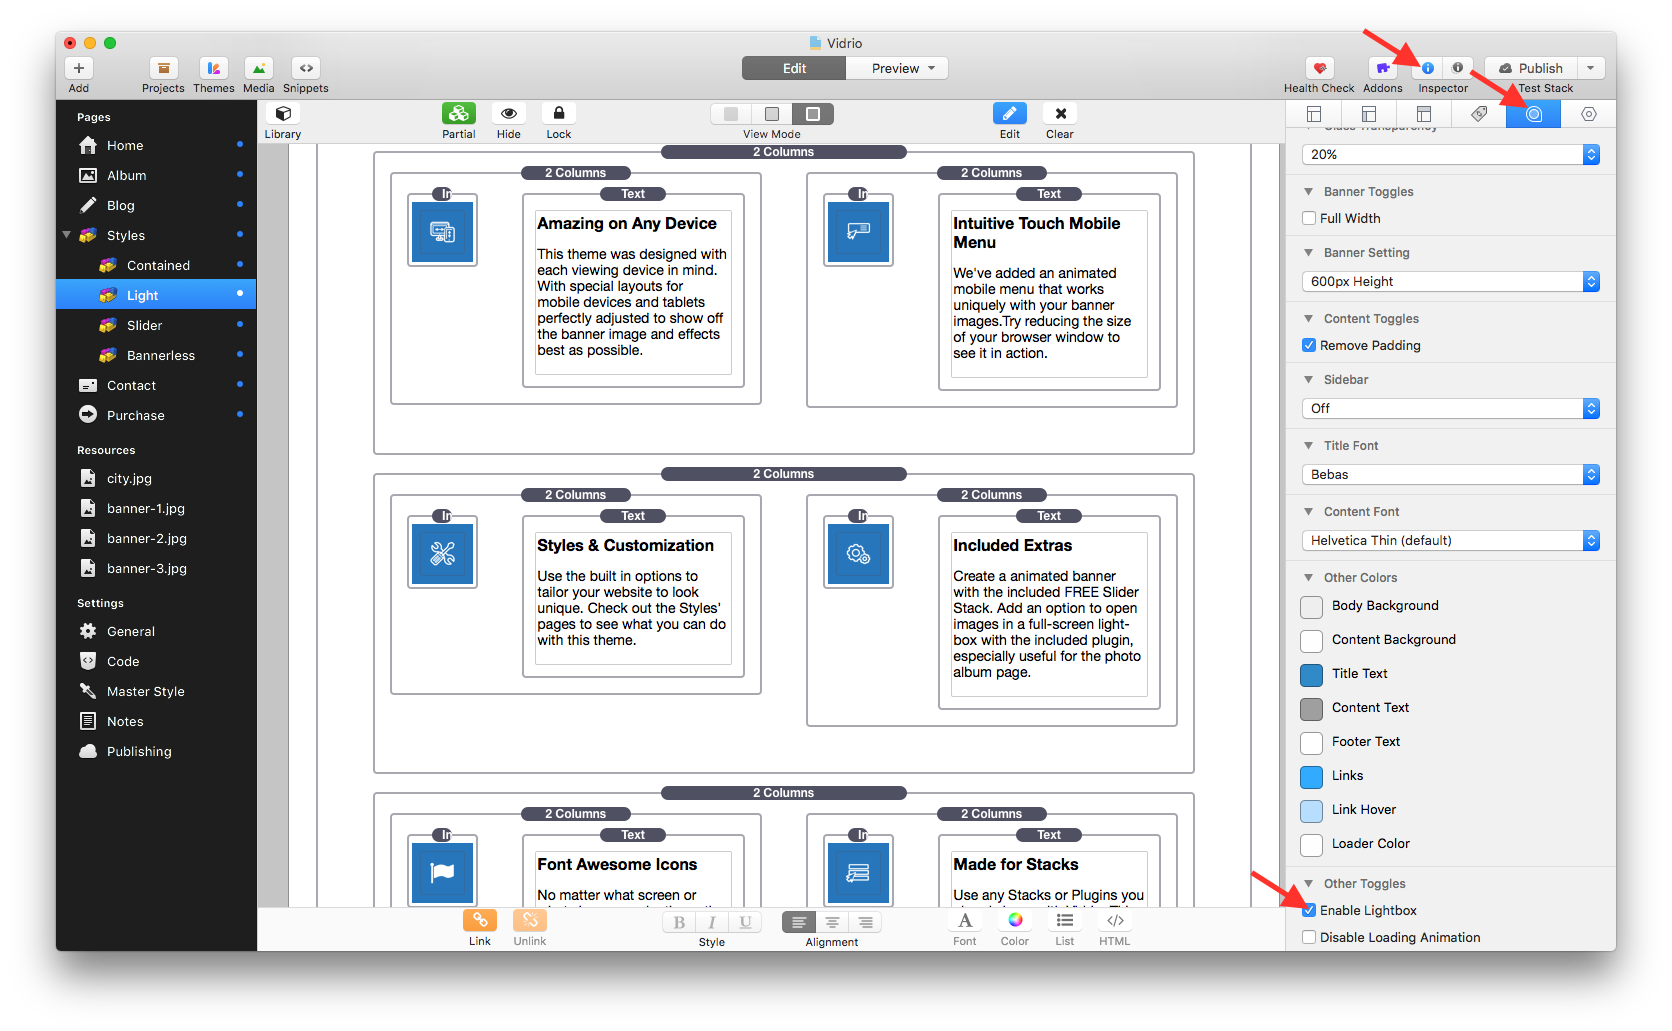
First we must enable the plugin. Navigate to your Page Inspector > Styles Tab and enable the Lightbox by selecting checking the ‘Enable Lightbox’ checkbox under the “Other Toggles” heading.
If you are using a “Photo Album” page, all of the images added will automatically be opened in a Lightbox.
If you want to add the Lightbox effect to an image on another page type import or drag and drop an image into that page.
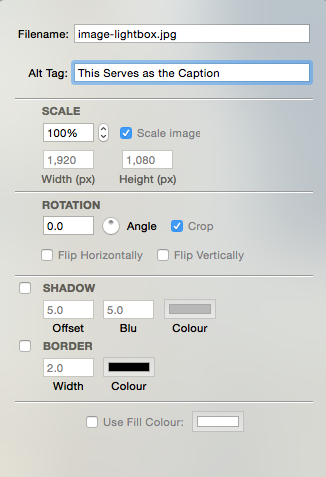
Then Double click the image and in the popup menu change the Filename to something that includes the word ‘lightbox’. You can also change the “Alt Tag” to set what will display as a caption for the image.
Using Font Awesome Icons
Font Awesome’s Icons can just about be used anywhere on your site. Check out the links below to learn more about how to use Font Awesome.
Style Options
Navigation
Align Right – Aligns the menu navigation page titles to the Right instead of the left.
Show Site Title – Displays the Site Title to the Right of the logo (to the left of the menu navigation page titles).
Show Site Slogan – Displays the Site Slogan centered inside of the Banner area.
Disable Parent Pages – Disables menu navigation page links that have sub-pages. These “parent” pages will not be able to be navigated to and will only be used as titles for the drop down sub-page menus.
Glass
Dark Edges – Changes the edges of the glass from a white reflection to a dark shade. This option is useful if you are using a white “Content Background” color.
Remove Blur – Removes the blur effect of the glass.
Glass Transparency – Adjust how strong the transparency of the glass color is.
Banner
Full Width – Makes the Banner image stretch to the the sides of the browser window.
Banner Setting – Adjusts the height of the Banner image.
Content
Remove Padding – Remove padding from the content. This setting is useful when using a Stacks page and you want a Stack to stretch to the edge of the content.
Sidebar – Enable the sidebar and select which side it displays on.
Title Font – Choose a font for the page titles. Some Options also effect the navigation menu page titles.
Content Font – Choose a default font for the content text.
Other Toggles
Enable Lightbox – Turn on the Lightbox plugin on the Album Page or for images with “lightbox” in the file name.
Disable Loading Animation – Removes the sliding animation on page load in and out.