Stack settings
Restriction Settings
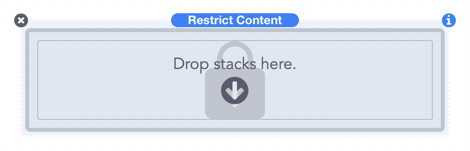
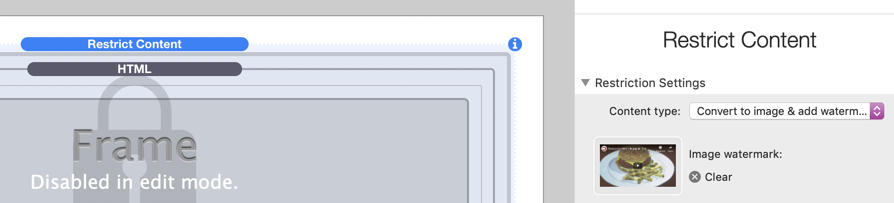
Content type – All content placed inside of the “Drop stacks here” section of the stack will be automatically converted into a single image. The content you place inside this section is not able to be interacted with and the HTML and CSS is also not inspectable by your page visitors. Use this option to add additional layers of restriction.
Add blur – Adds settings to allow you to degrade the quality or completely blur the content.
Gradient fade out – Will fade half of the content out towards the bottom.
Add watermark – Adds settings to allow you to add a custom watermark over your content.
Blur – Value in pixels that adjust how strong the blur effect is. Use small amounts 1-5px to degrade the quality of an image and large amounts to completely hide or censor your content.
Image watermark – This image will be placed over the top of your content. If a visitor downloads the image, your watermark will be on the image. Watermarks are removed if the content is unlocked.
Image size – Select how you want your watermark to cover your image.
Position – Select a position for your watermark.
Opacity – Adjust how visible your watermark is, a lower percentage is best if you do not want to obstruct the content.
Repeat – Optionally repeat the image in both the x and y directions to cover the entire content section. Note: this option only effects the image watermark.
Text watermark – Add a text watermark over your content. This field should be left blank if you are opting to use a image watermark instead. Text watermarks automatically repeat and cover the entire content section. Watermarks are removed if the content is unlocked.
Text size – Adjust the font size of the watermark text.
Text color – Change the color of the watermark text. Note: The opacity setting also effects the text watermark.
Enable call to action – Optionally add content over the top of your restricted content. When enabled, a new “Drop stacks here” section will display below the locked content section in the stacks editor. This section is able to be interacted with by page visitors. If the content is unlocked, the call to action section is removed.
Unlock Settings
Allow Access – Optionally allow page visitors to unlock the content. Once the content is unlocked it will be presented just as you have created it in the stacks editor. Visitors will have full access to the content.
With password – Set a password to allow users to unlock your content.
With confirmation button – Place a button or link on the page that will allow page visitors to unlock your content.
Password – place the password you want your visitor’s to use here. The password is case-sensitive.
Allowed attempts – The amount of password attempts a visitor has. If they input a password wrong this many times they will be locked out for a time.
Placeholder text – The text inside of the password field until it has been clicked on or selected.
Invalid text – What is shown when an incorrect password is provided.
Failed text – What is shown when someone has been locked out for too many failed attempts.
Field position – Select where you want the password field to display.
Show password field on hover – When enabled, the password field will only be visible when the content is hovered or selected.
Enable light-box on image – When the content has been unlocked, this option will add a simple light-box effect to all images inside the content.
How to create a confirmation button or link
After setting the “Allow access” settings to confirmation button, some info will display below the stack in the editor. There you will see some values you need to use as well as some instructions on how to create a link or button.
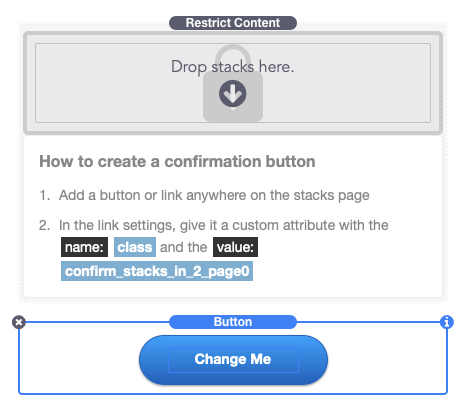
- In this example we will be using Stacks’ built-in button. You can add the button anywhere on the stacks page.
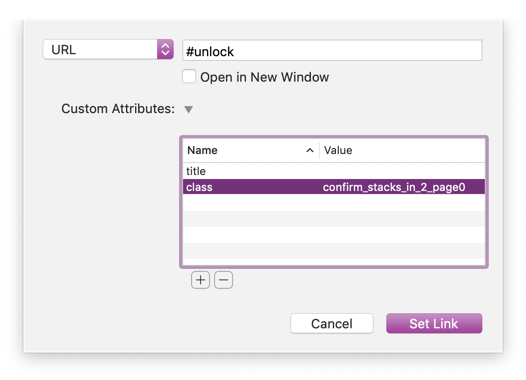
- In the button’s settings panel select the “Set link” button. In the window that opens add any value after the “#” (Example: #unlock). Note: If this anchor tag is left blank, the browser will jump back to the top of the webpage when the link is clicked.
- Click the “+” button to add a new attribute. In the “Name” column add class and in the “Value” column add the value that is provided in the instructions below the stack in the stacks editor. Do not forget to add the underscores “_” and do not add any spaces.
- Click “Set link” to finish. When this button is clicked, the content of the associated stack will automatically be converted into HTML. Visitors will have full access to the content.
How to support iframe videos/content
Iframe content cannot be converted into a canvas image so iframes will show up blank until the content is unlocked. There is a work around however, you can create a thumbnail image or screenshot of the video player to serve as a placeholder until the content is unlocked.
After you have created a thumbnail, set the “Content type” to add a watermark. Place the image in the “Image watermark” setting and then set the opacity to 100%.