Setup
Add Super Forms 2 to the editor.

Select the stack and open the Inspector settings panel. In the Configuration section you can define the Email address you want the form to submit to.

There is also a Email Subject field that lets you customize the subject of the received form message. No additional configuration is needed for the form to function.
Next click the Form Field stack inside of the Super Forms 2 stack.

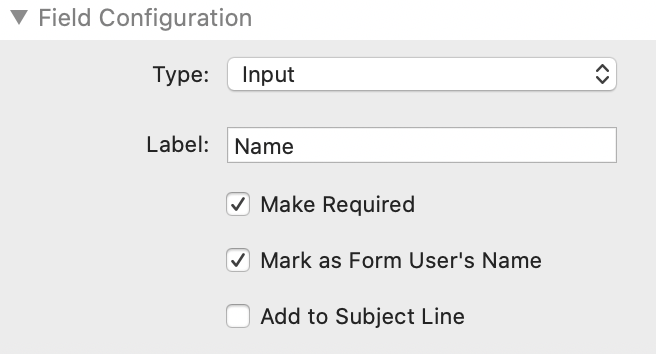
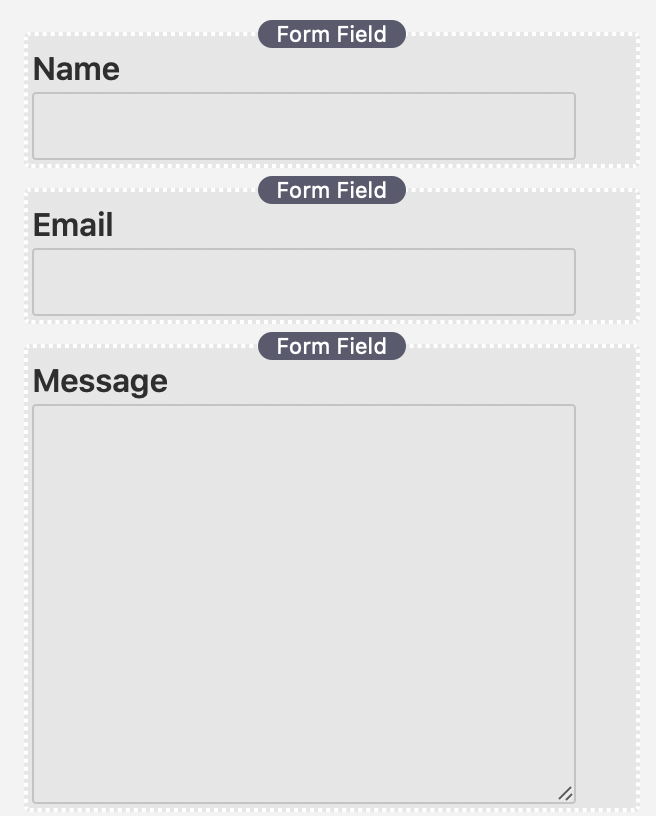
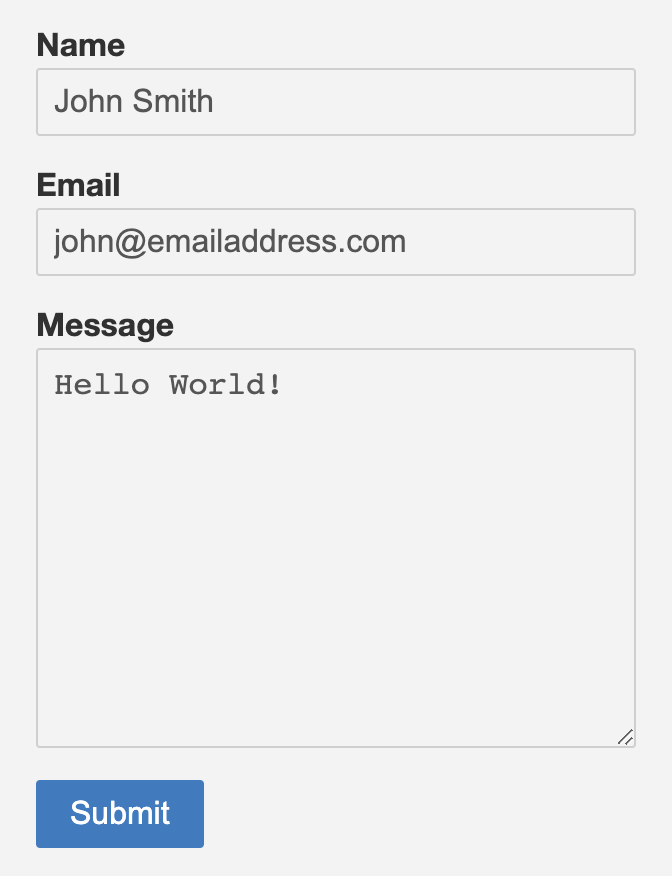
In the Field Configuration section of the settings panel you will need to define a few things to customize the field for use. In our example we will be creating a “Name” input field. The Type field defaults to “Input” which is want we will need for this field. Next we can change the Label to “Name”.
Since we will need to know the name of the form user in our example, we will enable the Make Required option. This will prevent the user from being able to submit the form without providing a name. We will also enable the Mark as Form User’s Name option to allow the field’s input to be used as the name in the received form message. No additional configuration is needed for this field.
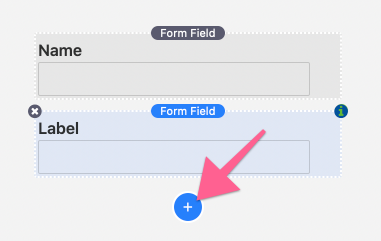
Click the blue add stack button inside of the Super Forms 2 stack. This will add another configurable form field.
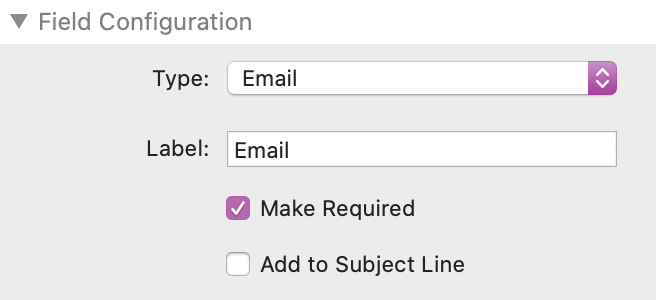
In the Field Configuration section of the new Form Field stack we will set the Type to “Email”. Next we can change the Label to “Email”. This field should also be set to required. When an “Email” field is set to required it will validate the input for proper email formatting on form submission. No additional configuration is needed for this field.
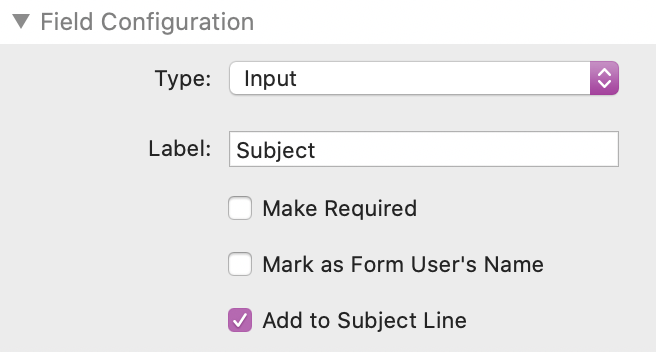
Add a new Form Field stack to be used as the email message subject. Leave the Type set to “Input” and change the Label to “Subject”. Next we will use the Add to Subject Line option to allow the field’s input to be used as the subject of the received form message. The input value will be appended to the Email Subject defined in the Super Forms 2 stack configuration.
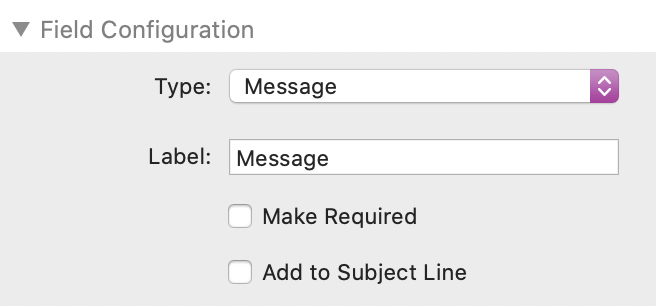
Add a new Form Field stack to be used as the email message. Set the Type to “Message” and change the Label value to “Message”.
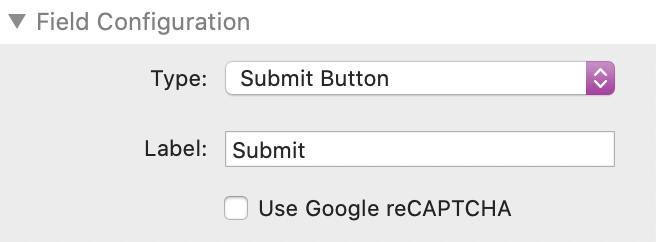
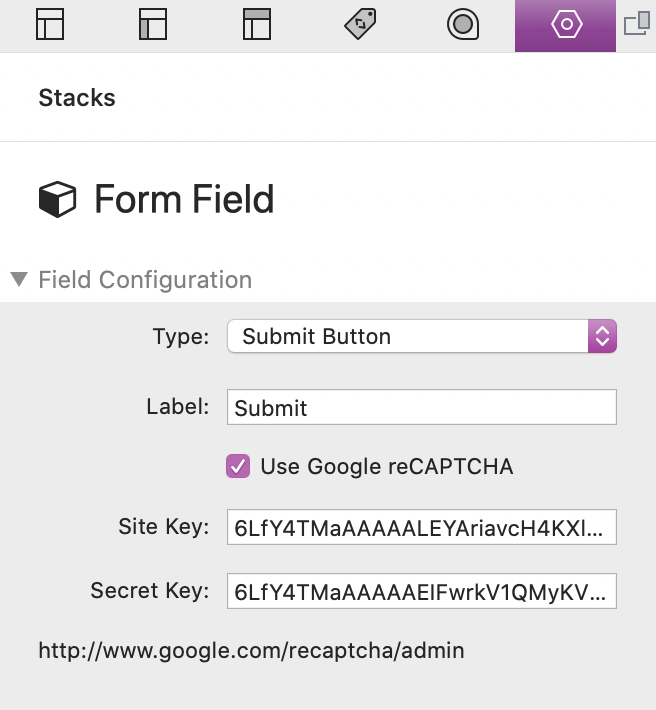
Lastly, add one more Form Field stack to the form. This field Type should be set to “Submit Button”. The label will default to “Submit” but this can be modified. A new Use Google reCAPTCHA option will display allowing you to enable a spam filter for the form. See the “Using Google reCAPTCHA“ tutorial below for more info.
The form is now completely configured for use. See the tutorials below for info on how to customize the appearance as well as how to use the advanced configuration features.
Style Customization
In the Super Forms 2 stack Inspector settings panel are two sections dedicated to styling the form, labels, and fields. The first section Colors provides basic customization. The second section Styles has more options for further customization.
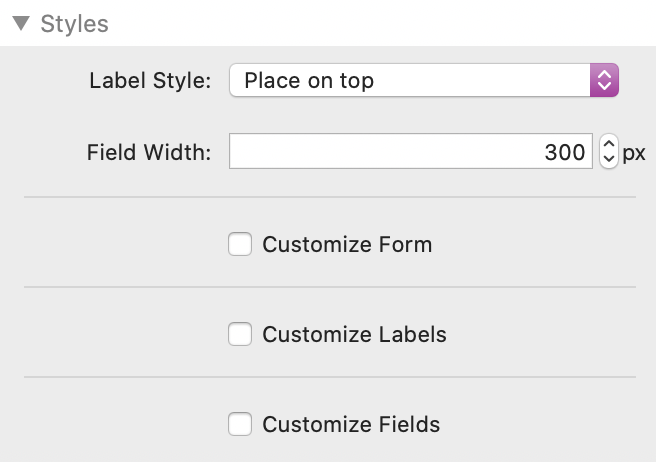
There are two main style settings. First is the Label Style which defines the position of the label and the style of the form fields.

The second main style setting is the Field Width. This defines the width of the each of the fields. If the value defined here is larger than the available horizontal space the fields will automatically adjust to fit. The remaining three options allow you to optionally fine tune the appearance of the form, labels, and fields. If you wish to define the font the form uses you will need to enable Customize Form, otherwise the form will use the default font of your theme or framework.
Form Field Settings
General
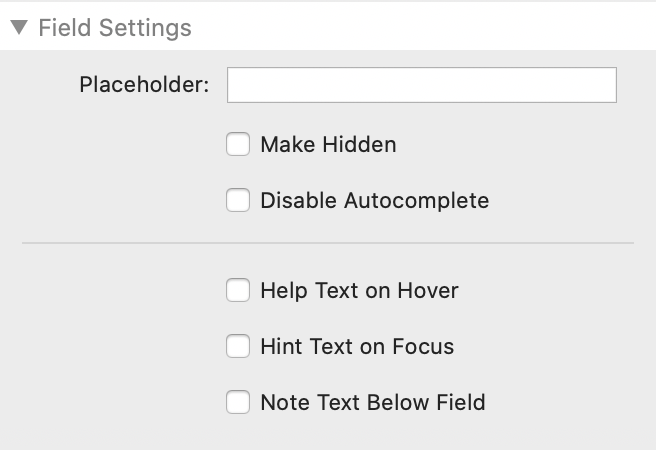
Placeholder
This text will display inside of the form field when it is empty. This placeholder text does not apply to forms with a Label Style set to “Use as placeholder” or “Use as placeholder & animate up on focus”.
Make Hidden
Enable this to hide the field from view. If the field has a default value it will still submit that value when the form is used.
Disable Autocomplete
Prevents browsers from using autocompletion features on the field.
Help Text on Hover
Adds question mark icon to the right of the field. When the icon is hovered a definable text message will appear below the field.
Hint Text on Focus
Adds a definable text message will appear above the field in a chat bubble only when the field is in focus.
Note Text Below Field
Adds a definable text message that is always visible below the field.
Type: Input
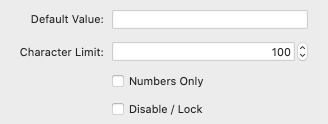
Default Value
This text will serve as the pre-filled value for the input field on page load. It can be used along with the Make Hidden option to pass hidden values along with the form on submission.
Character Limit
Sets the maximum amount of characters that can be added to the field. This is useful for fields that should only have a certain amount of letters or numbers like a zip code.
Numbers Only
Prevents the form user from placing non-numeric characters into the field. This is useful for fields that should only have numbers like a phone number.
Disable / Lock
Enable this to prevent the field from being edited. It can be used along with the Default Value option to pass uneditable values along with the form on submission.
Type: Message

Field Height
Defines the height of the message field in pixels.
Field is Resizable
Enable to allow the message field to be resized by the form user.
Type: Checkbox
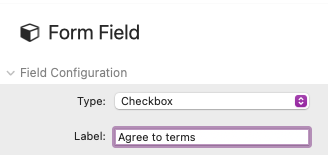
Checkbox field types do not include labels above the field. The Label value is used as the text next to the the checkbox. If you would like to add a label above the field you may use any text or heading stack.
Type: Radio
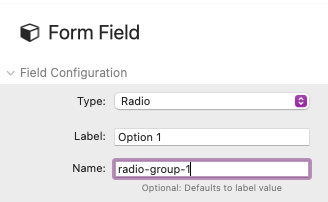
To limit radio selection to one per named group, each associated radio option should have the same Name value.
Radio field types do not include labels above the field. The Label value is used as the text next to the the radio button. If you would like to add a label above the field you may use any text or heading stack.
Type: Select
![]()
Enable Multi-select
Enable to allow form users to select multiple options from select list.
Type: Filter & Select
![]()
Allow Custom Value
Enable to allow form users to supply their own value.
Type: Date & Time
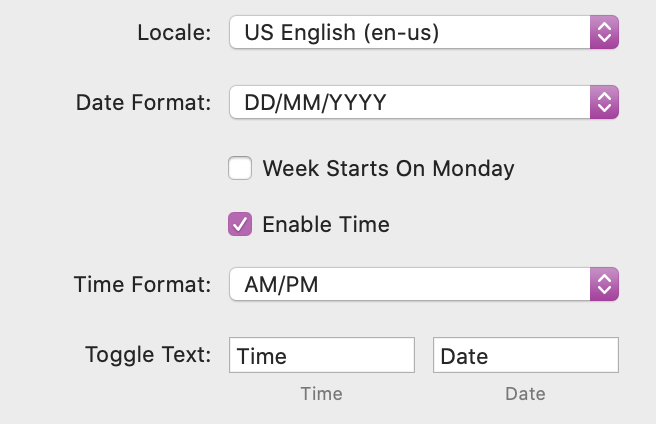
Locale
Choose from 79 options to change the language of the calendar popup.
Date Format
Define the format of the date as displayed in the field and when the form is submitted.
Week Starts On Monday
Define the start of the week format of the calendar popup.
Enable Time
Allow the form user to define a time in addition to the date selected.
Time Format
Define the time format.
Toggle Text
Customize the language of the the Time and Date toggle buttons.
Language Customization
In the Super Forms 2 stack Inspector settings panel is a Language section for customizing the form submission messages wording and language.
Advanced Configuration
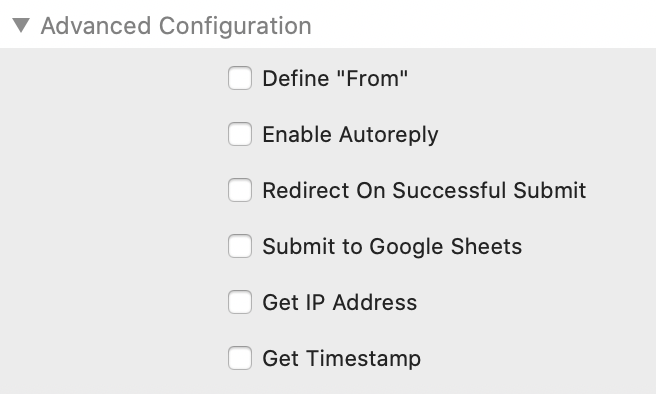
Define “From”
This optional configuration setting allows you to define an email address that is associated with your domain. This is required by some hosts to allow the message to properly send to an email address that is not associated with your domain. For example, if the form submits to yourname@gmail.com but your website is yourdomain.com, some servers will require that you enable this setting and set the Email value below it to yourname@yourdomain.com.

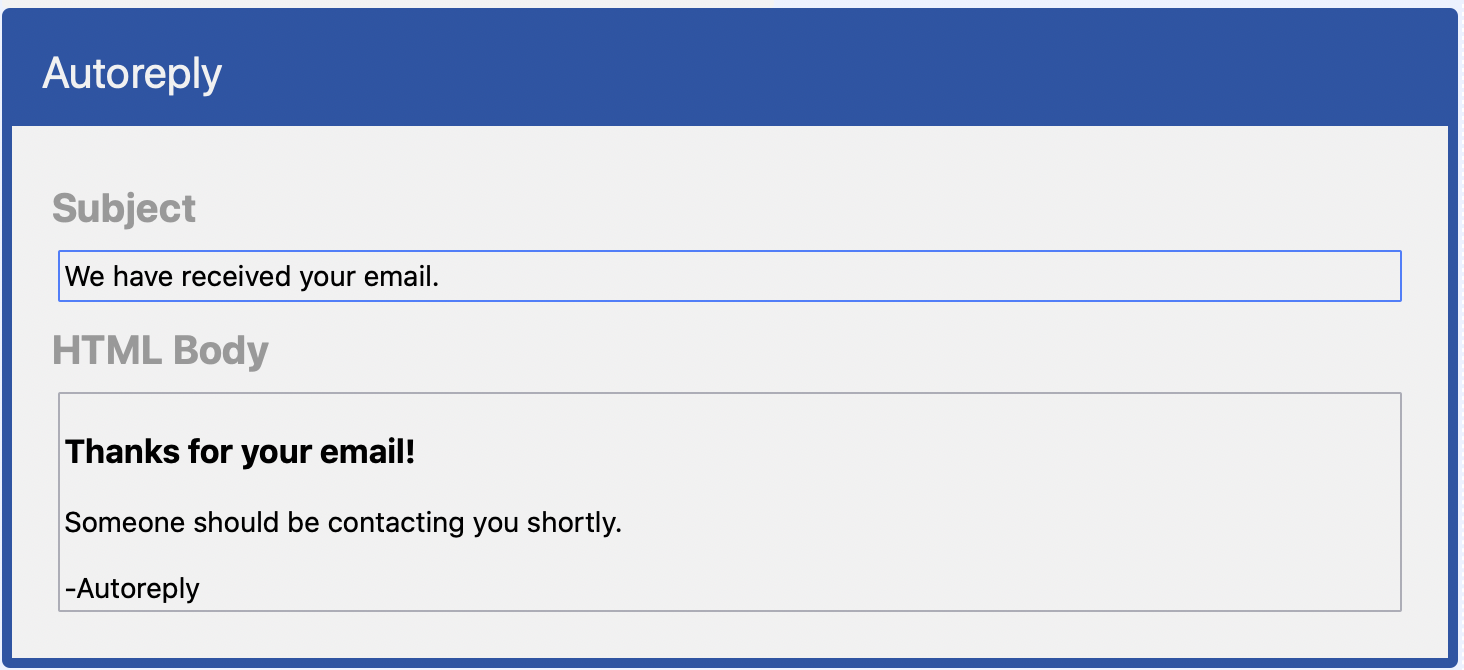
Enable Autoreply
Enable to send a custom message to user who submit the form. You can optionally add an email address to the “Reply to” field to allow users to reply to your automated message. Add a value like “noreply@yourdomain.com” if you do not want users to be able to reply to the message.
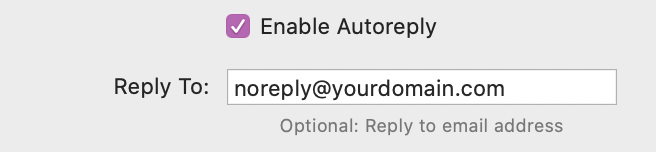
The message can be customized in the stacks editor.
Redirect On Successful Submit
Enable this to send the form user to a custom defined url or page after the form has successfully been submitted. If there is an error, the form will not redirect and will display the error message instead.
Submit to Google Sheets
[Please see Submitting Form To Google Sheets tutorial below]
Get IP Address
Enable this to automatically grab the IP Address of the form user on submission.
Get Timestamp
Enable this to automatically grab the the date and time of the form submission.
Adding a Custom Captcha
The submit button settings include the option to use a custom captcha. After enabling the option you can create your own question and define the correct response. The question will be generated as an image making it harder for bots to simply scan it and determine an answer. Leaving the the “Captcha Answer” field blank will turn “Honey Pot” mode on. This will hide the field from view and when bots auto-fill the field the form will not actually send a message.
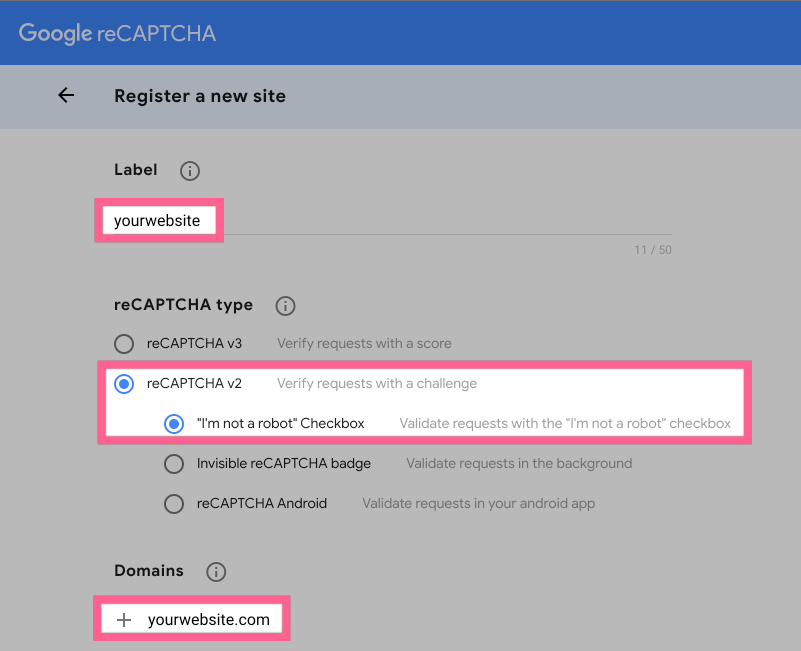
Using Google reCAPTCHA
The Google reCAPTCHA spam filter requires a Site and Secret key to function. To get your keys go to http://www.google.com/recaptcha/admin and login or create a free account. This feature uses Google reCAPTCHA v2.
After logging in, click the plus icon found in the top bar on the page.

Then add a custom label for your website. Set the reCAPTCHA type to reCAPTCHA v2 and “I’m not a robot” Checkbox. Then add your website domain name to the Domains list.
Submit the form and you will be provided with both of the keys you need.

Copy the corresponding key values into the “Submit Button” Form field configuration settings.
When the form is uploaded to the domain you added to the reCAPTCHA admin settings, it will require human verification to submit the form.
Submitting Form To Google Sheets
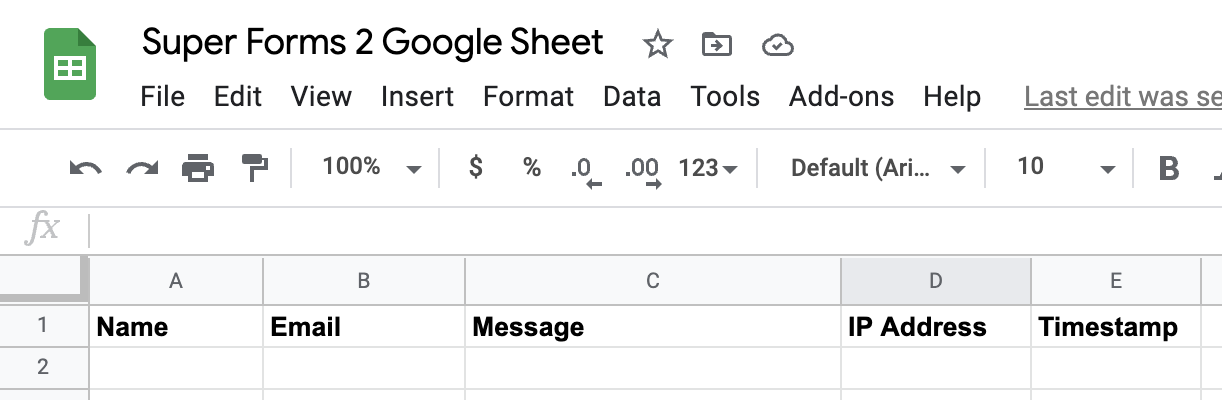
To submit your form to a Google Sheets you will first need to create a new spreadsheet. Go to https://docs.google.com/spreadsheets and login or create a free account. In a new spreadsheet you will need to add titles to row 1 of each of the letter columns equal to the corresponding Label values of your form fields.
The values are case and space sensitive so they must match exactly.
In the spreadsheet you created, go to the “Extensions” menu and select “Apps Script” from the dropdown.

This will open a new page with an editor and that has some default code inside of it. Clear or delete the code you see in the editor.
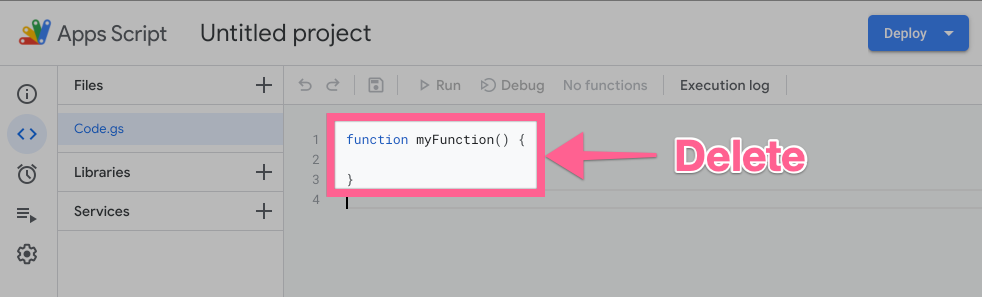
Copy and paste the code below into the editor.
// original from: http://mashe.hawksey.info/2014/07/google-sheets-as-a-database-insert-with-apps-script-using-postget-methods-with-ajax-example/
// original gist: https://gist.github.com/willpatera/ee41ae374d3c9839c2d6
function doGet(e){
  return handleResponse(e);
}
function doPost(e){
  return handleResponse(e);
}
//  Enter sheet name where data is to be written below
var SHEET_NAME = "Sheet1";

var SCRIPT_PROP = PropertiesService.getScriptProperties(); // new property service
function handleResponse(e) {

  // shortly after my original solution Google announced the LockService[1]
  // this prevents concurrent access overwritting data
  // [1] http://googleappsdeveloper.blogspot.co.uk/2011/10/concurrency-and-google-apps-script.html
  // we want a public lock, one that locks for all invocations
  var lock = LockService.getPublicLock();
  lock.waitLock(30000);  // wait 30 seconds before conceding defeat.

  try {
    // next set where we write the data - you could write to multiple/alternate destinations
    var doc = SpreadsheetApp.openById(SCRIPT_PROP.getProperty("key"));
    var sheet = doc.getSheetByName(SHEET_NAME);

    // we'll assume header is in row 1 but you can override with header_row in GET/POST data
    var headRow = e.parameter.header_row || 1;
    var headers = sheet.getRange(1, 1, 1, sheet.getLastColumn()).getValues()[0];
    var nextRow = sheet.getLastRow()+1; // get next row
    var row = [];
    // loop through the header columns
    for (i in headers){
      if (headers[i] == "Timestamp"){ // special case if you include a 'Timestamp' column
        row.push(new Date());
      } else { // else use header name to get data
        row.push(e.parameter[headers[i]]);
      }
    }
    // more efficient to set values as [][] array than individually
    sheet.getRange(nextRow, 1, 1, row.length).setValues([row]);
    // return json success results
    return ContentService
          .createTextOutput(JSON.stringify({"result":"success", "row": nextRow}))
          .setMimeType(ContentService.MimeType.JSON);
  } catch(e){
    // if error return this
    return ContentService
          .createTextOutput(JSON.stringify({"result":"error", "error": e}))
          .setMimeType(ContentService.MimeType.JSON);
  } finally { //release lock
    lock.releaseLock();
  }
}
function setup() {
    var doc = SpreadsheetApp.getActiveSpreadsheet();
    SCRIPT_PROP.setProperty("key", doc.getId());
}
If you have changed the title of the spreadsheet tab (found at the bottom of the spreadsheet)
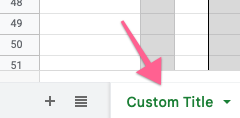
you will need to update the line:
var SHEET_NAME = “Sheet1”;
to match the name of your spreadsheet I.E.
var SHEET_NAME = “Custom Title”;
This code will allow your form to submit to the sheet you created. Next click the save icon to save your changes (you may also optionally name the project).

Next click the dropdown menu button next to the “Debug” button, then click “setup”.
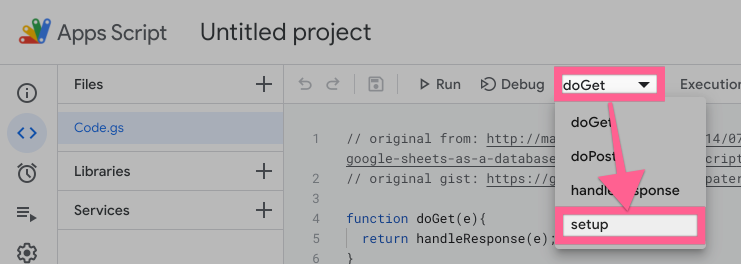
Now click the “Run” button.

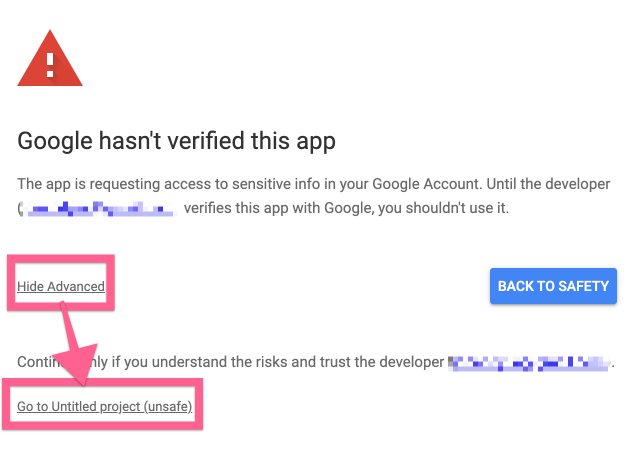
You will be asked to authorized the project to access your data. During the process you may receive a warning that Google has not verified the developer of the app you are trying to grant access to. Do not worry as the app developer in this case is you. To get past the warning message click the “Advanced” link then click “Go to your project (unsafe)”.
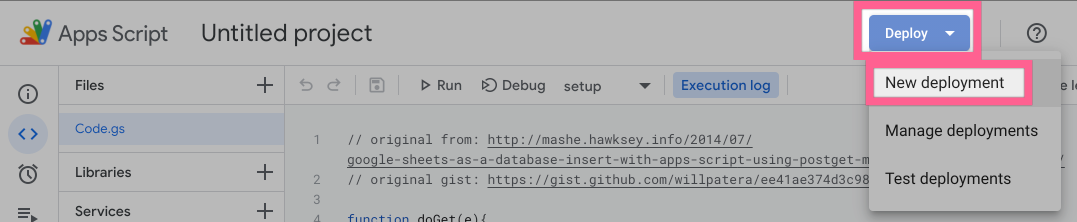
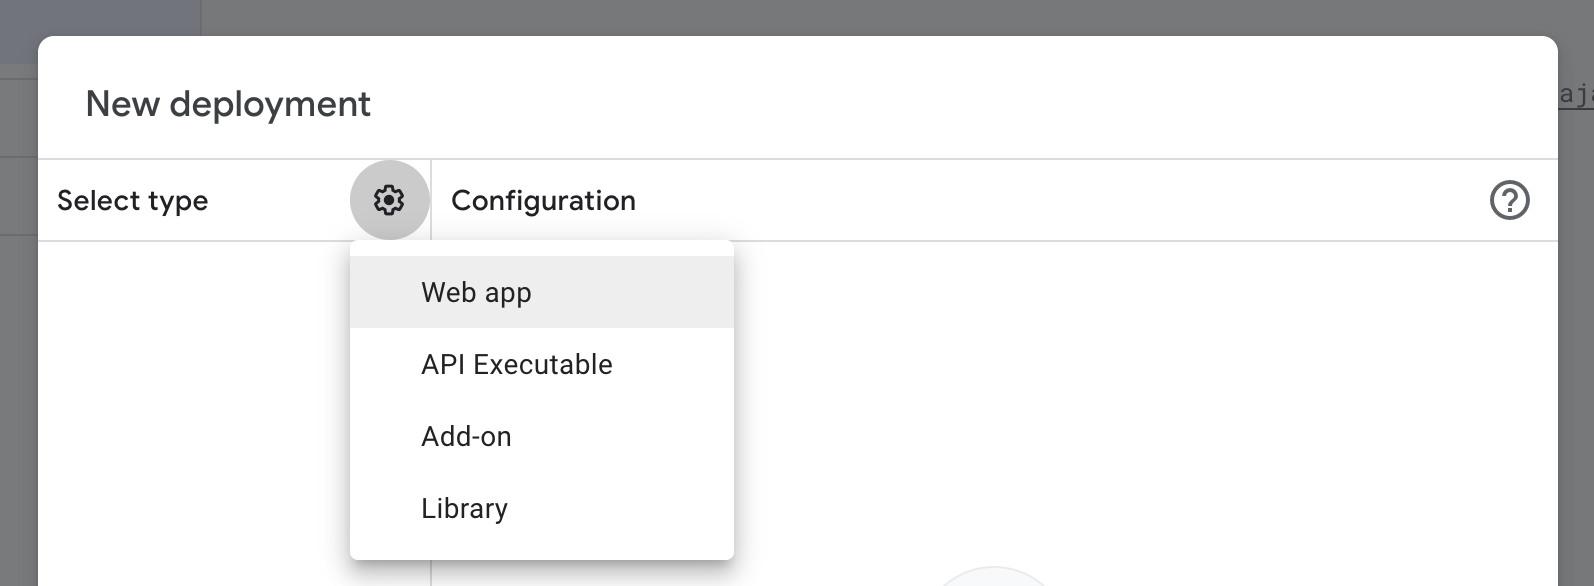
After completing the authorization process, you will just need to deploy the project. Click on the “Deploy” button and select “New Deployment.”
In the popup, click the gear icon and select “Web app”
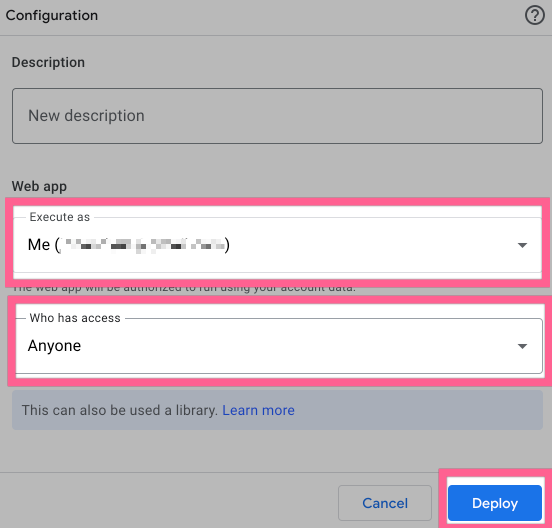
In the configuration, set “Execute as” to “Me” and “Who has access” to “Anyone”. These two fields are very important, once you have verified they are set the the correct values, click “Deploy”.
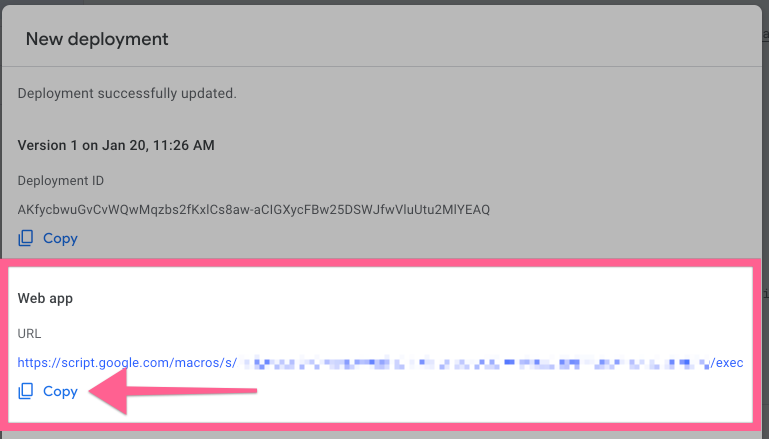
Lastly, copy the “Web app” URL value found at the bottom of the popup.
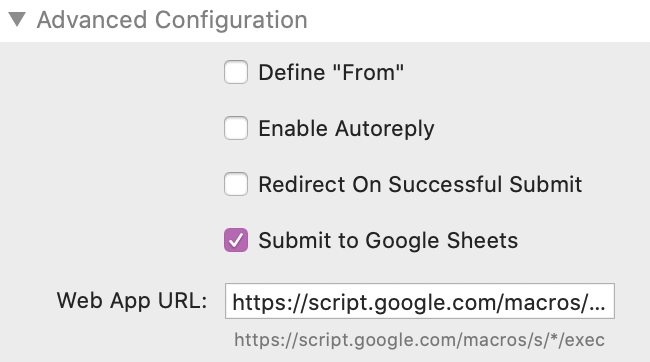
Paste this value into the Super Forms 2 Advanced Configuration Web App URL field.
Now when the form is submitted (even in preview mode) the data will be added as a new row to the spreadsheet you created.
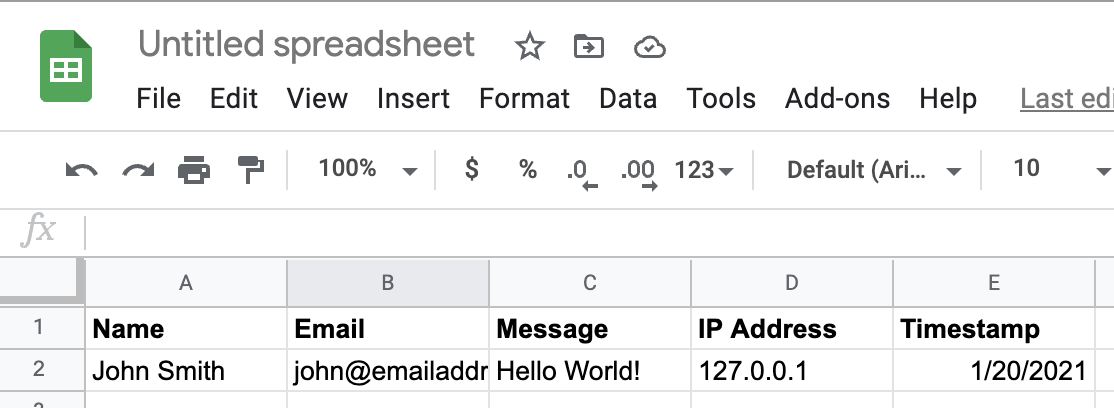
Note: If the Get IP Address and Get Timestamp advanced configuration options are enabled, you may place the titles “IP Address” and “Timestamp” in the first row of the spreadsheet to get those values.
Using Step Hybrid Mode
“Step Hybrid Mode” is a feature that replaces the form with a nested Step 2 element. Please note that you need to own a copy of Step 2 to use this mode. The setup process is largely unchanged for Super Forms 2 and Step 2 (See tutorials), but there are a few differences to be aware of.
Key Changes:
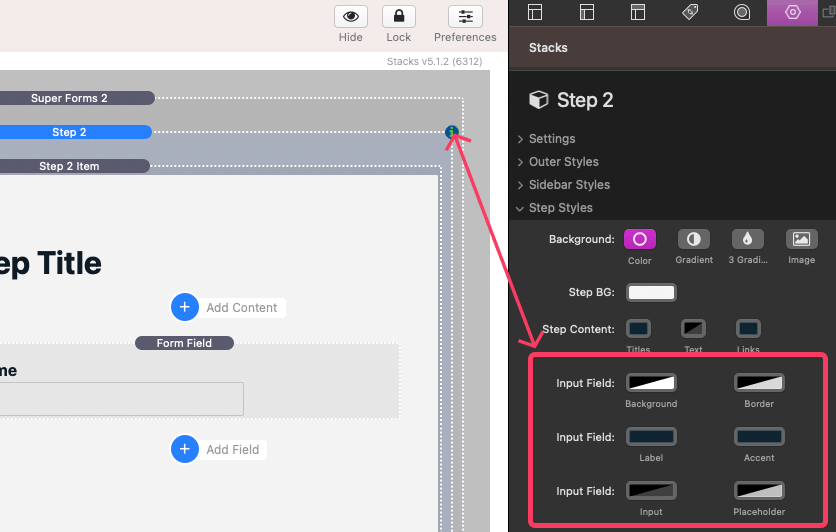
Style Customization: While you can still customize the style of form labels and input fields in the Super Forms 2 settings, the color options must be defined in the Step 2 settings.
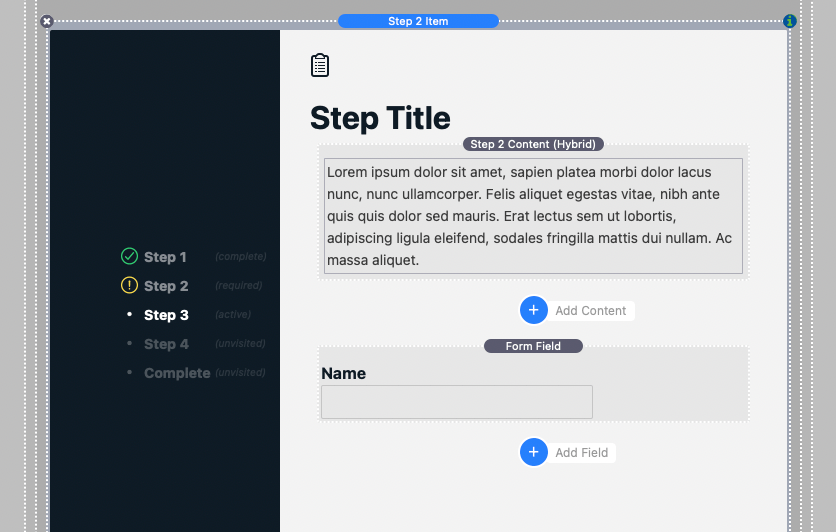
Adding Form Fields: Step 2 Item elements now include an extra “add” button. The original button still adds content, while the extra button adds Super Forms 2 form fields. Consequently, Step 2 Content elements no longer include form field type options in their settings panel.
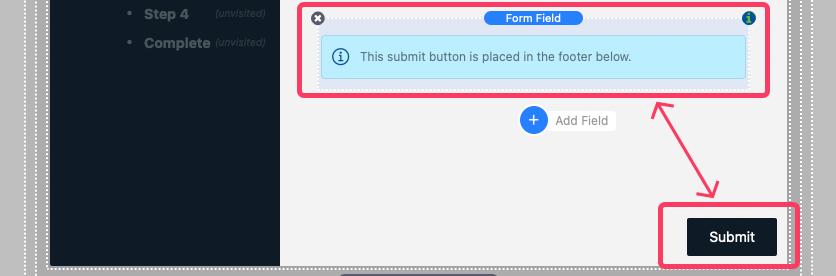
Submit Button: As Step 2 replaces the form structure, you must add a submit button field to one of the steps. This button will take the place of the “Next” or “Complete” button in the step’s footer.
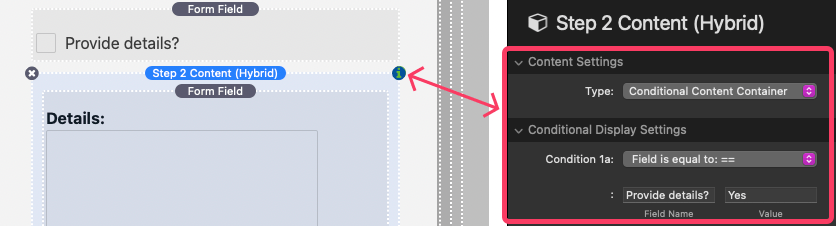
Condition Content Container: Step 2 Content elements have an additional type option in the settings called “Condition Content Container.” This empty container comes with the same conditional display settings as Step 2 Items, allowing you to control the appearance of content within a step based on form input, just like you can conditionally show or hide steps.
Troubleshooting
Message sends successfully but does not arrive:
If you are seeing a “Mail has been sent!” message and no email ever comes through, it is likely your hosting has a email “from” restriction. Some hosting providers only allow you to have form messages sent via an email address associated with your domain name. This is for security reasons. In most cases you will need to set up an email address with your hosting provider. For example if you own the domain “example-domain.com”, your email would need to be something similar to “johndoe@example-domain.com” in order for the mail to send. If you would like the form to send a message to an account not associated with the domain (IE yourname@gmail.com) place it in the Email field and then place the associated email address (IE johndoe@example-domain.com) in the Advanced Configuration: Define “From” field.
If seeing a PHP error message when submitting the form:
There may be a problem with your host’s PHP setup. It may not be configured correctly to use the PHP mail() function either for security reasons or because they support another PHP mailing system. You should contact your host to determine the best way to fix this issue.
If a captcha error appears, even though the captcha has been entered correctly, Or
If when attempting to send, nothing happens, there are no errors or confirmation:
The likelihood is that your host does not have PHP sessions enabled. Sessions are simply a way of carrying information between webpages. RapidWeaver uses them for the confirmation messages as well as spam protection. Contact your host explaining that the PHP session on your contact form is not working as it should. They will understand what this means and provide a solution.
If email appears to send correctly:
The Contact Form script is working just fine and it is an issue either with the server not sending the email or a spam filter catching it. Please check your hosting company’s spam filtering policy. Note: be sure to double check the spelling of the email address you entered into email setting.
If you’re still having issues getting the Contact Form to work:
Contact your host for advice. Ensure they are able to send an email from the server using PHP mail(). (Check below to see a sample message to send to your host.)
Sample message to send to your host:
Hello,
I am currently having trouble sending emails via a contact form on my webhost. a) It would appear that everything is working just fine and the mail is sent yet I do not receive an email. OR b) It would appear that the server is unable to send an email from my server using the PHP mail() function. Would you be able to tell me whether I must do anything specific in order to send an email using your servers. The PHP code relies on sendmail and the standard PHP mail() function and PHP sessions to send the emails.
Regards
Jon Doe