Setup
Note: This tutorial assumes that you a familiar with HTML, CSS, and how to use RapidWeaver Stacks.
1 – To get started, you will need to set the RapidWeaver project’s theme to “HTML Body Blank”. This theme was specifically made for use with the HTML Body Stack and will give you access to the <head> and <body> elements. This theme also serves as a truly blank canvas to start your projects. If you want to use the HTML Body Stack inside of a different theme you can skip this step, however you will not have access to the <head> and <body> elements if you do so.
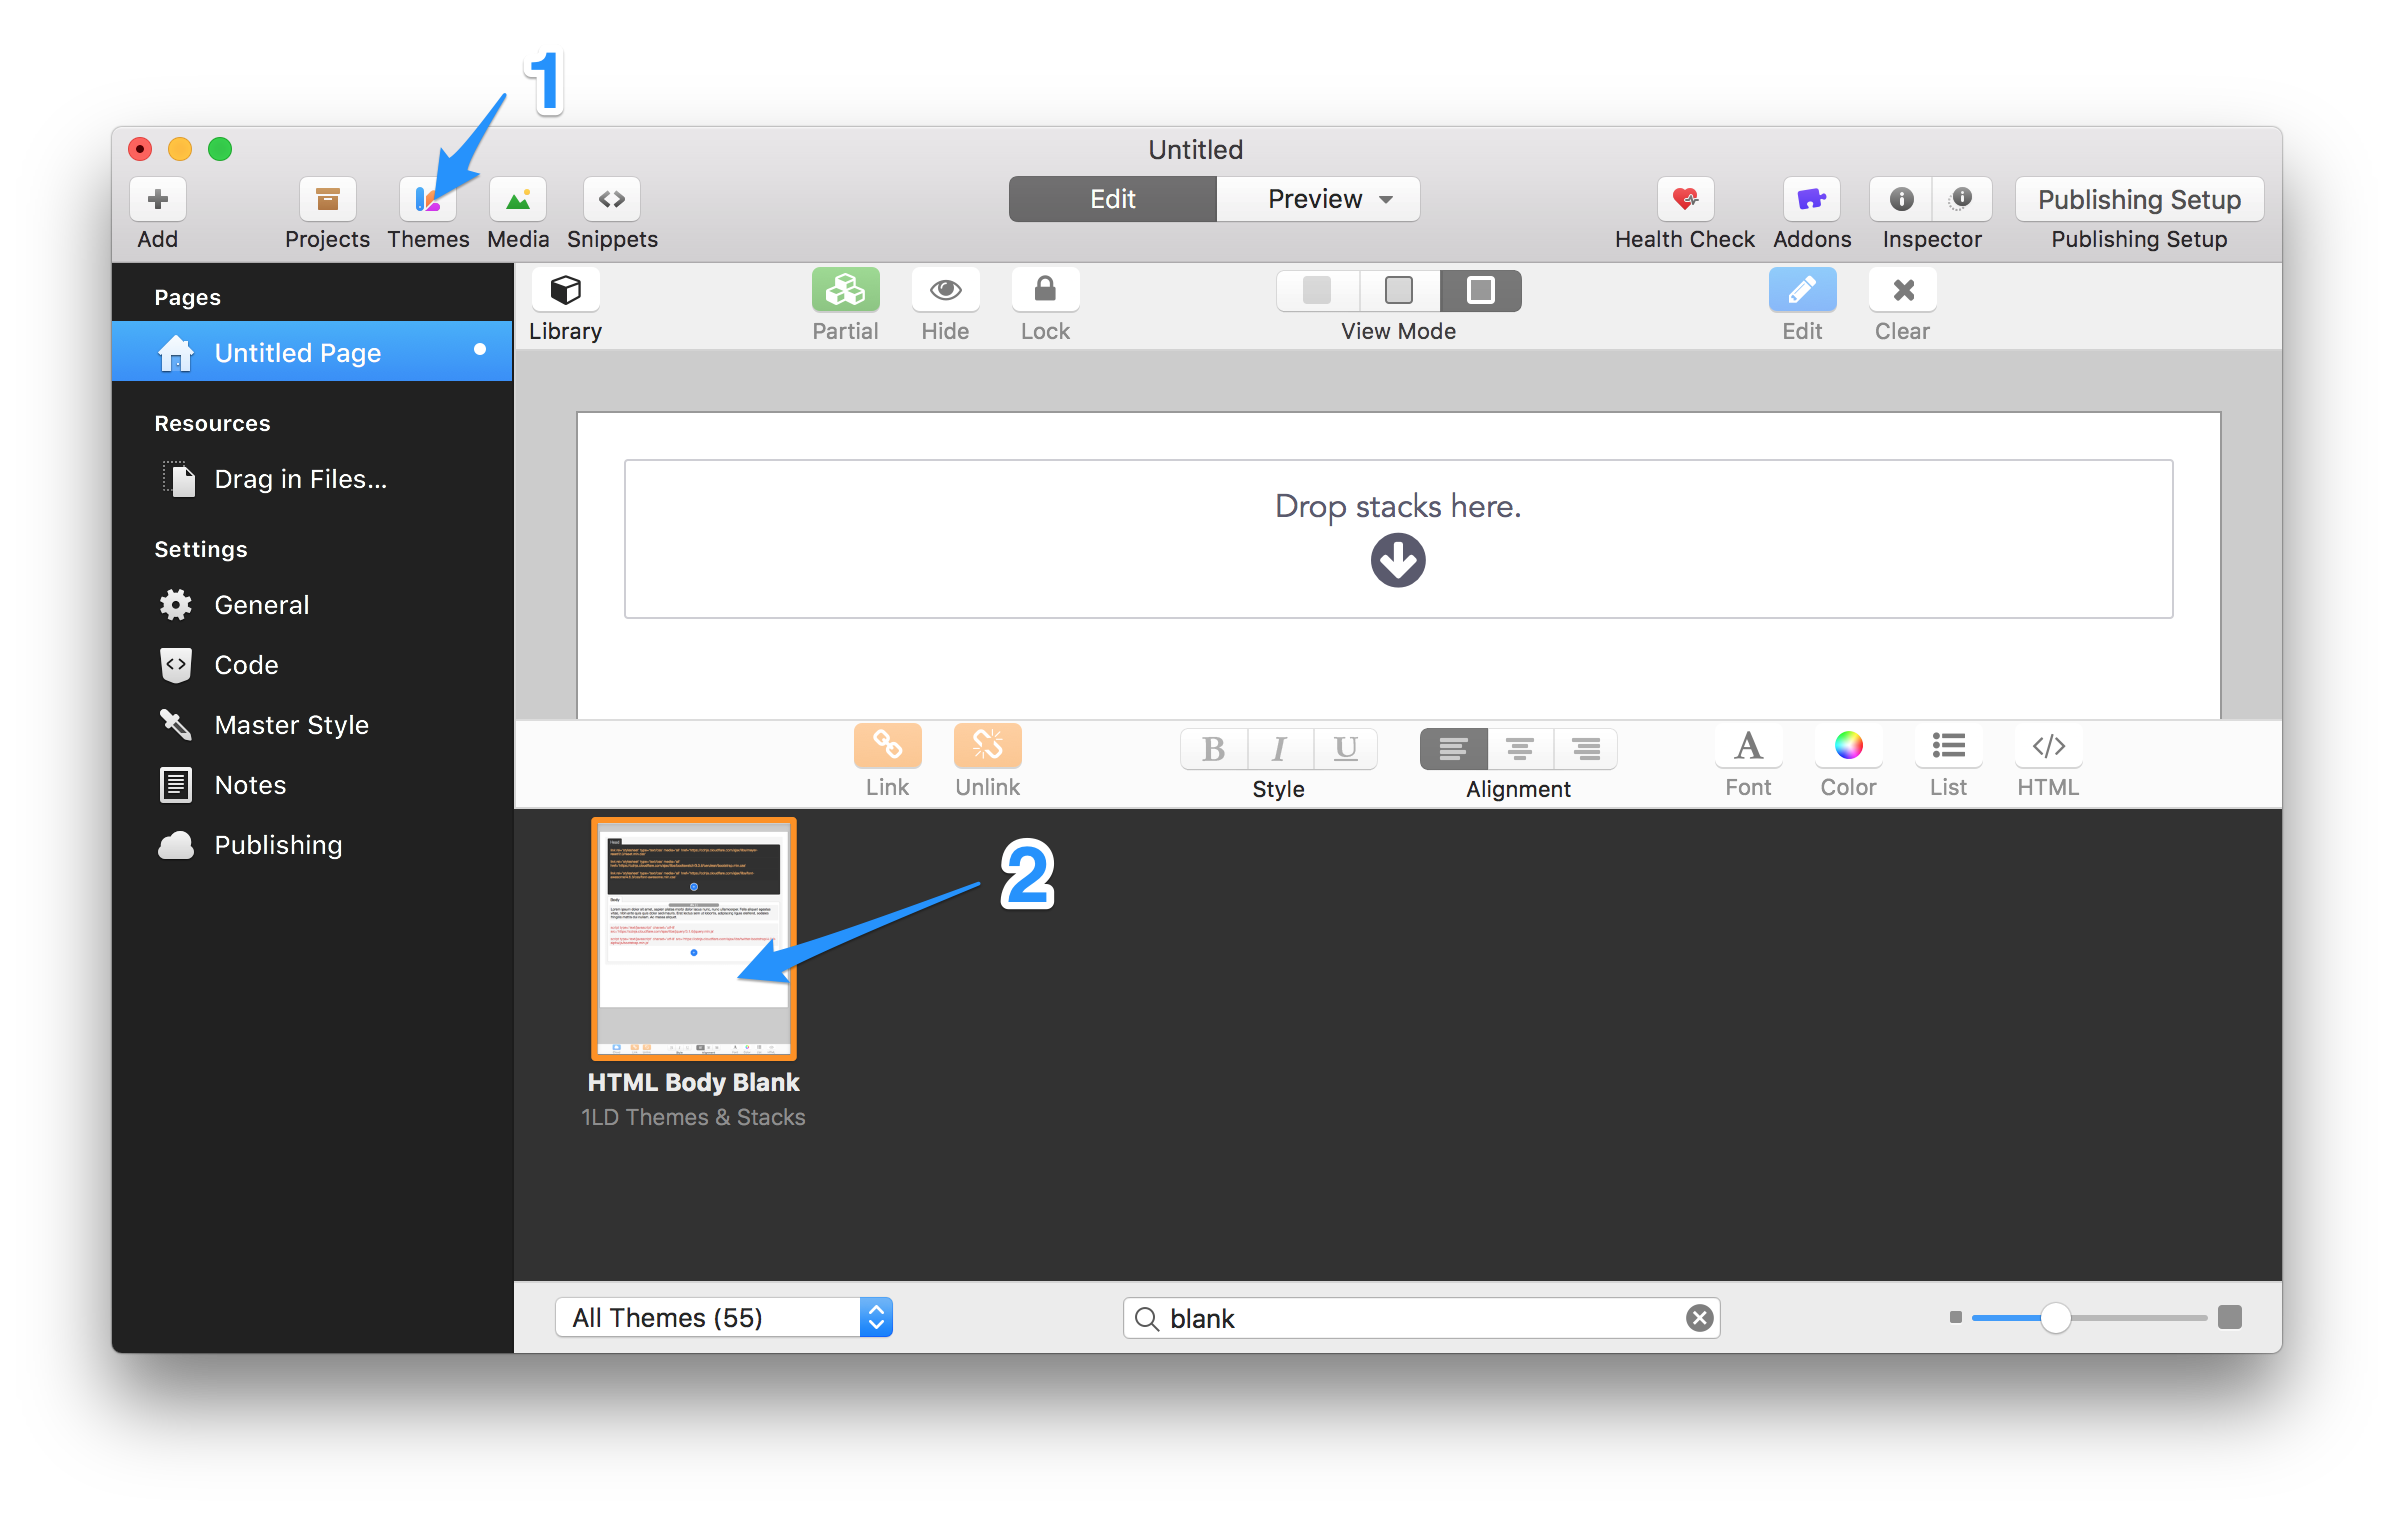
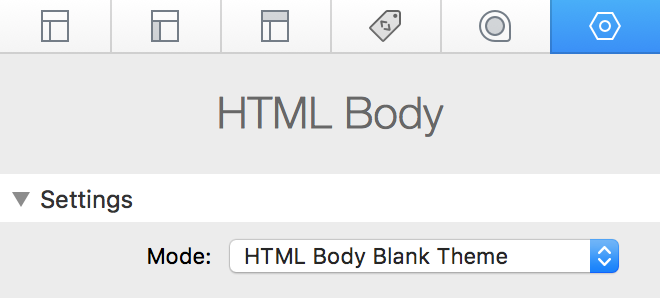
2 – Drag and drop the HTML Body Stack into the editor. The “Mode” option found in the settings panel is set to “HTML Body Blank Theme” by default. If you are using the Stack inside of another theme change this value to “Other 3rd Party Theme”.
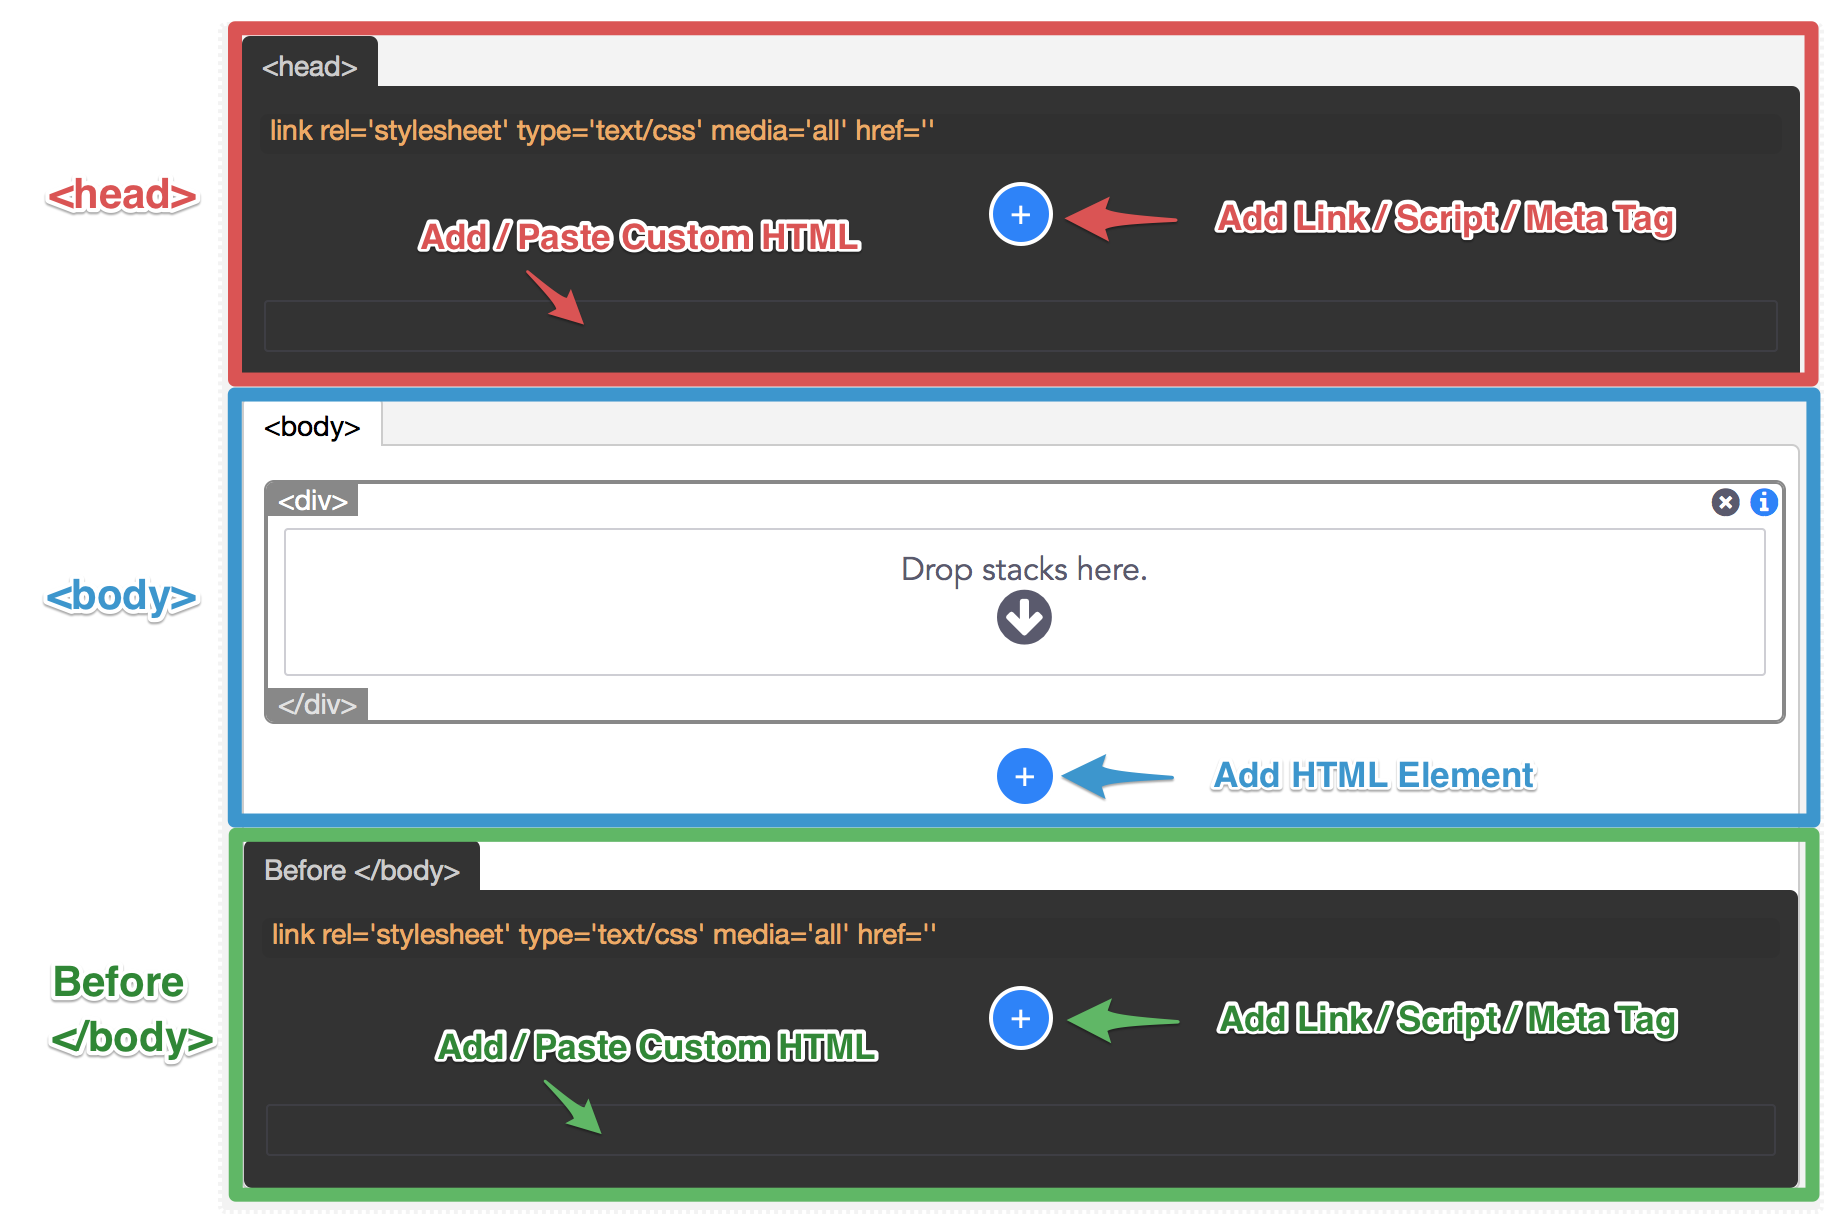
This Stack is separated into 3 main sections: “<head>”, “<body>”, and “before </body>”. Each section has a blue button to add their respective elements.
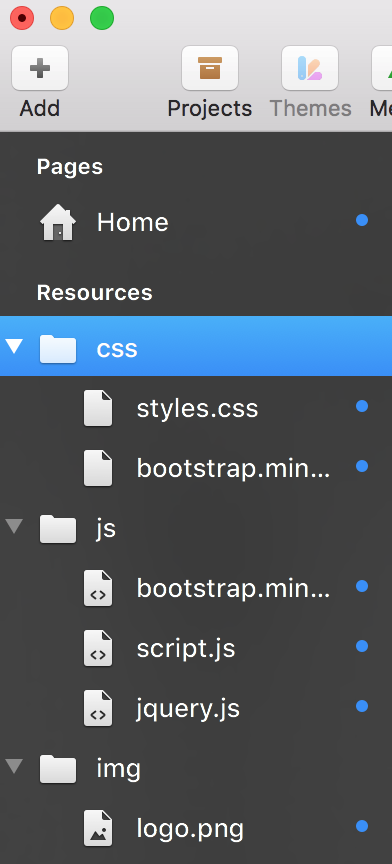
3 – Add all of your project files (css, js, images) to your Resources section found in the Source List to the left of the RapidWeaver window.
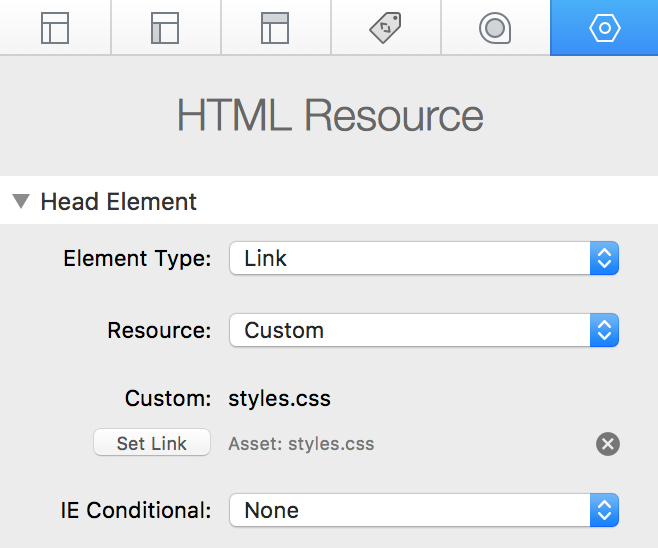
4 – Now we can use the “<head>” and “before </body>” sections to create links to those files. Click the blue button in either section to begin adding a link. Select the element that pops up and in the settings panel, set the “Element Type” to either “Link” or “Script”.
Note: This Stack includes a few CDN (content delivery network) hosted libraries that you can add quickly by changing the “Resource” value. You can also add IE conditional comments around the specific links if you need to target specific old versions of Internet Explorer with the “IE Conditional” option.
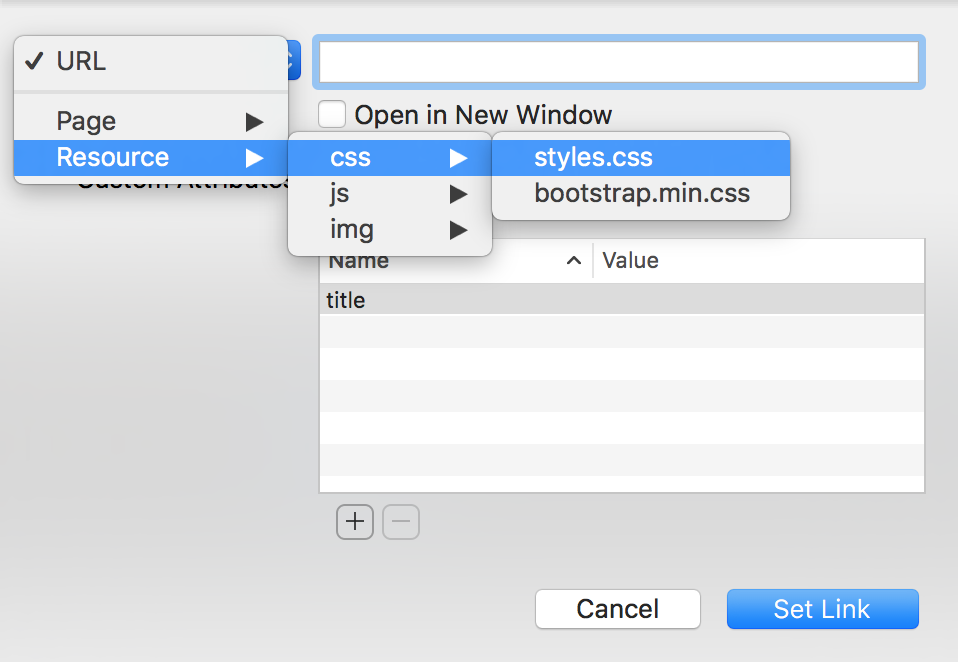
5 – Leave the “Resource” option set to “Custom” and click on the “Set Link” Button. In the link dialog window that opens up locate the file you wish to link to and click “Set Link”.
6 – Repeat Step 5 until you have linked all of your necessary files.
Note: The “<head>” and “Before </body>” sections have editable areas below the blue buttons. You can use these areas to type or paste any HTML, CSS, or Javascript you need added to your project.
7 – To begin creating a project, just click the blue button in the “<body>” section of the Stack. This will automatically add a new HTML Element Stack. You can also manually add HTML Element Stacks by dragging them in from the Stacks’ Library.
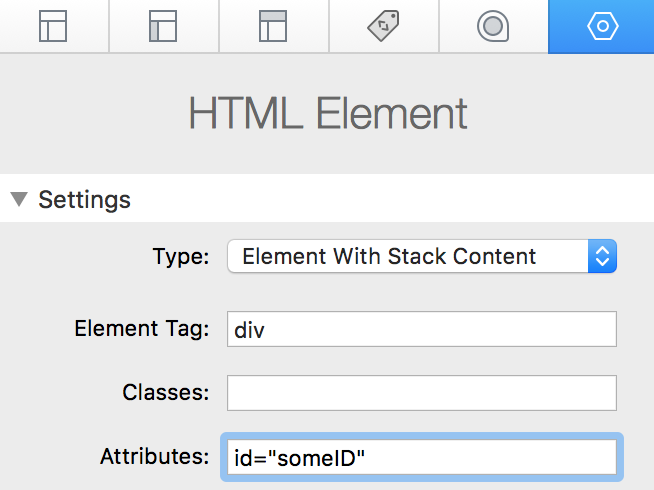
8 – Each HTML Element Stack has it’s own settings panel where you can change the Element Tag, add classes, or add custom Attributes (IE you can add an ID by typing in id=“someID” into the “Attributes” field).
9 – By default, the “Type” of each HTML Element Stack is set to “Element With Stack Content”. This allows you to nest other HTML Element Stacks or other 3rd party Stacks inside. If you need to type in text or HTML directly into the element change it to “Element With HTML Content”. You can also remove the element all together and just add text or HTML by selecting the last option “Non-wrapped HTML”.
This concludes all you need to know to get started on your project. For a further breakdown on what each of the settings do see the “Settings Panel” section below.
Settings Panel
HTML Body
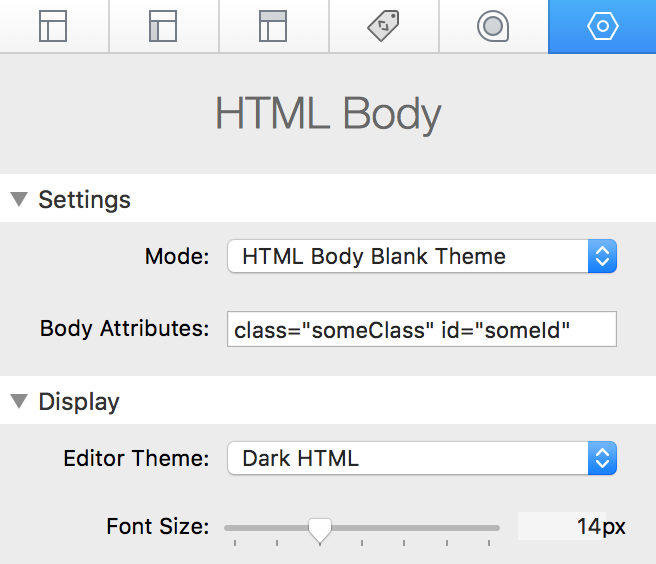
Mode – “HTML Body Blank Theme” must be used when the RapidWeaver project’s theme is set to “HTML Body Blank”. This will give you full access to the “<head>” and “<body>” elements. If you are using the Stack simply as an HTML section inside of another theme set the value to “Other 3rd Party Theme”.
Body Attributes – You can optionally add custom attributes to the <body> tag. Declare the attribute name followed by and equals sign (=) and the attribute value surrounded by single or double quotation marks (“ or ‘).
Editor Theme – By default, the HTML Body Stack shows in the Stacks editor as 3 labeled and separate tab sections. You can change this value to either “Dark HTML” or “Light HTML” to make the editor have more of an HTML text editor style of appearance.
Font Size – Adjust this value to increase or decrease the size of the HTML tag labels in edit mode.
HTML Resource
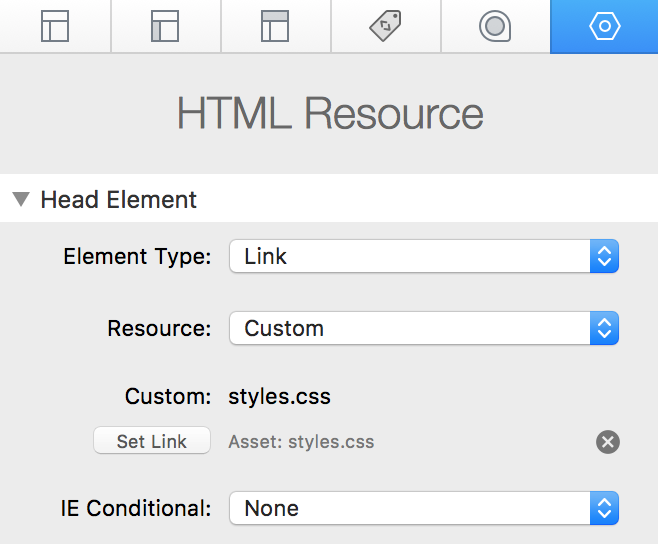
Element Type – Choose “Link” if you would like to create Stylesheet links and “Script” if you wish to link to javascript files. There is also and option for creating custom Meta tags.
Resource – Leave this option on “Custom” if you need to link to a resource found in your RapidWeaver Resources section. You can also choose from any of the included CDN (content delivery network) hosted libraries instead.
Custom – This is were you can add the link to the resource. Note: this option is ignored if you have chosen a CDN library in the “Resource” option.
IE Conditional – Though older versions of Internet Explorer are being fazed out, you can use this option to add a conditional comment that will allow the linked resource to only load in specific older versions of Internet Explorer.
HTML Element
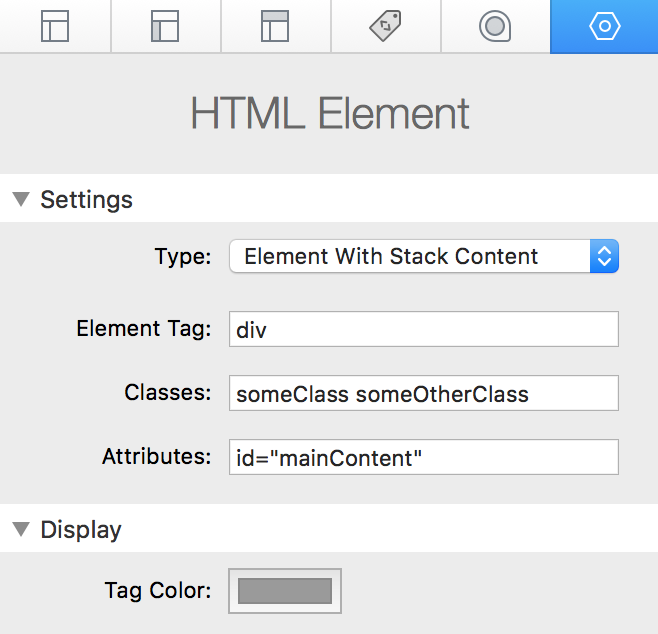
Type – By default, the “Type” of each HTML Element Stack is set to “Element With Stack Content”. This allows you to nest other HTML Element Stacks or other 3rd party Stacks inside. If you need to type in text or HTML directly into the element change it to “Element With HTML Content”. You can also remove the element all together and just add text or HTML by selecting the last option “Non-wrapped HTML”.
Element Tag – Accepts any HTML tag value.
Classes – You can add multiple classes each should be separated by a space. These classes will also show up in the editor to help you locate and identify sections of your code. When the element is selected, the classes will also show near the </> close tag.
Href – Only visible when the “Element Tag” is set to “a”. Allows you to create a link using the RapidWeaver link dialog window.
Src – Only visible when the “Element Tag” is set to “img”. Allows you to select an image using the RapidWeaver link dialog window.
Alt – Only visible when the “Element Tag” is set to “img”. Allows you to quickly edit the alt value for an image.
Attributes – Add custom attributes to the element. Declare the attribute name followed by and equals sign (=) and the attribute value surrounded by single or double quotation marks (“ or ‘).