Adding Images & Video to the Camera Slider
Step 1: Add the image that you want in the Resources folder in RapidWeaver.
Step 2: Open up your snippets menu and click and drag “Canari – Banner or California – Banner” into the Pageinspector under header.

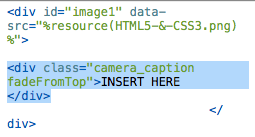
Step3: Once dragged it should look like this

Make sure that it says “image1″.
Step4: Replace “banner1.jpg“ with the name of the file that you want to use.
To remove the caption just delete the div “fadeFromTop”.
Inserting a Video
be sure to have a screen shot of the video to place as the banner image.
Extra Content
Step 1. Paste the Included Extra Content Snippet (or copy and paste the code from below) into the main content or the sidebar content.
Step 2. Replace the “CONTENT HERE” text with the desired content for each Extra Content area.3. Highlight
for each Extra Content are you are using and select “Ignore Formatting” from the “Format” Drop down menu. (Or use keyboard shortcut Cmd .[period] )4. When you are done your editor content should look like the screenshot below.

Note: Every consecutive Extra Content area needs to be pasted leading up to the last number you are using into the editor in order for them to work properly. Example: To use Extra Content#6, you must include the code for Extra Content#1-#5. Make sure to delete any open space between
for every area you do not wish to use or else there will be blank space in those areas. Also the same goes for the Extra Content Stack. Insert all Extra Content areas that lead up to the one you want to use. Make sure to label them in the stacks editor as #1-#7.
Social Media Icons
![]()
Step 1. Paste any of the included Social Media Snippets (or copy and paste code from below) into the main content or the sidebar content.
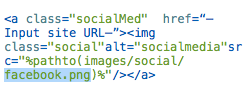
Step 2. Replace “WEB-ADDRESS-HERE” text with address you want the icon to link to.
Example:

Step 3. After you have pasted and updated the addresses to each icon highlight all of the code & select “Ignore Formatting” from the “Format” Drop down menu. (Or use keyboard shortcut Cmd .[period] )
The Icons will automatically appear in their place below the Main navigation menu.
Setting Up Masonry Gallery

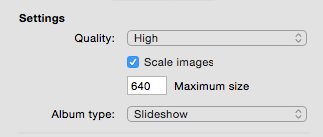
By default the Masonry Gallery is on. If you need to turn it on, click the “Page Info” button to bring up the Page Inspector. Click on the “Styles” tab & under “Masonry” select the on option that matches the width of your site (Site width option located at the top of the Styles list).
The only thing you need to do is to turn the thumbnail size to large. To do this open the Page Inspector & click on the “Page” tab. Now click on the “General” button & move the “Thumbnail Size” slider all the way to the right. Refresh your page & the photos will no longer appear blurry.
Single Image Banner
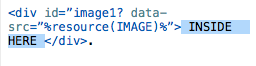
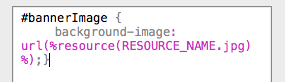
Step 1. To set up the Single Banner Option in Canari takes having the Single Banner Images Snippet.Step one the snippet into the Css within Page Inspector.
![]()
Step 2. Replace “RESOURCE_NAME.jpg” with the name of the file that you want to showcase and that should be it.
Banner Transitions
Step 1. Start by installing the Canari – Banner Transition snippet.
![]()
Step 2. Drag the snippet into the JavaScript section of the Page Inspector.
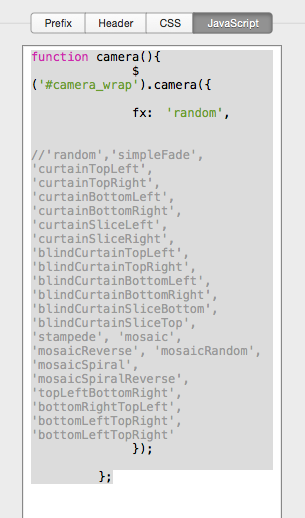
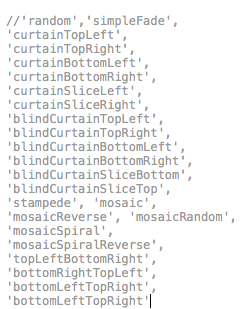
Step 3. Pick anyone of the types of captions and place it into the quotes in fx. By default the snippet is set for random.

Changelog
v2.0.0
Foundation 5 is used to add new functionality to the site 5 more extra content sections are added New full width slider as an option New menu that supports endless tiers (no limit on the amount of subcategories) New mobile menu Content displays on mobile devices in an improved look New page loading animation (can be turned off) JavaScript cleaned up for faster load times (jQuery & jQuery UI APIs are being called) New Fonts Added (Aileron, Aleo, Medio, & Penna) All lines converted into purely CSS – colors can be changed More footer color control options added
v1.5.3 (December 18, 2012)
- Banner Transition Snippet
- Banner Caption Text Color Options
- Banner Caption Text Size Options
- Banner Caption Background Options
v1.5.0 (August 18, 2012)
- Video option for slider
- Mobile re-design (fits theme even more nicely)
- Font size enlarged for mobile devices
- Nav-menu fix (display issues corrected)
v1.1.0 (August 18, 2012)
- 100% Responsive
- Slider supports tons more images and has a single or none option (customizable on every page)
v1.0.4 (June 6, 2012)
- New style option to change the color of the body
- New style option to turn the Mobile version of the site off and on
- New style option to turn Masonry Gallery off and on
- New style option to change the lines from black to white for darker themed sites
- New style option to change the caption background color to black
Bug Fixes:
- Now compatible with the “Consolidate CSS” option in the preferences menu
- Fixed the link hover effects in the blog page
- Other minor bug fixes