Setup
Setup for Movable Windows can be done in three steps:
1. Add Movable Windows:
Open your editor and add Movable Windows. The window’s appearance when expanded is always visible in the editor.
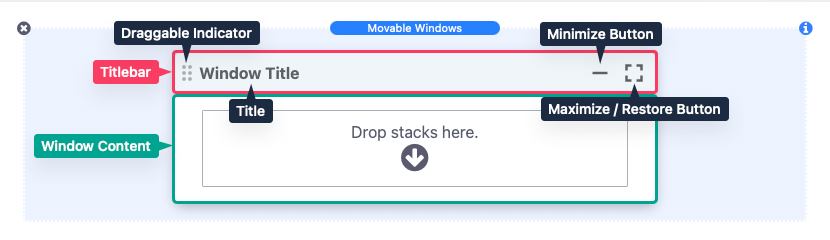
2. Add Content:
Fill your window with the content you desire. Use the Window Content section in the editor for this step.
3. Adjust Settings:
Click on Movable Windows in the editor and open the settings panel. It has three sections, and we’ll start with the “Window Settings.”
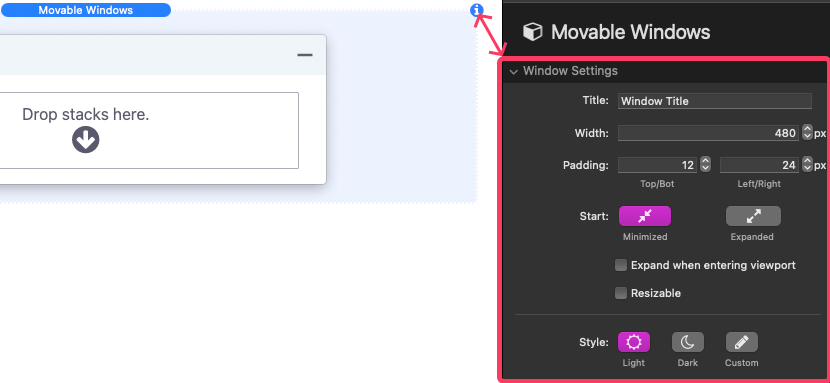
- Title: Define the text in the Titlebar, visible when expanded or minimized.
- Width: Set the expanded window width; height adjusts automatically.
- Padding: Control space around the window content.
- Start: Choose between “Minimized” or “Expanded” on the first page load.
- Expand when entering viewport: Available if “Start” is set to “Minimized.” Auto-opens the minimized window when it is scrolled into view.
- Resizable: Allow resizing with defined minimum and maximum dimensions.
- Maintain aspect ratio: Only available if resizable. Scales height and width proportionally.
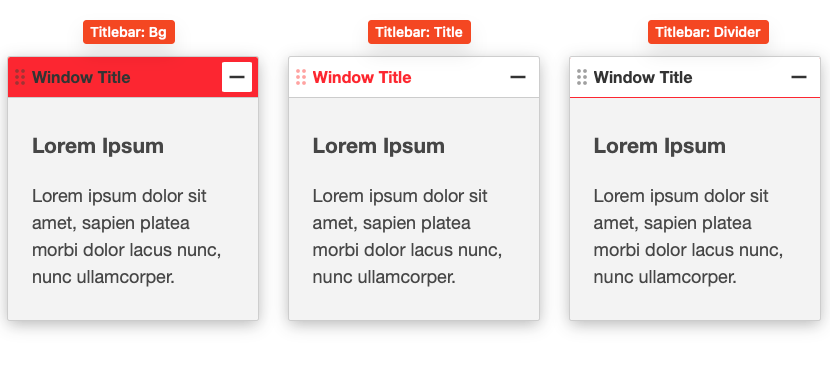
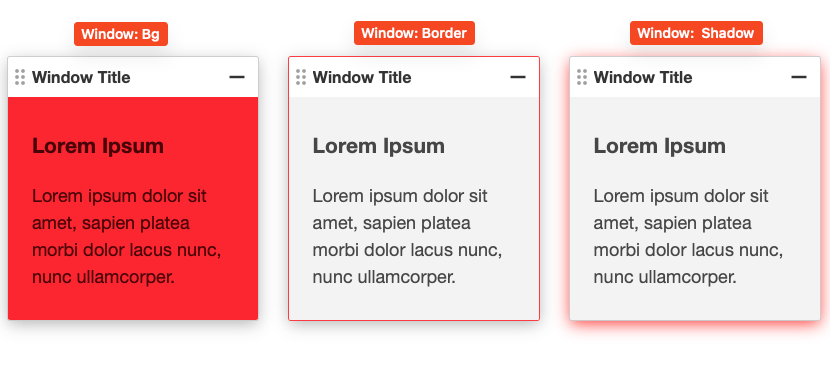
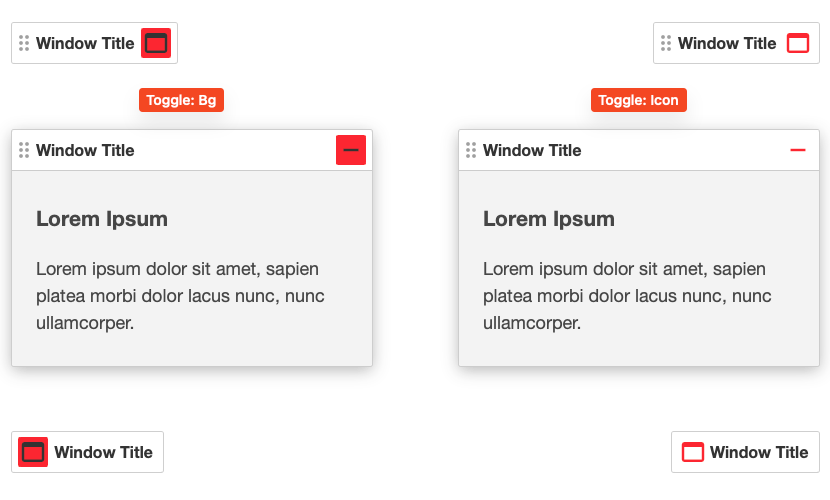
- Style: Choose from “Light,” “Dark,” or “Custom” to change the appearance of the window. “Custom” allows you to set your own color for each of the window elements as well as adjust the corner rounding. Refer to the following graphics to see what each of the available color options apply to.
Now, let’s look at the “Minimized Settings” section:
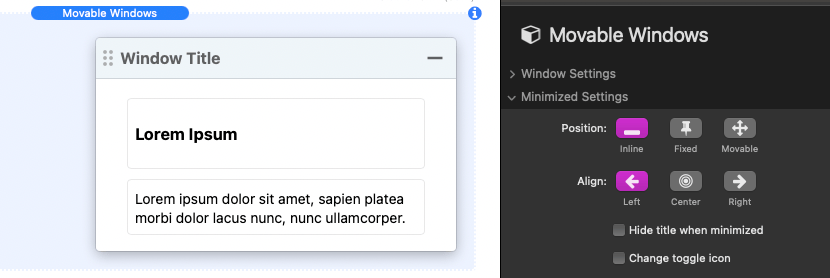
- Position: There are three options to choose from.
- Inline – The minimized window will display in the exact location inside your page content that it is placed. If this option is selected a setting is provided to allow you to adjust the horizontal alignment.
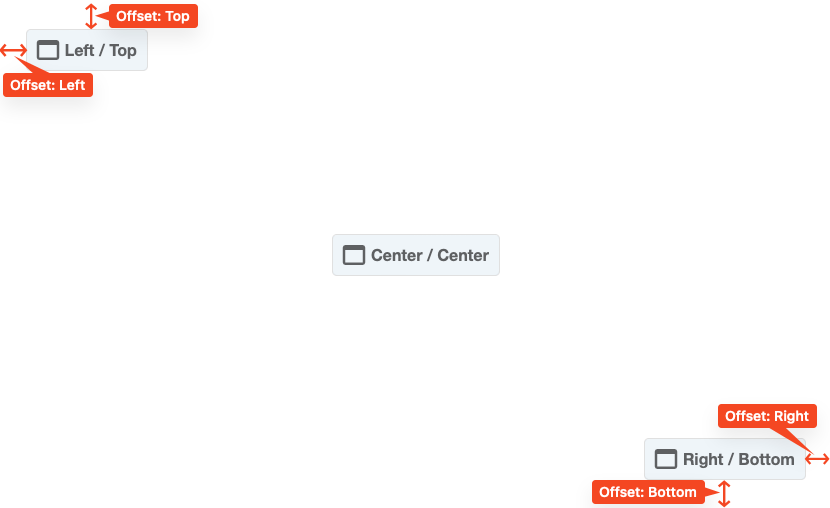
- Fixed – The minimized window will display at a defined location fixed to the browser viewport. The minimized window will always be visible as the page is scrolled. If this option is selected position and offset settings are provided for you to define the location where the window will display when minimized. You can refer to the following image to see an example of what the different provided settings do.
- Movable – The minimized window will display at the location the open window was minimized. The minimized window will always be visible as the page is scrolled and page visitors can drag the window to any location in the browser viewport.
- Hide title when minimized: Remove title from the titlebar when minimized.
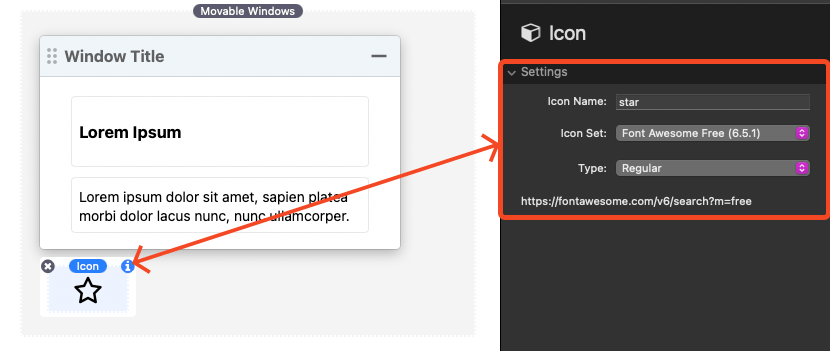
- Change toggle icon: Enable to optionally change the minimized window icon. When enabled, an icon element will appear in the editor. Opening the settings panel of that element will allow you to choose an icon from three provided icon libraries.
Finally, tweak the “Expanded Settings” section:
- Initial Position: Define the starting location of the expanded window in the browser viewport
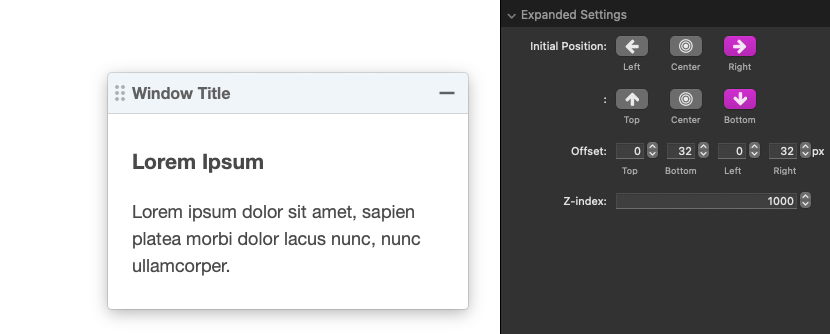
- Offset: Adjust the space around the expanded window from the edges of the browser viewport.
- Z-index: Adjust the vertical stacking order of the window when expanded in relation to other non window elements on the page. You can modify the z-index value to control which elements appear in front of or behind the window. Higher values appear in front.
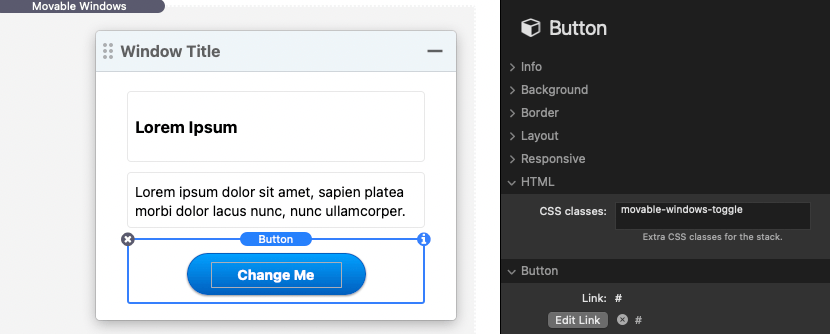
Custom minimize toggle button
You can configure a button or link inside your window content to minimize the window when clicked. The first way to do this is to add the class “movable-windows-toggle” to the element.
The second way to do this is to add a new attribute to a link. The attribute title should be “movable-windows-toggle” and the value should be “1”.
