Basic Set Up
1) Add Super Forms to your stacks page.

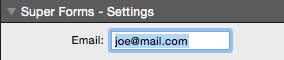
2) Next you will need to add your email to the Email input box inside of Super Forms’ settings panel. This will tell Super Forms where to send the email once the submit button has been clicked.
3) Drag and drop the Form Element Stacks into Super Forms’ “Drop stacks here” section to build your form. *More info on the form elements below
Tip: If your form is not fitting well into your page you can set the Width Fit option to 50/50 or 100%. These options work better in narrow areas.
4) After you have published your website, visit the page to test your form. Fill out the required fields and submit the form to see if it works. If you receive a red error please refer to the Troubleshooting section below. You host may have some requirements before it will allow you to send a message.
Note 1: Most hosting providers only allow you to have mail sent to a email address associated with your domain name. This is for security reasons. In most cases you will need to set up an email address with your hosting provider. For example if you own the domain “example-store.com”, your email would need to be something similar to “johndoe@example-store.com” in order for the mail to send. If you are seeing a “Mail has been sent!” message and no email ever comes through, it is likely your hosting has this restriction.
Note 2: If your hosting provider does not support PHP you will not be able to use this Stack to send mail. However, most hosts do support PHP. Please contact your hosting provider to find out.
The Form Elements
Super Forms comes with 9 Form Element Stacks that you can add to build your own custom form. They are Captcha, Checkbox, Date, Email, File, Input, Select, Text Field, and Title.
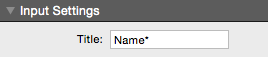
Title Setting
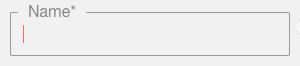
All of the stacks have a Title Setting. Whatever you put will display as the title and placeholder for the Form Element.

Other Settings
Just about all of the stacks have these checkbox options:
Enable Help Text – Text that appears when the question mark icon has been hovered.
Enable Hint Text – Text that appears when the field has been focused (or clicked on)
Enable Note Text – Text that appears directly below the field
Make Required – If this is enabled the form will not submit unless this field has been filled out. Users will be prompted to fill the field out.

The help text icon displays to the left of the field, the hint text pops up to the right of the field when the field is focused, and the Note text will display in full below the field.
Some of these stacks also contain these Email Formatting options:
Add to Subject Line – This will add the answer to the subject line of the email that is sent to you.
Add to From Line – This will add the answer as the From value of the email that is sent to you.
![]()
Additional Stack specific settings and setup:
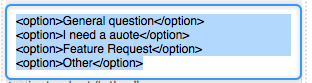
Select
To add options you need to add HTML tags. To do so just type the name of the option you want into the text area and wrap it with <option> and </option>. You can add as many options as you want to.
Example:
<option>General question</option>
<option>I need a auote</option>
<option>Feature Request</option>
<option>Other</option>
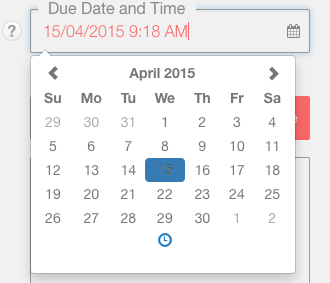
Date
Enable Time – This will allow users to select a time as well as date.
Troubleshooting
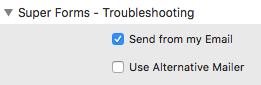
Some host’s may not support the method Super Forms uses to send the email. If you receive an error when trying to use/test the form online, try enabling the “Use Alternative Mailer” option found in the Troubleshooting section of the settings panel.
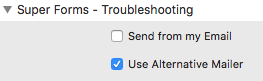
Some servers may also require email to be sent from the domain owners email address for security reasons. If so, check the ’Send from my Email’ checkbox in the Pure Forms – Settings.
If neither of these two options help, please refer to the additional troubleshooting section below.
Additonal Troubleshooting
If seeing a PHP error message when submitting the form:
– There may be a problem with your host’s PHP setup. It may not be configured correctly to use the PHP mail() function either for security reasons or because they support another PHP mailing system. You should contact your host to determine the best way to fix this issue.
If a captcha error appears, even though the captcha has been entered correctly, Or
If when attempting to send, nothing happens, there are no errors or confirmation:
– The likelihood is that your host does not have PHP sessions enabled. Sessions are simply a way of carrying information between webpages. RapidWeaver uses them for the confirmation messages as well as spam protection. Contact your host explaining that the PHP session on your contact form is not working as it should. They will understand what this means and provide a solution.
If email appears to send correctly:
– The Contact Form script is working just fine and it is an issue either with the server not sending the email or a spam filter catching it. Please check your hosting company’s spam filtering policy. Note: be sure to double check the spelling of the email address you entered into Super Forms’ email setting.
If you’re still having issues getting the Contact Form to work:
– Contact your host for advice. Ensure they are able to send an email from the server using PHP mail() and ‘sendmail’. (Check below to see a sample message to send to your host.)
Sample message to send to your host:
Hello,
I am currently having trouble sending emails via a contact form on my webhost. a) It would appear that everything is working just fine and the mail is sent yet I do not receive an email. OR b) It would appear that the server is unable to send an email from my server using the PHP mail() function. Would you be able to tell me whether I must do anything specific in order to send an email using your servers. The PHP code relies on sendmail and the standard PHP mail() function and PHP sessions to send the emails.
Regards,
Jon Doe