Publishing your website in RapidWeaver
You will need to obtain information before you can upload your site, which includes (1) your server, (2) your username, and (3) your password. If you don’t know these then please contact your host for assistance.
Uploading Your Website in RapidWeaver
The first time you upload your website, or as RapidWeaver calls it “publish” your website, you have to enter information to tell RapidWeaver where your website files are going to be uploaded to. After that, every time you hit publish you will not be shown the information, but if you wish to change it press Command + K.
1. Click the “Publish” button located in the top right of RapidWeaver’s backend (where you edit your websites content).

In RapidWeaver 6 this image is replaced by the following:
![]()
Note that the CMD + K function can be found as an option in the drop-down as well.
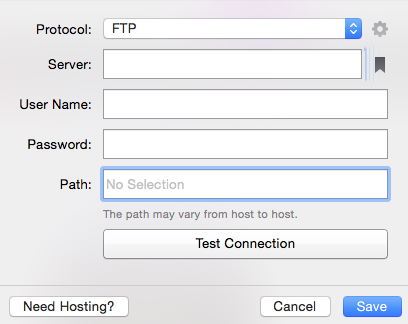
This button will open the screenshot image below where you will need to add your login information. You can test the connection with the “Test Connection” button.
Many hosts will also require a path to be put in an inner folder, such as /www/ or /public_html/ or /html/
Hit publish when you are finished and go have a snack or something because the first upload can take a while. Don’t worry though, future uploads will only upload the files you have edited and not the whole site over again.