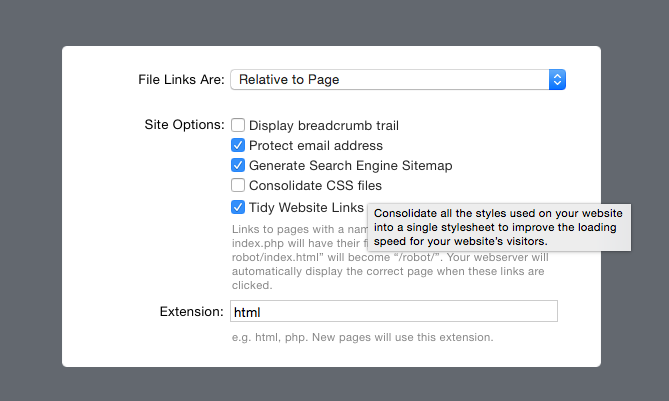
Important: Turn off Consolidate CSS
This theme is not compatible with the “Consolidate CSS” feature. You must disable for the theme to display correctly.
To do so in RapidWeaver 6, open your Configure menu and under the “Advanced Tab” uncheck the checkbox titled “Consolidate CSS files”.
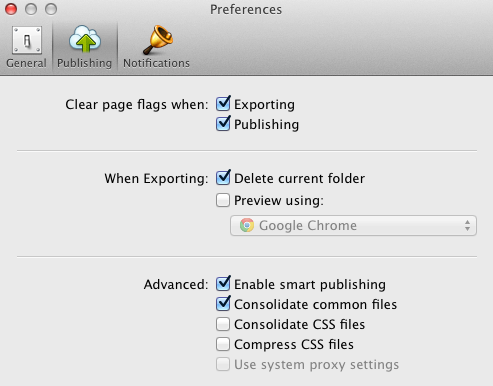
To do so in RapidWeaver 5, open your Preferences menu and under the “Publishing Tab” uncheck the checkbox titled “Consolidate CSS files”.
Change the Font Size of Site Description or Navigation Menu
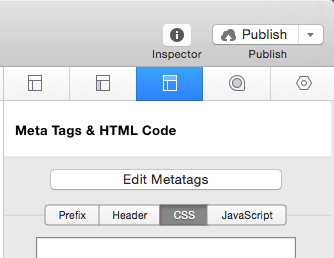
Step 1: Navigate to your Page Inspector > HTML tab > CSS tab.
Step 2: Enter the following:
1 2 3 4 5 6 |
#menu li a {
     font-size: 18px;
}
.ltswrap h2 {
     font-size: 18px !important;
}
|
Step 3: #menu li a will change the font size of your navigation menu links. The other will change the font size of your Site description. You can replace 18px to meet any size of your choosing.
Static Background Image
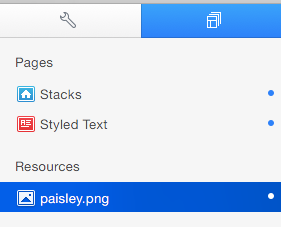
Step 1: Add the image you wish to use to the “Resources” section.
Step 2: Navigate to your Page Inspector > HTML tab > Header Tab.
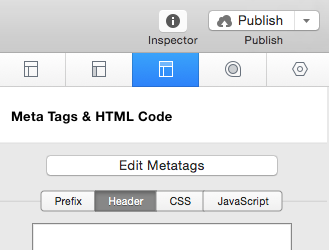
Step 3: Add the following text to the Header Section:
1 |
{image : '%resource(paisley.png)%'}
|
*Make sure the resource name matches the name in your resources section, pay special attention to the the extension (.jpg, .jpeg, .png, .gif) if it does not match as well the page will not load
Preview and you are done!
Background Image Slideshow
Step 1: Add the images you wish to use to the “Resources” section.
Step 2: Navigate to your Page Inspector > HTML tab > Header Tab.
Step 3: Add the following text to the Header Section:
1 2 3 |
{image : '%resource(slider1.jpg)%'},
{image : '%resource(slider2.jpg)%'},
{image : '%resource(slider3.jpg)%'}
|
*Be sure to separate each image with a comma while leaving the last image with no comma after it & make sure the resource names match the names in your resources section, pay special attention to the the extension (.jpg, .jpeg, .png, .gif) if it does not match as well the page will not load
You may add as many photos as you wish to the slide show. Preview and you are done!
Scrollable Background Image
Step 1: Add the image you wish to use to the “Resources” section.
Step 2: Navigate to your Page Inspector > HTML tab > CSS tab.
Step 4: Add the following text to the CSS Section:
1 2 3 |
html {
     background-image: url(%resource(background.jpg)%);
}
|
*Make sure the resource name matches the name in your resources section, pay special attention to the the extension (.jpg, .jpeg, .png, .gif) if it does not match as well the page will not load
Preview and you are done!
Social Media Icons
Step 1: Find the Social Media Icon you want you use from the Glyph Chart below:
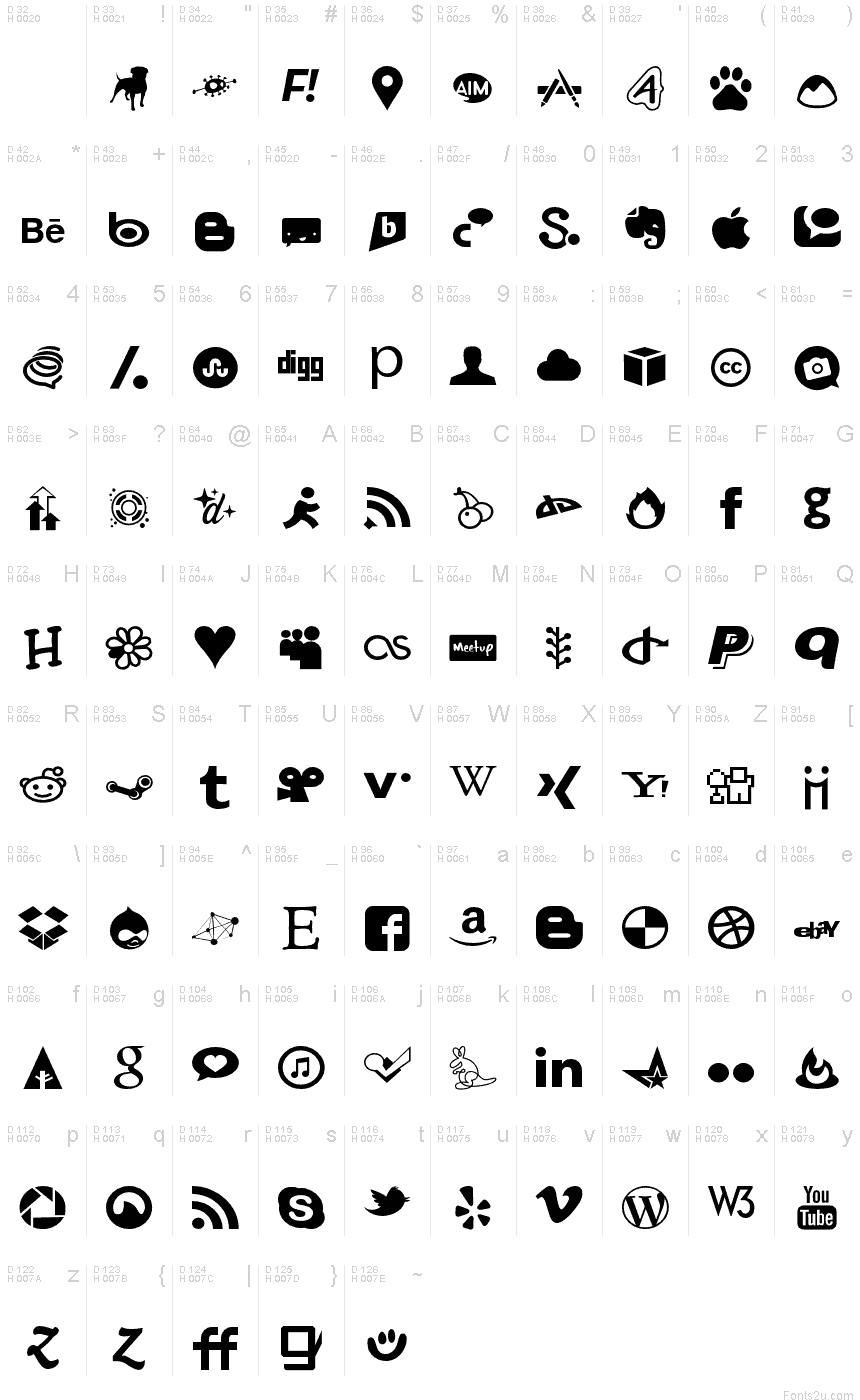
Step 2: Type the corresponding letter or number into your desired location.
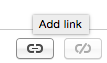
Step 3: Highlight your letter or number and select the Add Link button.
 or
or ![]()
Step 4: Type in the URL to your social media page & add a new Custom Attribute Named: class with the Value: social
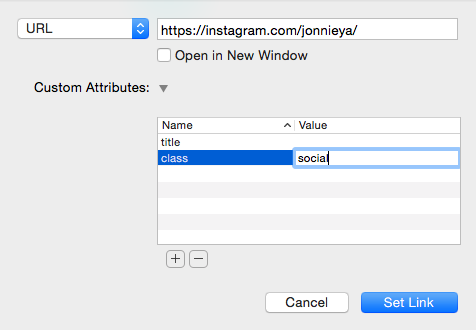
*check the Open in New Window Box if you do not want visitors to leave your page when clicking on the link
Click Set Link and you are done!