Setup
1. Add the Page Flux stack to any part of your stacks page and it will automatically be enabled for that page.
2. Adjust the options in the settings panel till you get the animation and colors you want to use. While in edit mode, Page Flux will show examples of the selected in and out animations as well as display the currently selected loader and styles. Selecting a new animation option will cause the examples to reanimate, giving you a general idea of what the animations will look like.
3. Add a single Page Flux to each of your websites pages to ensure the animation is fluid between all pages.
Importing Page Flux into a non-stacks page
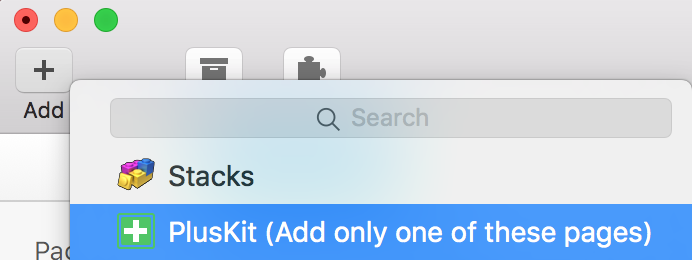
You can add Page Flux to non-stacks pages by importing it using the PlusKit plugin.
1. Add the PlusKit plugin to your RapidWeaver project. This will allow you to import Stack pages into non-stack pages.
2. Now you will need to add a new stacks page to import into your preferred non-stacks page.
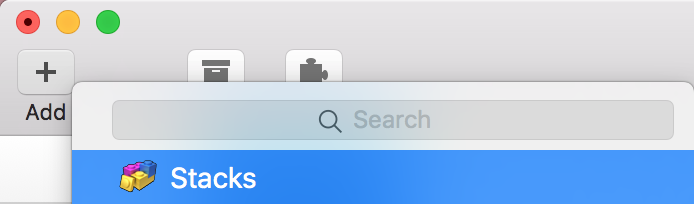
3. Give a unique title to this new stacks page, in this example we will be simply calling it “Page Flux”.
![]()
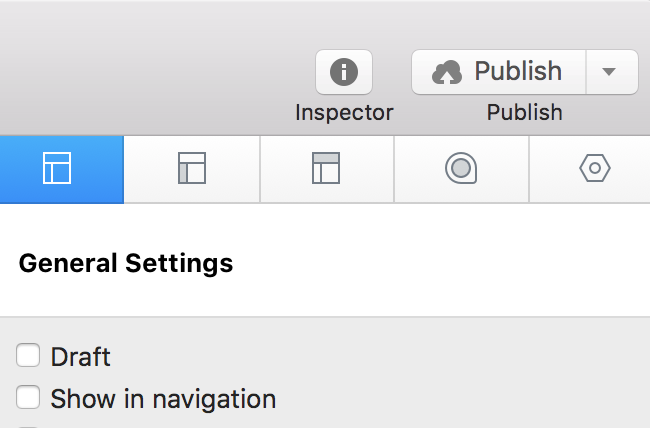
4. Add the Page Flux stack to this blank stacks page and style it how you would like it to animate. Be sure to open the Page Inspector > General Settings and disable “Show in navigation” so that this page does not show up on your site as it’s own standalone page.
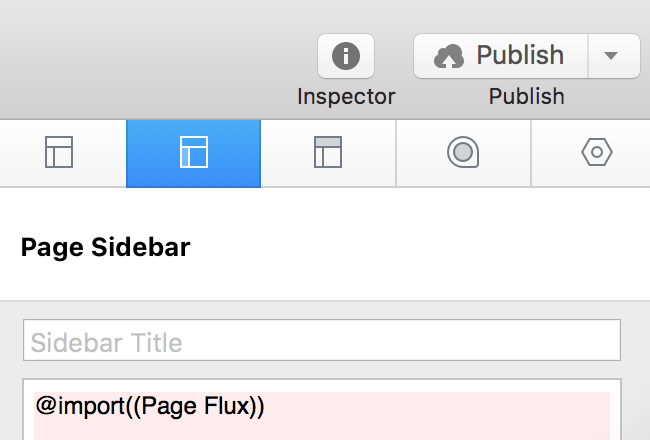
5. Navigate to the non-stacks page you wish to import Page Flux into and open the Page Inspector > Sidebar. Add the code below into the sidebar and replace “PageNameHere” with the title you created in step 3.
@import((PageNameHere))
For our example the import code would be “@import((Page Flux))”. Note: The page name is case and space sensitive.
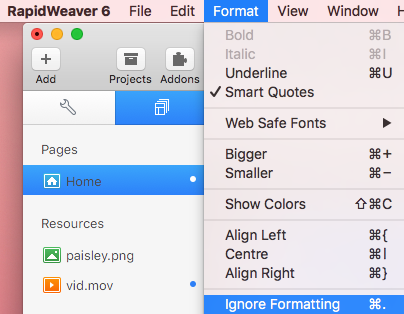
6. Highlight the import code and select “Ignore Formatting” from the “Format” dropdown menu.
Options
Animation Settings
In Animation – Sets how the page will animate in when it is loaded.
In Duration – Controls the speed of the In Animation.
Out Animation – Sets how the page will animate out when a new page is loading in.
Out Duration – Controls the speed of the Out Animation.
Use Overlay Animations – Enable this option to replace the animation in and out options with overlay animations. Note: If using Overlay animations it is recommended that you use them in every page of your website. If one page does not have the overlay the effect can be lost.
Loading Settings
Loader – Choose an loading icon animation. You can also use a custom image that display while the page is loading.
Size – Controls the size of the loader
Speed – Sets the speed at which the loader rotates or animates.
Override Theme Body Color – Enable this option to set the color of the background. This will keep the background from flashing white in-between page loads.