Slider/Banner Images
Step 1
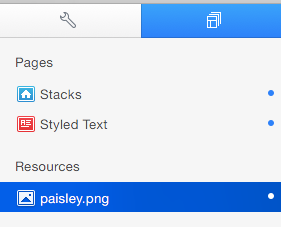
Add the images you wish to use to the “Resources” section.
Step 2
Copy and Paste the code below into the main content editor or into the sidebar content.
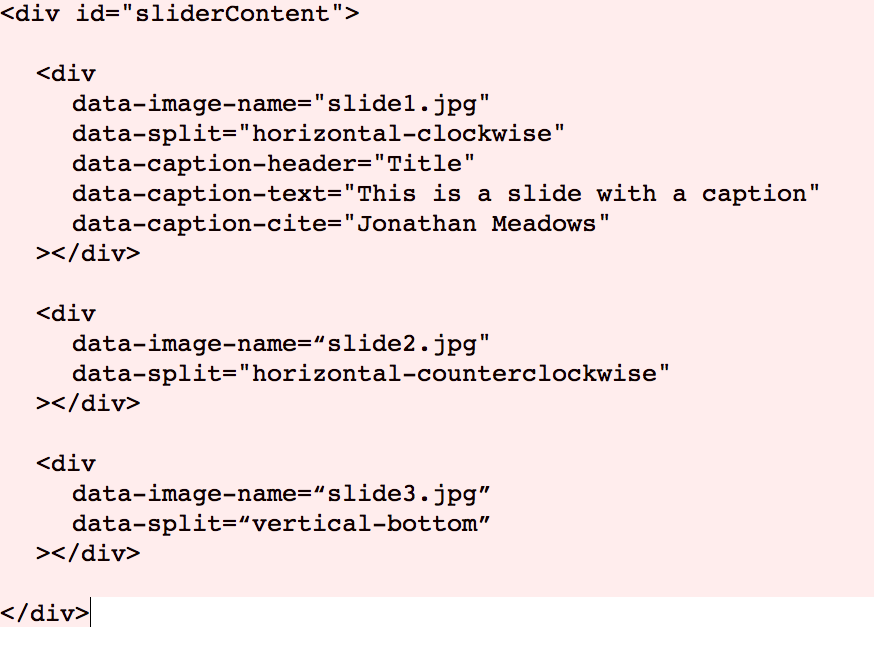
<div id="sliderContent">
<!--Paste Step 3's Code Here -->
</div>
Step 3
Select from the 3 options below and copy and paste the code into the sliderContent Div you pasted from Step 2.
1: Single banner image or a default slider image with no caption
<div data-image-name="IMAGE_NAME.jpg" ></div>
2: Slider image with adjustable transition effect
<div
data-image-name="IMAGE_NAME.jpg"
data-split="horizontal-counterclockwise"
></div>
3: Slider image with adjustable transition effect & caption
<div
data-image-name="IMAGE_NAME.jpg"
data-split="horizontal-counterclockwise"
data-caption-header="Title"
data-caption-text="Place paragraph text here"
data-caption-cite="Firstname Lastname"
></div>
You can change the “data-split” value to adjust the transition effect. Each value represents how the image will slice on transtion. The available options are:
horizontal
horizontal-right
horizontal-left
horizontal-clockwise
horizontal-counterclockwise
vertical
vertical-top
vertical-bottom
vertical-clockwise
vertical-counterclockwise
Change the “data-caption-header” value to add a title or delete this line if you do not wish to have a title.
Change the “data-caption-text” value to add text.
Change the “data-caption-cite” value to add a cited name or delete this line if you are not using a quote.
Step 4
Change “IMAGE_NAME.jpg” to exactly match the name of your image in the Resources section (case sensitive)
Step 5
Repeat Steps 3 & 4 until you have as many photos that you want to display in the slider. After you have added your images and changed your values, highlight all of the code and select “Ignore Formatting” from the Format drop down menu. Your finished code should be similar to the screen shot below.
NOTE: RapidWeaver’s editor uses two types of quotation marks. Be sure your code uses straight quotation marks ![]() and not curly quotation marks
and not curly quotation marks ![]() . The curly quotation marks are not recognized as code and will cause the slider to load improperly.
. The curly quotation marks are not recognized as code and will cause the slider to load improperly.
Adding an Image to the Background
Step 1
Add the image you wish to use to the “Resources” section.
Step 2
Copy and paste the code below into your Page Inspector > HTML > CSS section.
1 2 3 |
.charis-background {
    background-image: url(%resource(IMAGE_NAME.jpg)%);
}
|
Step 3
Change “IMAGE_NAME.jpg” to exactly match the name of your image in the Resources section (case sensitive)
Extra-Content (non-Stacks page)
Step 1
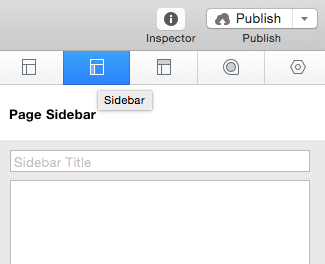
Navigate to the Sidebar Tab of the Page Inspector.
NOTE: if you are using a styled text page you may also use the Main Content editor
Step 2
Copy and Paste the code below into the text area.
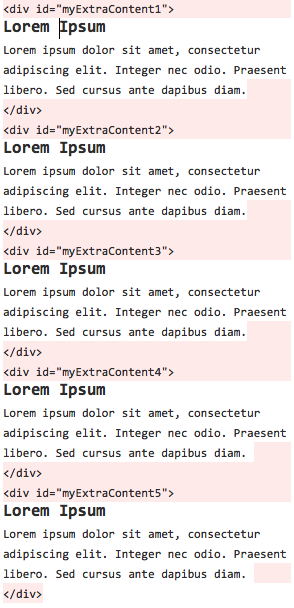
<div id="myExtraContent1">
Extra-Content 1 content Here
</div>
<div id="myExtraContent2">
Extra-Content 2 content Here
</div>
<div id="myExtraContent3">
Extra-Content 3 content Here
</div>
<div id="myExtraContent4">
Extra-Content 4 content Here
</div>
<div id="myExtraContent5">
Extra-Content 5 content Here
</div>
Step 3
Highlight all the code & select Ignore Formatting from the Format Drop down menu (or press command + . ).
Step 4
Add your desired content to each section. Highlight everything between and & select Ignore Formatting from the Format Drop down menu (or press command + . ). This will allow you to add formatting to the content you have added.
Step 5
Preview and you are complete. Your finished code in the Sidebar(or Main Content editor) should be similar to the screen shot below.
Create Button
Step 1
Type into the editor whatever you would like the button to say on it.
Step 2
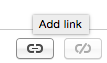
Highlight your text & select the Add Link button.
 or
or ![]()
Step 3
Type in the URL or select where you would like the button to navigate to.
Step 4
Add a new Custom Attribute Named: class with the Value: btn
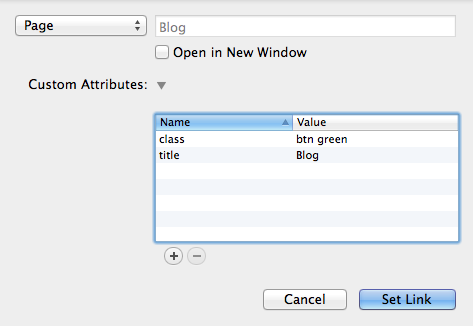
NOTE: You can also add an additional color value after btn. The available values are:
red
blue
green
purple
cyan
yellow
Step 5
Click set link.
Using Font Awesome Icons
Font Awesome’s Icons can just about be used anywhere on your site. Check out the links below to learn more about how to use Font Awesome.
Chocolat Lightbox
Step 1
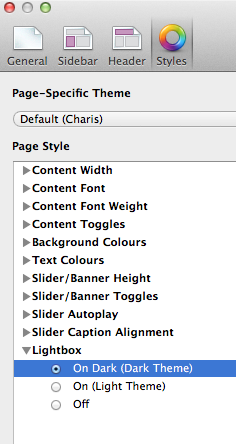
Turn on Chocolat Lightbox in the Styles section of the Page Inspector.
Step 2
In order for the Lightbox to work correctly you will need the original image and a thumbnail (smaller version) of the image.
Step 3
Add the original image into the Resources section of RapidWeaver.
Then drag and drop the thumbnail image into the place you would like the image thumbnail popup to display.
Step 4
Next, right click the thumbnail image and select Add Link. (Or click the Add link button after selecting the image)
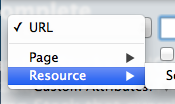
Step 5
Click on the URL drop down and select the resource from the list.
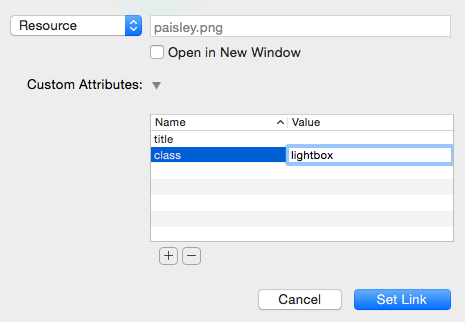
Step 6
Add a custom attribute titled class with the value lightbox and then click Set Link.
Step 7
Switch to preview mode to see if it worked and you are done. To add more photos repeat Steps 3-6.